
Repository and View API Tokens
Repository and View API tokens enable granular API access to an individual repository, view, or asset in a view. The API token is limited only to the repository where the API token is created, and to the corresponding permissions granted to that token. API tokens are limited to a single view within the UI but can be created through the GraphQL API to cover multiple views and repositories. For information about how to create API tokens to cover multiple views, see createViewPermissionsTokenV2() .
Note
Repository and view are used interchangeably, as are the token names. In the UI, the terms View Token and Repository Token may be used, but refer to the same object.
The following diagram illustrates how a view token may apply to all assets in a view, such as Repo Token 1, or may be limited to one or more specific assets in a view, such as Repo Token 2. The asset permissions control what is allowed for a specific asset. The repo permissions apply to the entire view.
Access includes:
Data read access (including querying and searching the repository events)
Data management, such as data retention and deleting stored events
Searching repositories, including saved queries, sharing dashboards and connecting views
Ingest configuration, including the ability to create ingest tokens and parsers
Integrations, S3 archiving, event forwarding and managing packages
Triggers and actions, such as scheduled searches and alerts
Repository tokens are managed from the Repository
Settings page:
The following lists detail the permissions required for each functionality area and its corresponding pages.
View Repository Tokens
Repository API Tokens can be managed through the
Repository Settings page for each
repository or view. When managing tokens you can view the current list
of tokens, create new tokens, and select existing tokens to get more
detailed information.
To manage and view tokens for a repository or view:
Go to the repository list and select the repository for which you want to create an API token.
Click
Settingsin the top menu.Select from the menu and select the page.
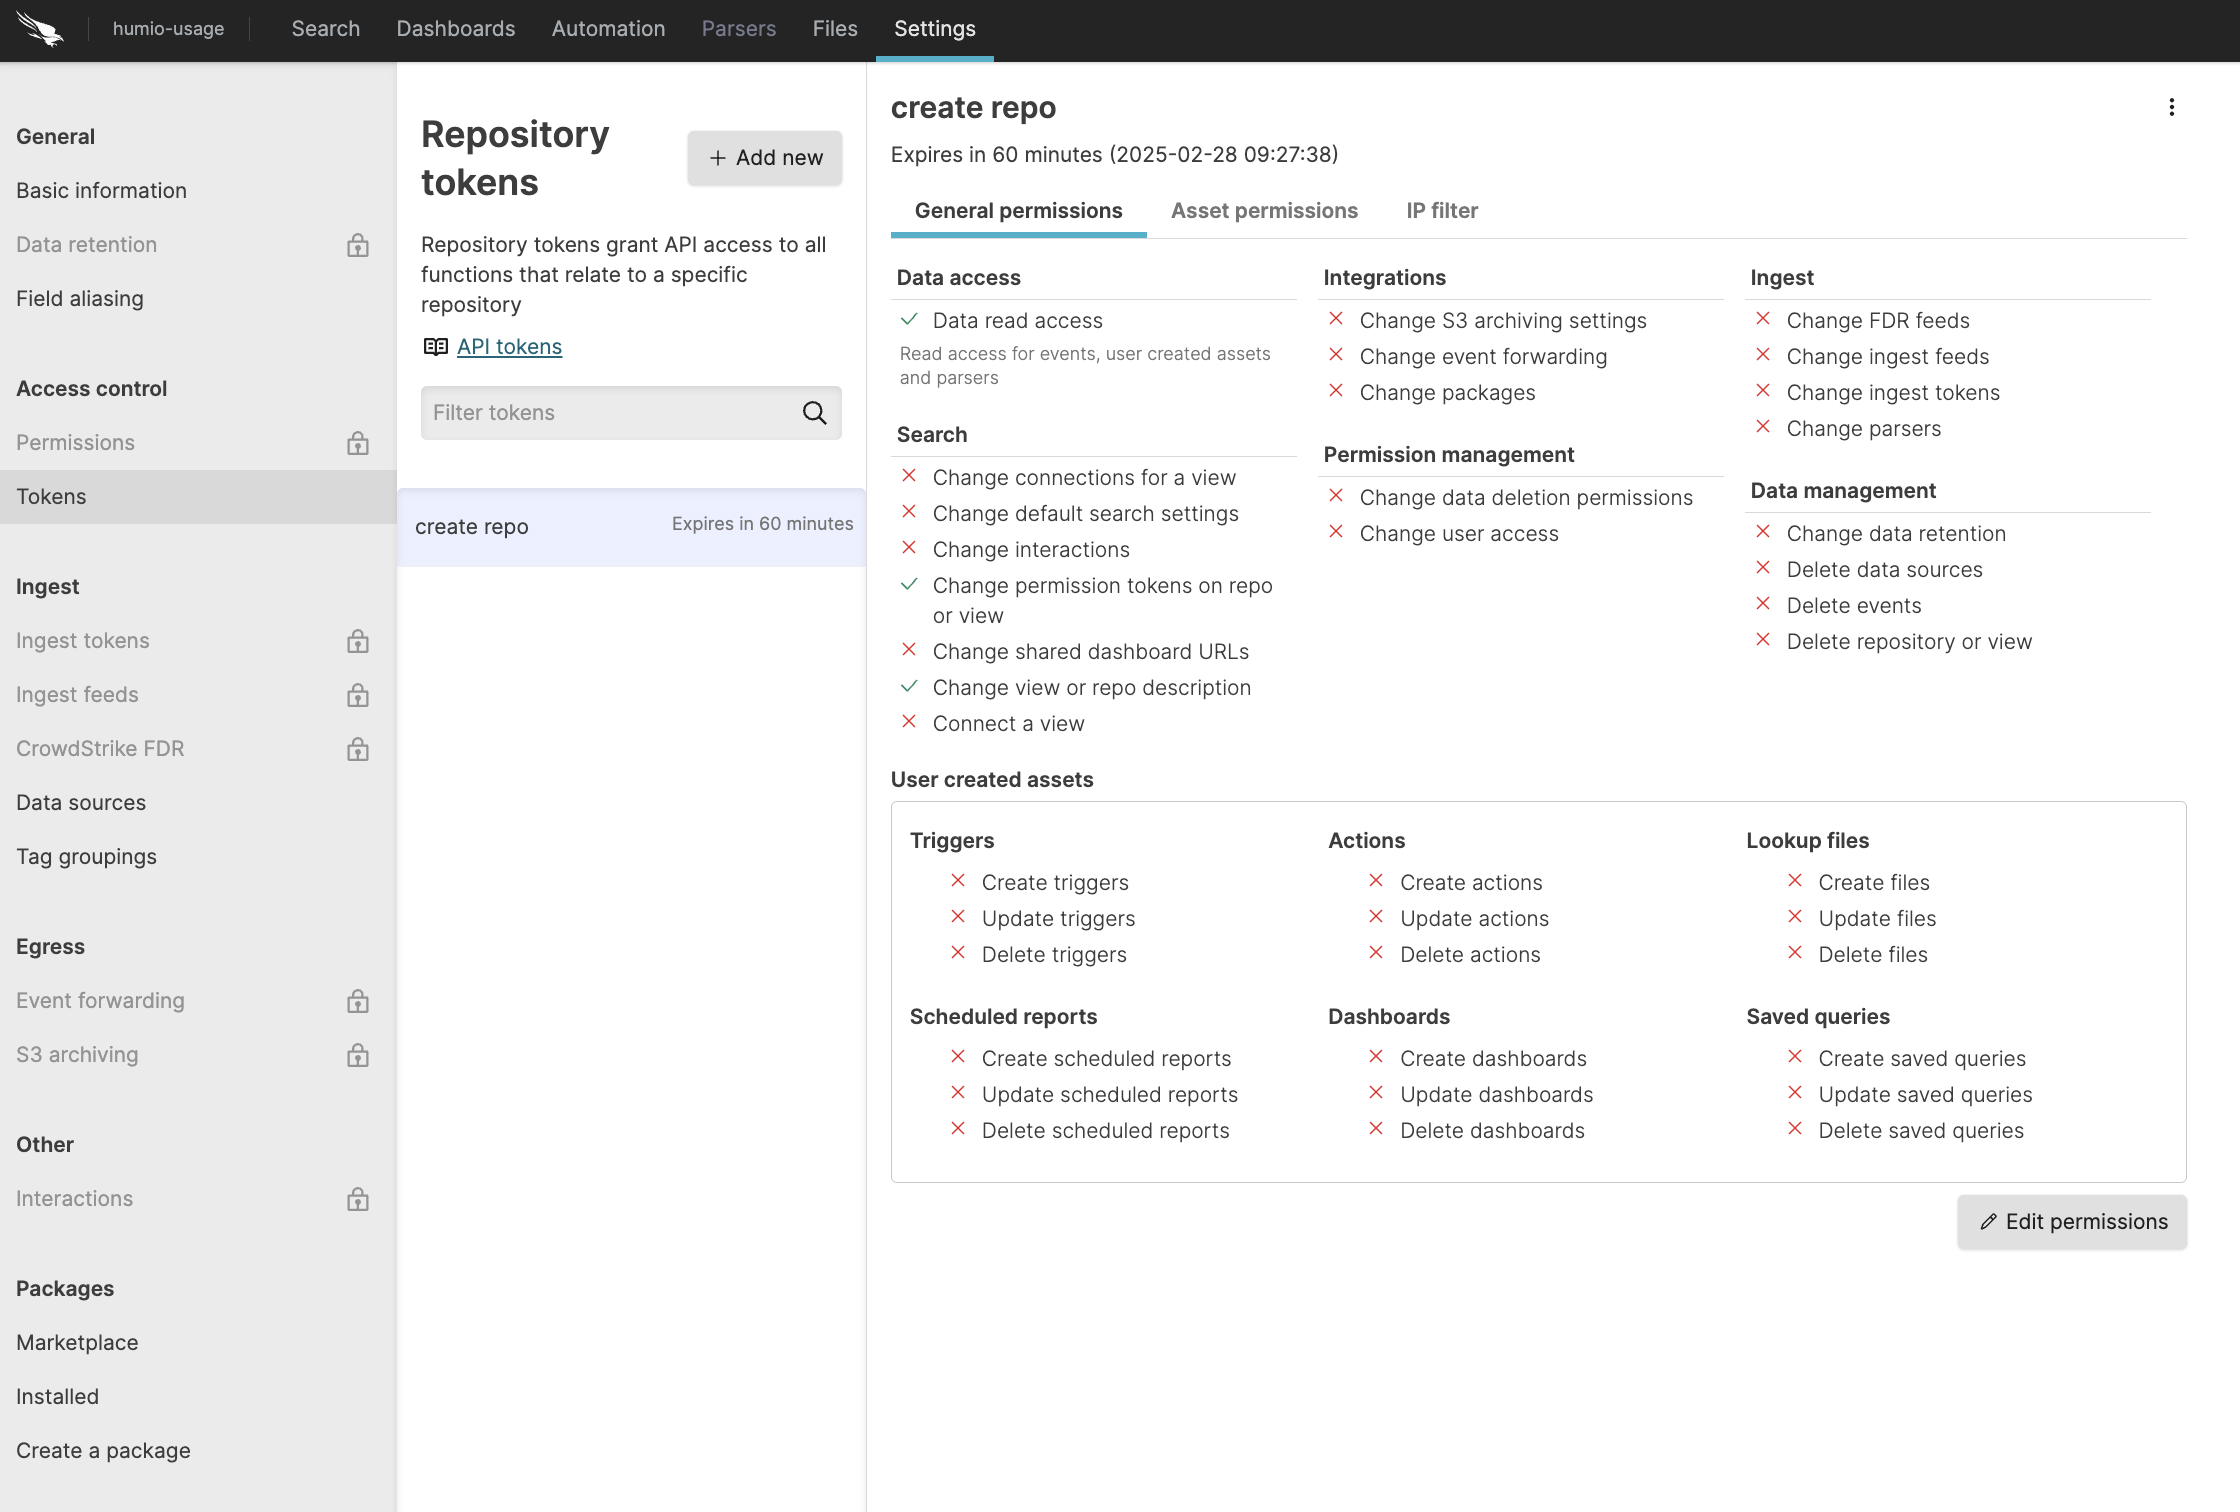
Figure 25. Repository Tokens
The list of tokens shows all currently active tokens and if configured, the expiry duration of the token. Expired tokens are shown in the list for up to 5 minutes after they have expired.
You can filter the list of tokens by using the Filter tokens search box to select the tokens by name.
Selecting a token will display the token details. For more information, see Manage Repository API Tokens.
To create a new token, click + Add new. For more information on creating new tokens, see Create Repository API Tokens.
Create Repository API Tokens
Security Requirements and Controls
Change permission tokens on repo or viewpermission
Repository API tokens have the following parameters that will be unique to each API token created:
The permissions granted apply only to the repository or view in which the API token is created. The same token cannot be used to access or manage other repositories.
The permissions chosen for the token provide granular access to the specific area of API functionality. For example, granting only the specific permission Change data retention only provides the ability to change the data retention; access to other management functions on the repository will fail.
Tokens can be modified if the
Update permissionssetting is enabled within the Repository and View API tokens security policy.Repository tokens can be given an expiration time expressed as the number of minutes, hours, or days from creation.
An IP filter can be applied to limit access to a specific IP address or network. For more information, see IP Filters.
To create a new Repository or View API token:
Go to the repository list and select the repository or view for which you want to create an API token.
Click
Settingsin the menu.Select under Access Control to go to the or page.
Click .
Give the token a name.
If the security policy allows for setting a custom IP filter, you can select the named IP filter from the pop-up. For more information on IP filtering, see IP Filters and Repository and View API tokens security policy.
If the security policy allows, you can set an expiration for the API token, based on the number of minutes, hours, or days until the API token expires. If the security policy does not specify an expiration, you can optionally create an API token without an expiry time.
Click .
Select the permissions that you want to grant to the token. You can select as many permissions as required for the API token. Asset permissions can only be added to a token if
Data Read Accessis granted to the view; otherwise they are not available. For information on the permissions and what API endpoints they support, see Repository and View Permissions.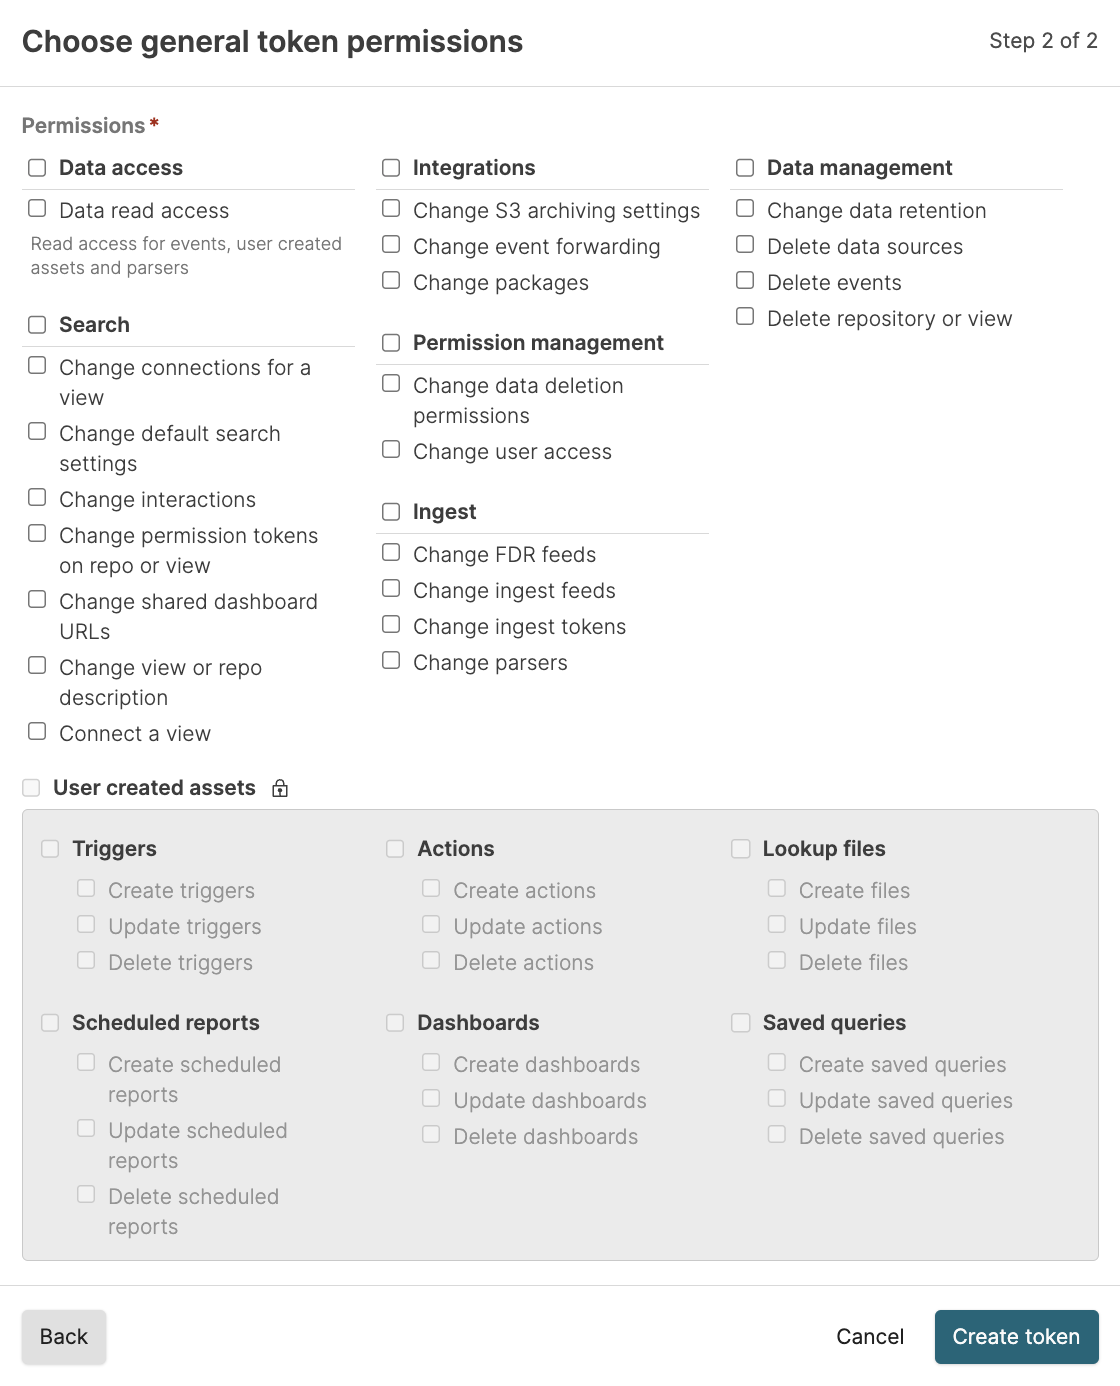
Figure 26. Create Repository Tokens
Note
Support for organization owned queries is implied for all view tokens.
Click to create the token. This shares the API token string and the ability to copy the string to your clipboard. This is the only time the API token string will be shared, so the token should be copied and stored in a safe place.
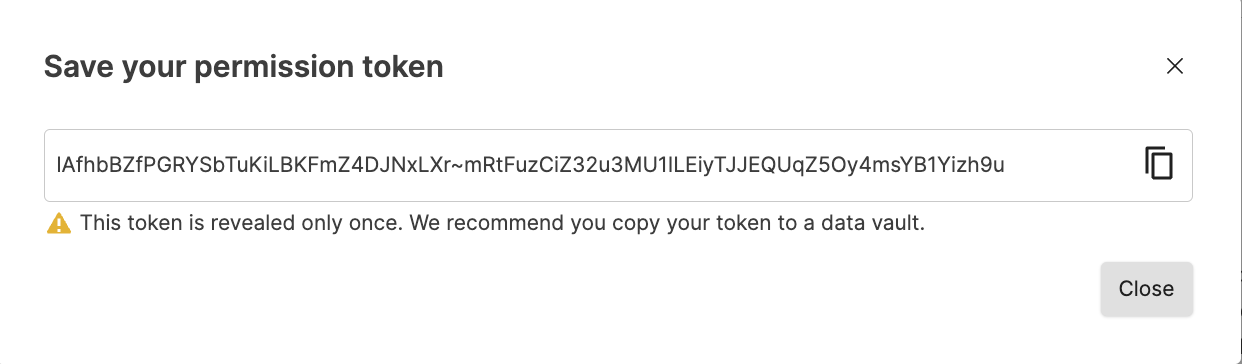
Figure 27. Repository Token String
Click .
Manage Repository API Tokens
Security Requirements and Controls
Change permission tokens on repo or viewpermission
Repository tokens may be modified depending on the settings within the Repository and View API tokens security policy. If the Update permissions setting is enabled, an existing repository token can be modified to update the permissions granted. In addition, tokens can be renewed (if allowed) or deleted.
To view the details for an existing token, select the token from the list in the Repository and View API Tokens interface. This will show a summary of the organization API token, expiry, permissions, and IP filter information:
Expiry information is shown first in the summary in both the duration and an explicit date and time when the token will expire. Expiry information cannot be changed.
Permission information is shown with each permission and a corresponding green tick (enabled) and red cross (denied). Permission information cannot be changed unless the Update permissions option is enabled within the Repository token security policy.
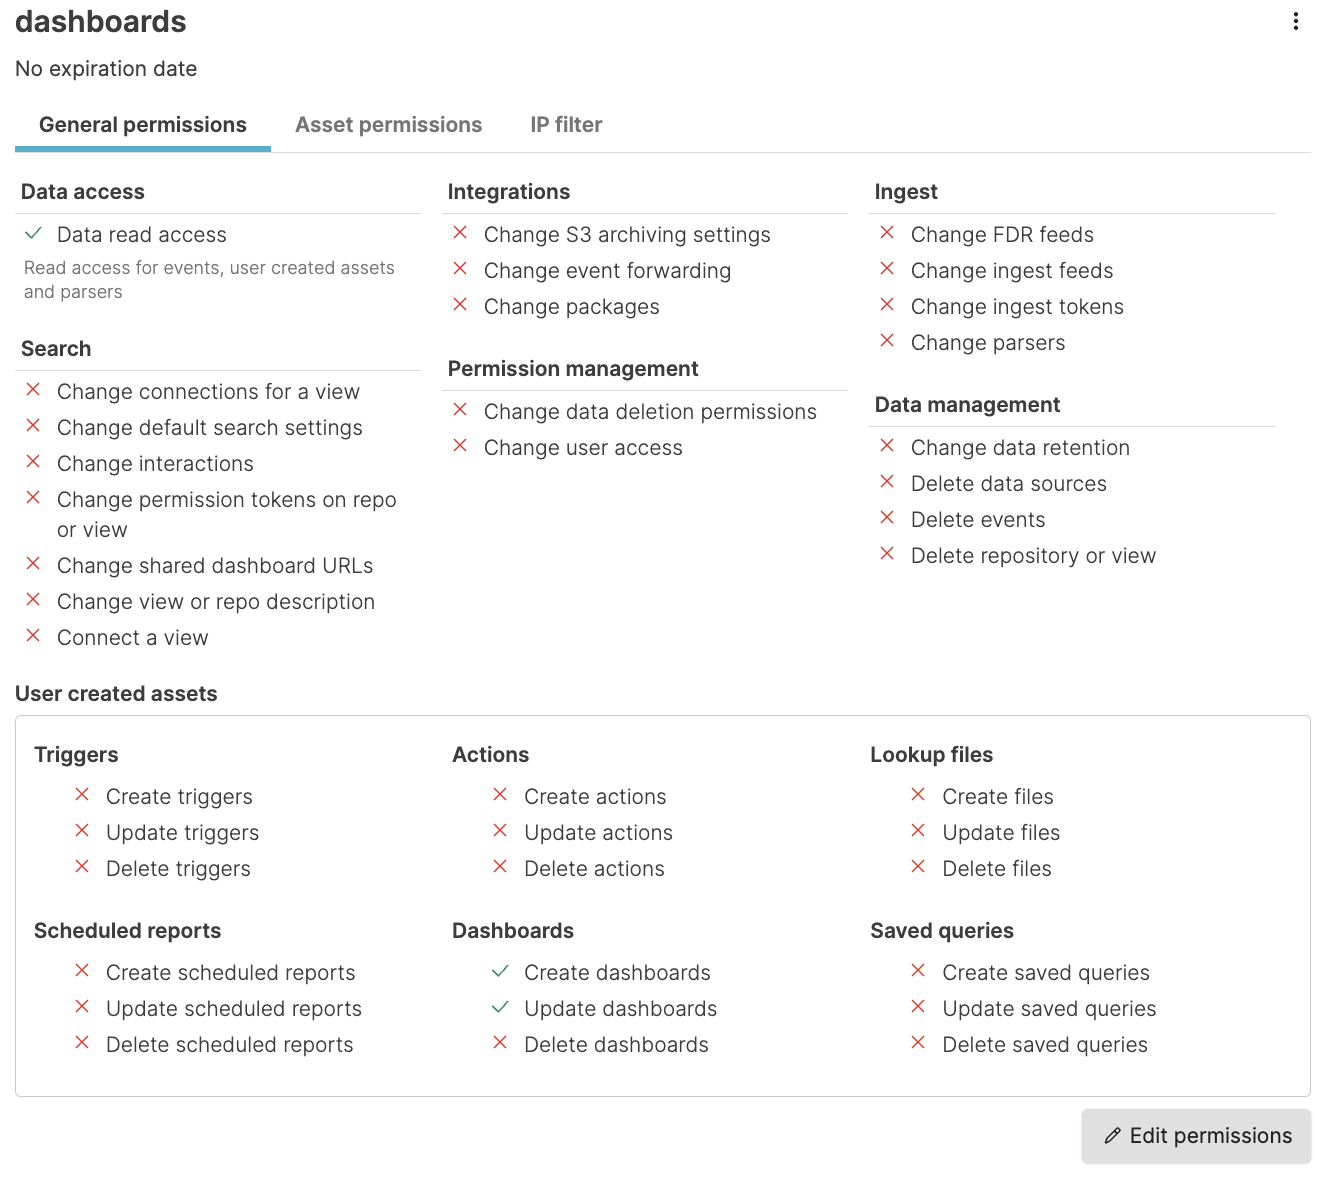 |
If editing the permissions is enabled, click Edit permissions .
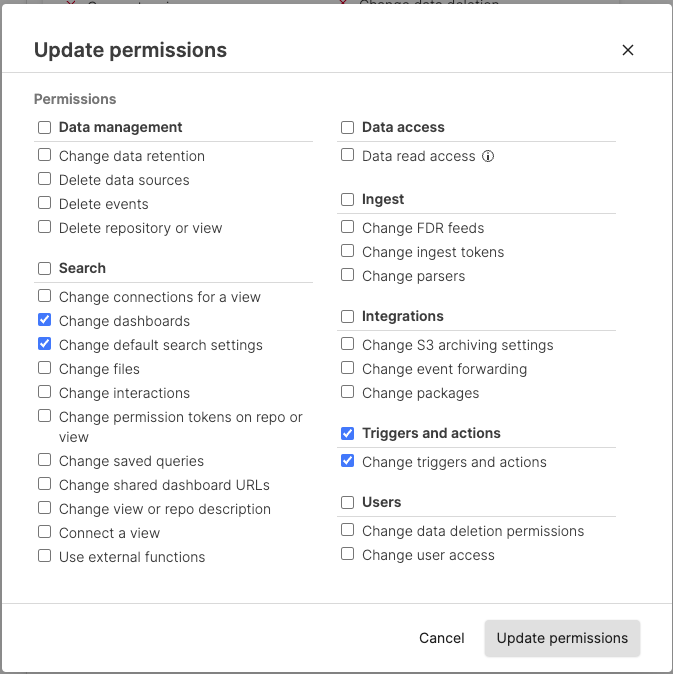 |
Adjust the permissions; click to save the updated permissions.
To see the asset permissions granted, switch to the Asset permissions tab. You can adjust permissions for individual assets as needed.
The following actions are available in the ⋮ menu.
To recreate the API token string, click the button. This will regenerate the token string so that it can be copied. Resetting the token in this way immediately invalidates the previous token string. The new string will need to be used.
To delete the API token, click the button. You will be asked to confirm the action. Once deleted, the API token is no longer valid and all API operations with the deleted token will fail.