


Charting Log Levels
If you have logs that contain log levels like
INFO,
ERROR, and
WARN, it can be interesting to
visualize them over time. In this scenario, you will be able to:
Monitor error rates over time
Track warning frequency patterns
Compare log severity distribution across services
Visualization: The chart displays a stacked area visualization with colored series representing INFO, ERROR, and WARN log levels. Each series shows the count of log events for that severity level in each time bucket. Hover over any area to see exact event counts and timestamps for each log level. Spikes in ERROR or WARN series indicate potential issues requiring investigation.
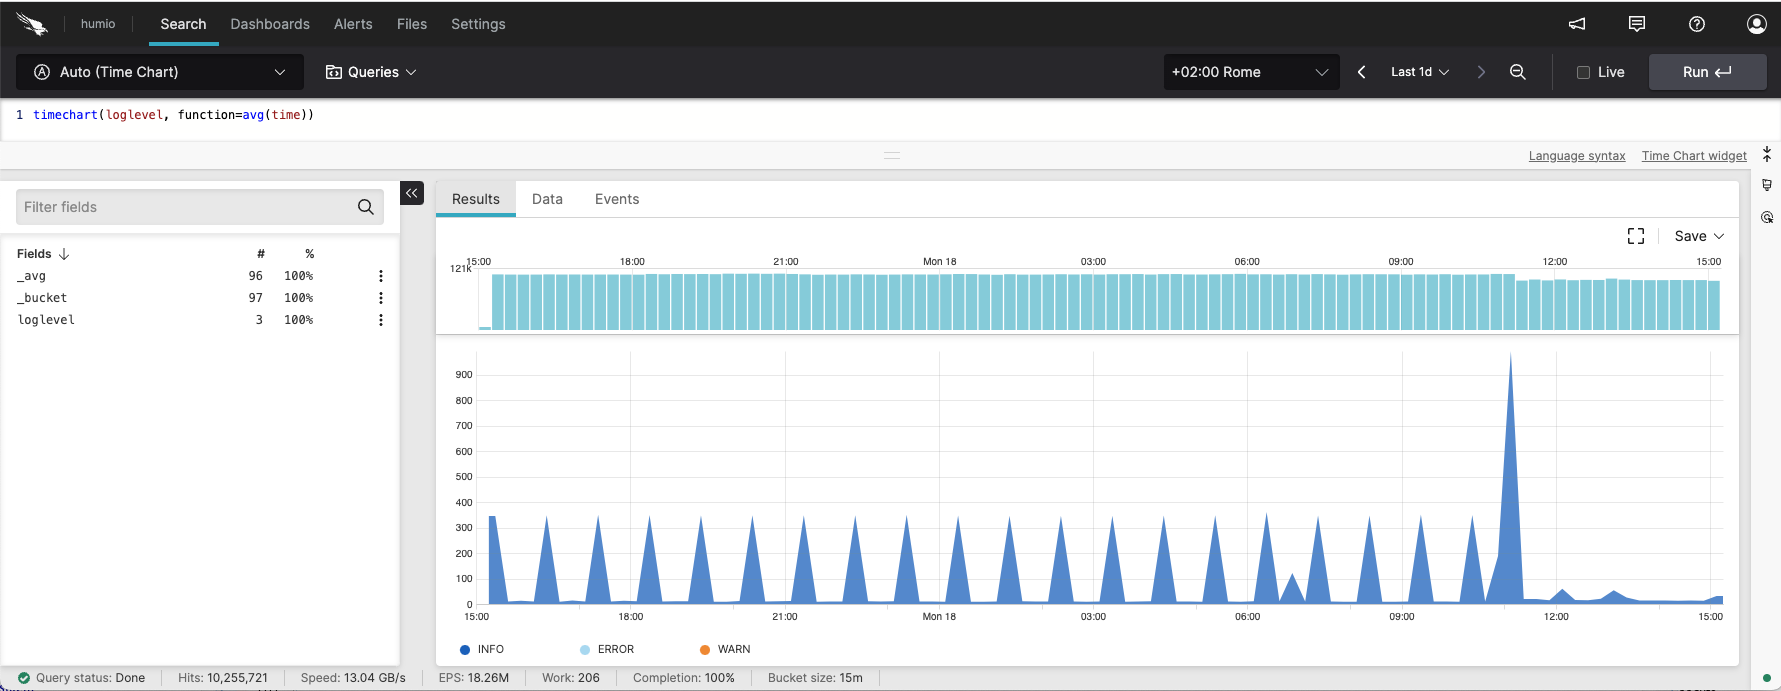 |
Figure 259. Charting Log Levels
Sample input data. Here is example input data for this scenario (with the loglevel field extracted by a parser):
| @timestamp | host | logger | loglevel | message | service | thread |
|---|---|---|---|---|---|---|
| 1970-01-01T00:00:02 | app-server-01 | com.example.service.Auth | INFO | User authentication successful | auth-service | kafka-producer-network-thread-1 |
| 1970-01-01T00:00:02 | app-server-02 | com.example.db.ConnectionPool | WARN | Connection timeout occurred | payment-service | timer-thread-8 |
| 1970-01-01T00:00:02 | app-server-03 | com.example.api.RequestHandler | INFO | Processing API request | user-service | http-nio-8080-exec-5 |
| 1970-01-01T00:00:02 | app-server-04 | com.example.cache.RedisClient | ERROR | Failed to acquire database connection | notification-service | pool-3-thread-2 |
| 1970-01-01T00:00:02 | app-server-05 | com.example.scheduler.TaskExecutor | INFO | Scheduled task completed | analytics-service | scheduler-thread-4 |
Query. To create this time chart, use the following query:
timeChart(loglevel)Query breakdown:
Use the
timeChart()function with the loglevel field as the grouping parameter.Group events by their loglevel field value to create separate series for each log level (INFO, WARN, ERROR).
By default, the
count()function aggregates the number of events in each time bucket.Each series in the chart represents one log level, showing event frequency over time.
Configuration:
From the
Searchpage, type your query in the Query Editor → clickChoose in the
Widget SelectorClick the style icon : the side panel shows most settings already configured by default based on the query result.
In Plot, configure the chart type based on your visualization needs:
For cumulative view: Set Type to
Area, Interpolation toLinear, and Stacking toStackto display cumulative log levels over timeFor distinct comparison (recommended): Set Type to
Lineand Interpolation toLinearto display each log level as a separate line, making it easier to identify patterns in ERROR and WARN occurrencesOptionally enable Show data points to display individual event markers on the lines
In Legend, configure legend display:
Set Position to
BottomorRightbased on preferenceEnable Show title if you want the legend to display a header
In Colors, set Palette to
Inheritor choose a custom palette.In X-axis, optionally enable Show UTC time to display timestamps in UTC timezone.
In Y-axis, configure the vertical axis:
Set Title to
Event CountSet Scale to
LinearSet Format value to
Metricfor automatic unit formatting
In Series formatting, customize colors for each log level to align with severity conventions:
Click on the INFO series and set Color to green
Click on the WARN series and set Color to orange
Click on the ERROR series and set Color to red
Click on the CRITICAL series (if present) and set Color to purple
In Title formatting, set Size to
Medium.
You can further customize this widget by setting more properties, see Time Chart Property Reference.
Alternative: You can plot other
values by specifying different functions in the
function parameter of the
timeChart() function. For instance, to visualize
average response time by log level, use the avg()
function on a time field:
timeChart(loglevel, function=avg(time))
Similarly, the percentile() function is useful
for analyzing response time distributions across log levels, such as
tracking 95th percentile response times to identify performance
degradation:
timeChart(loglevel, function=percentile(field=time, percentiles=[95]))