Manage Dashboards
Security Requirements and Controls
Data read accesspermissionUpdate Dashboardspermission
When accessing an existing dashboard within your LogScale instance, you can choose to navigate around the dashboard view, share, export or duplicate the dashboard, and configure the dashboard access.
Access all dashboards across repositories
Security Requirements and Controls
Data read accesspermissionUpdate Dashboardspermission
The All Dashboards system tab displays all dashboards from all repositories and views.
In the system tabs' main toolbar, click :
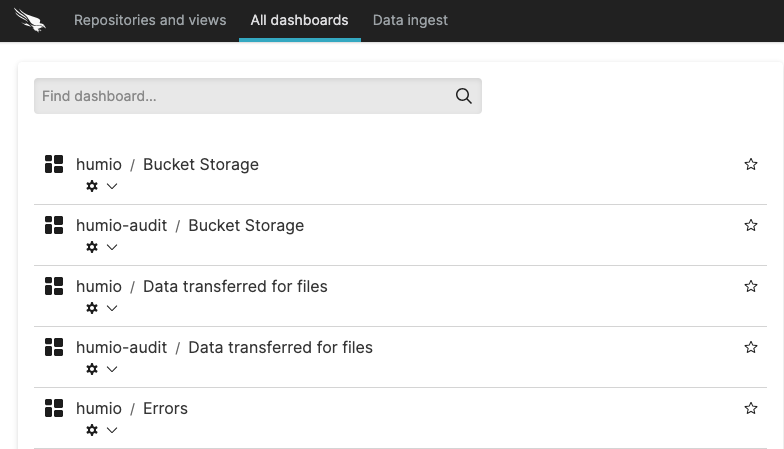
Figure 157. Access all dashboards
Select the desired dashboard by clicking the title after the slash: the dashboard and all its widgets will load (clicking the first item instead redirects you to the
Searchinterface in that repository).Optionally, click the star icon next to a dashboard to save it as favorite and bring it on top of the list for quicker access.
Optionally, click the settings icon to perform operations such as sharing, exporting or deleting the dashboard — see Manage individual dashboards for details.
For designing your own custom applications using LogScale, you can use the GraphQL API mutation, addStarToDashboard() to put a star next to a dashboard in the list. Use the removeStarFromDashboard() mutation to remove a star. To get a list of all starred dashboards, you can use the starredDashboards() query.
Tip
Press Ctrl+O from anywhere in the web interface to search for a dashboard or repository and jump directly to it:
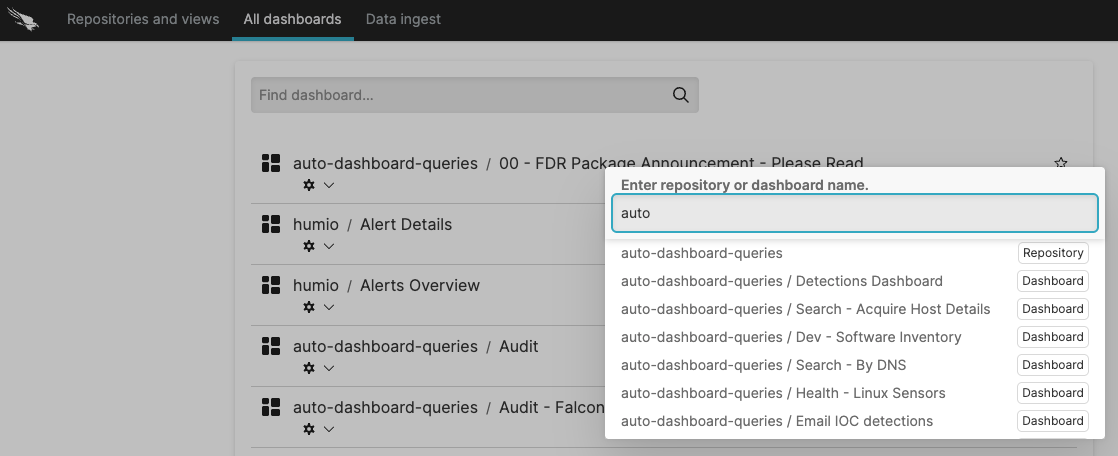 |
Figure 158. Jump to a Dashboard or Repository
Tip
Use the GraphQL API query, dashboardsPage() to create a custom interface or to access a list of dashboards from the command-line.
Note
Verify your permissions before accessing existing dashboards. Access to dashboards requires permissions to their associated repositories and views.
Manage repository dashboards
Security Requirements and Controls
Data read accesspermissionUpdate Dashboardspermission
The Dashboards Interface presents all dashboards that belong to a given repository in a table component format.
The table provides several options to manage repository dashboards, as follows.
You can manage multiple dashboards at once without opening them one by one: tick the corresponding checkboxes → click to access the following bulk operations:
the selected dashboards
to the selected dashboards
the dashboards as .zip file
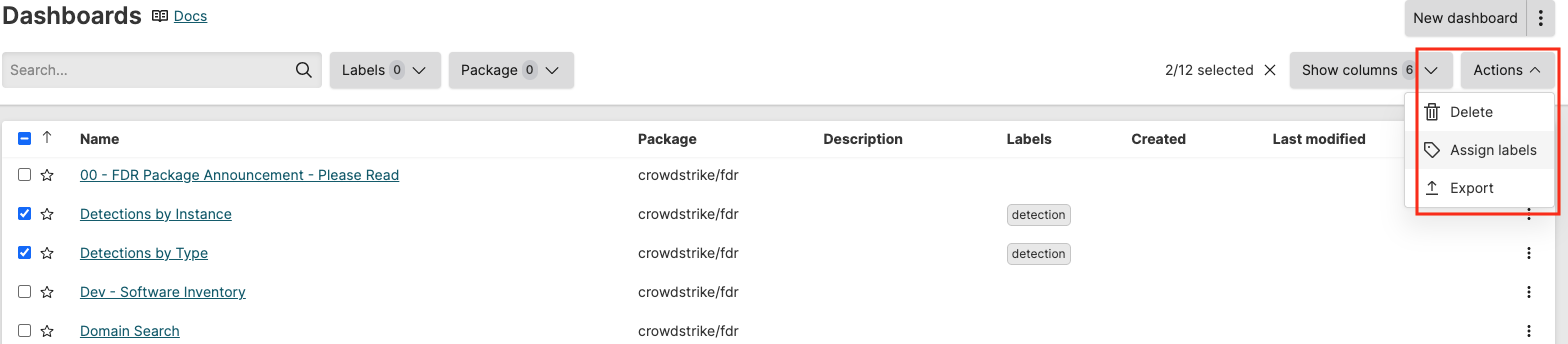
Figure 159. Repository dashboards
You can perform several actions on a specific dashboard directly from the overview table without opening the dashboard. Click the ⋮ menu icon next to a dashboard:
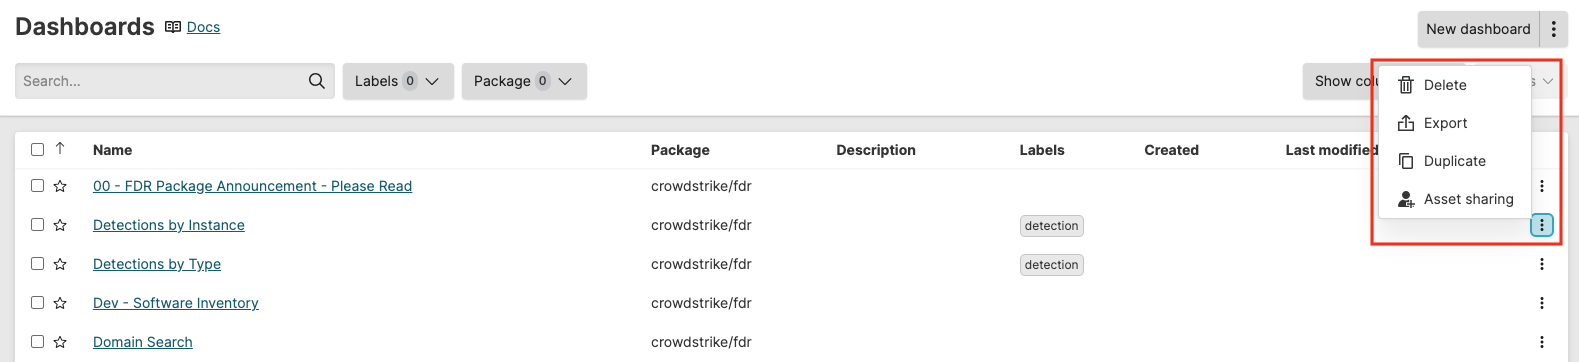
Figure 160. Repository dashboards
deletes the dashboard from the list
exports the dashboard as a yaml file
creates a copy of the dashboard, which can be saved in this or in another repository.
allows for setting permissions for that dashboard, see Permissions for dashboards for more information.
Using the GraphQL API, you can delete a specific dashboard with the deleteDashboardV3() mutation field. To assign labels using GraphQL, use the updateDashboard() with the labels parameter.
You can customize the style and formatting of a specific dashboard directly from the overview table without opening the dashboard. To do so, click on a dashboard row to open the Properties panel on the side:
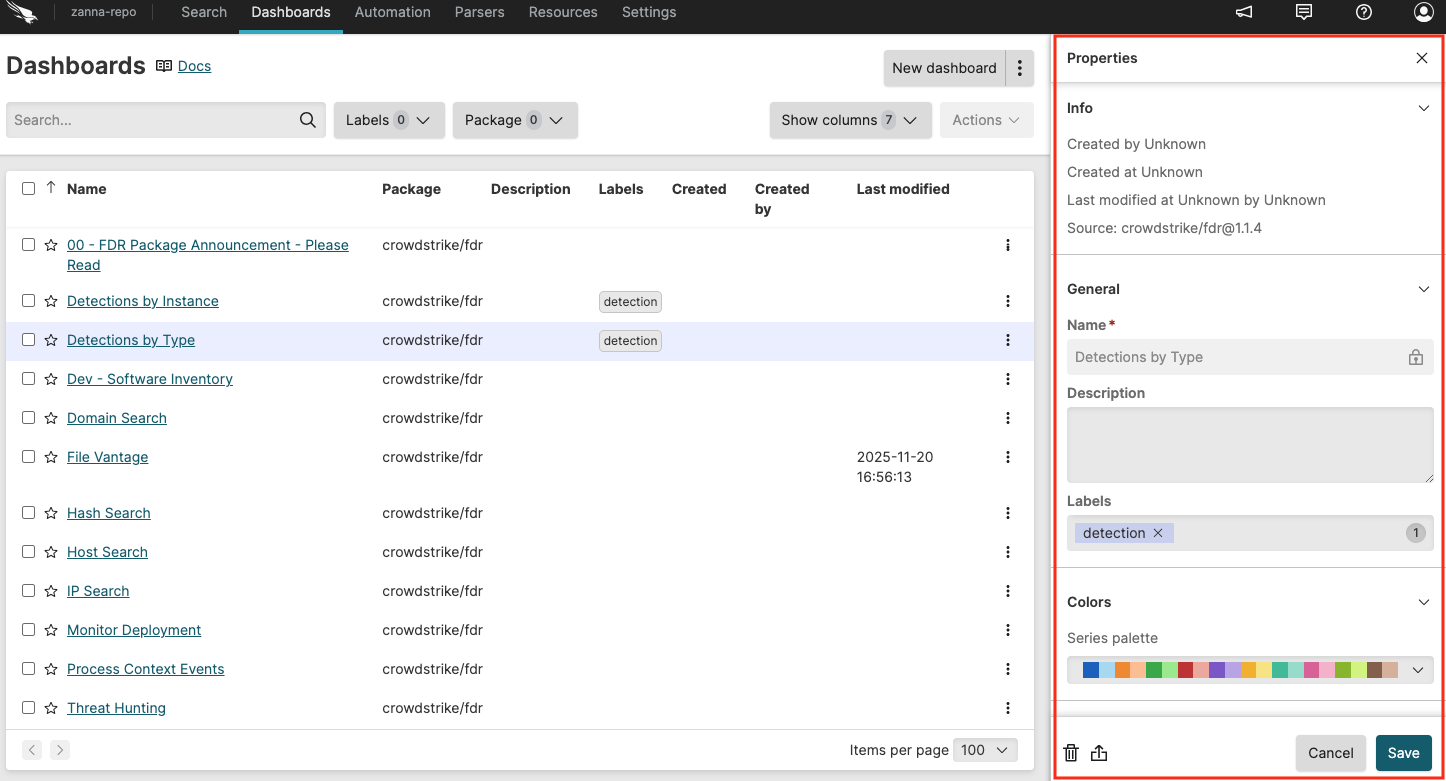
Figure 161. Customize dashboards from the overview table
In the panel, you can modify:
Name and description
Labels
Colors
Default time
Series formatting
These settings are also available in the dashboard edit panel, see Customize Dashboards for a detailed description. You can also customize a dashboard with the GraphQL API by using the updateDashboard(). mutation.
Manage individual dashboards
Security Requirements and Controls
Create DashboardspermissionData read accesspermissionDelete DashboardspermissionUpdate Dashboardspermission
After you open a dashboard, you can manage it using the controls highlighted in Figure 162, “Manage Dashboards”:
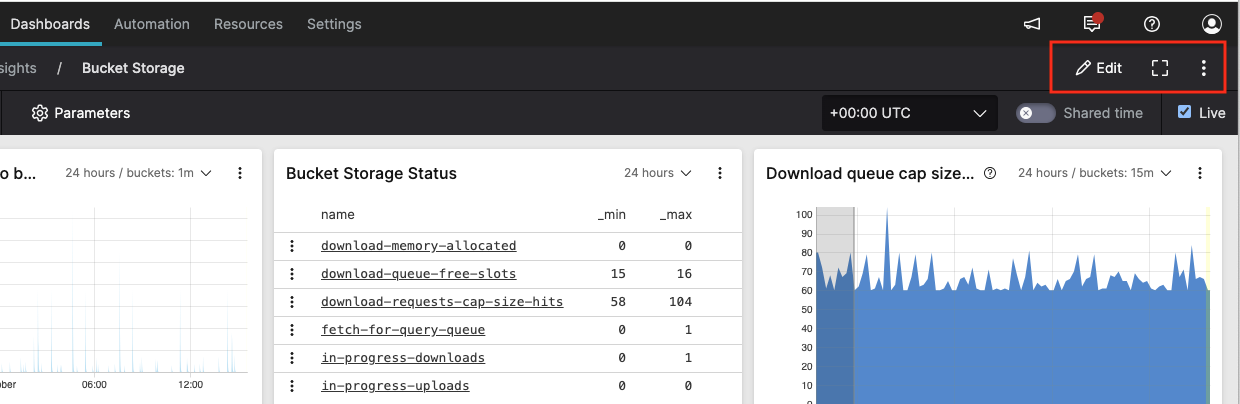 |
Figure 162. Manage Dashboards
Edit icon — enables the dashboard editing mode, see Customize Dashboards.
full screen icon — expands the dashboard to fill the screen
⋮ menu icon — provides access to several operations that you can perform on an individual dashboard:
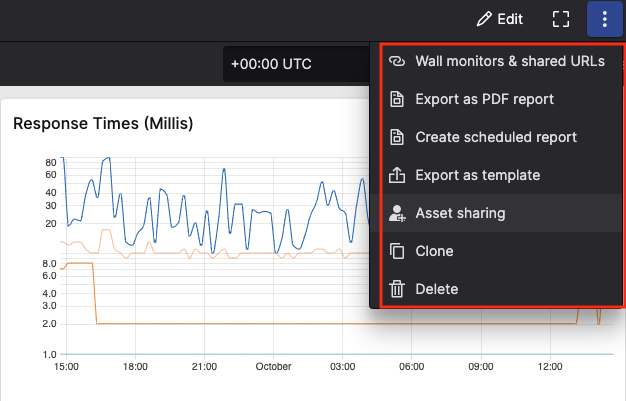
Figure 163. Dashboard operations
Available operations from the menu icon are:
— allows to share read-only dashboards. See Share Dashboards section below for more details.
— allows you to export the dashboard in PDF with several print options such as add the dashboard title in the header or the time window it was executed, set it as portrait or landscape, etc.
For more information, see Export Dashboards as PDF.
— allows you to export the dashboard in PDF with several print options such as add the dashboard title in the header or the time window it was executed, set it as portrait or landscape, etc.
For more information, see Schedule PDF Reports.
— allows you to create a template from the current dashboard, which you may reuse for new empty dashboards, as explained in Create Dashboards.
— allows you to give access to read, edit, or delete dashboards to another user or group.
For more information, see Permissions for dashboards.
— creates an identical dashboard. You are prompted to provide:
Dashboard name is the name you assign to the copied dashboard.
Target repository or view is the repository or view where you want to store your copied dashboard.
— deletes the dashboard and all associated widgets. Removal of a dashboard cannot be undone. To create a backup of the dashboard, consider using the option to keep a copy of the dashboard and its configuration.
Permissions for dashboards
Security Requirements and Controls
Change user accesspermissionData read accesspermissionUpdate Dashboardspermission
Sometimes you might want to collaborate with another user on a dashboard, but that user does not have permission to dashboards in the view. If you have permissions to do so, you can grant permissions to that user to edit and delete a particular dashboard in a view. For more information about asset permissions, see Asset permissions.
If you do not have
Change user access
permission on the repository, you will see a list of users only (no
groups) that already have at least Read permissions on the repository.
You can select from these users and give them more permissions (up to
the same permissions you have).
To grant access to edit or delete a dashboard to another user or group:
The creator of an asset and regular users can share the same permissions that they have to the asset with users who already have read access to the view. You cannot share access with users who do not have read access to the view. You cannot share access with groups at all.
Click ⋮ next to the dashboard you want to share and select .
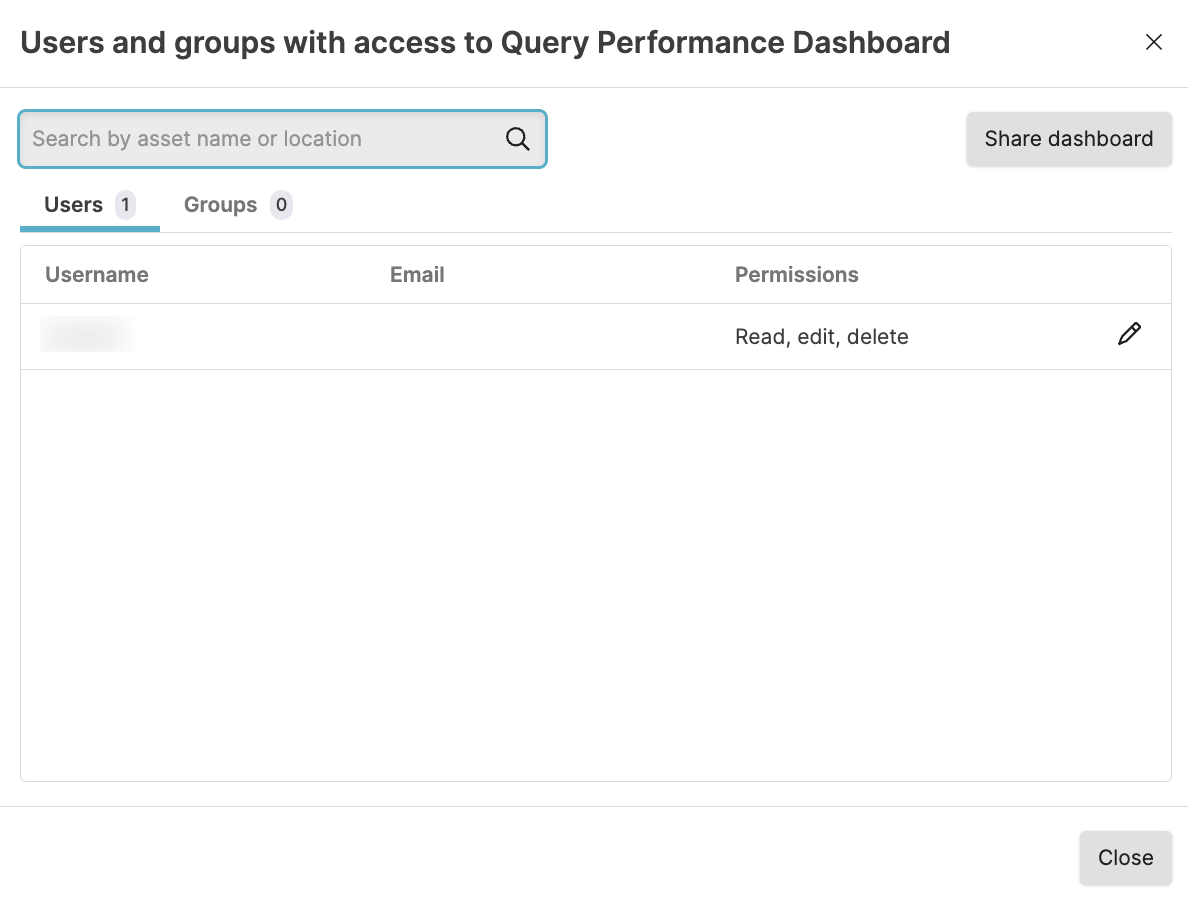
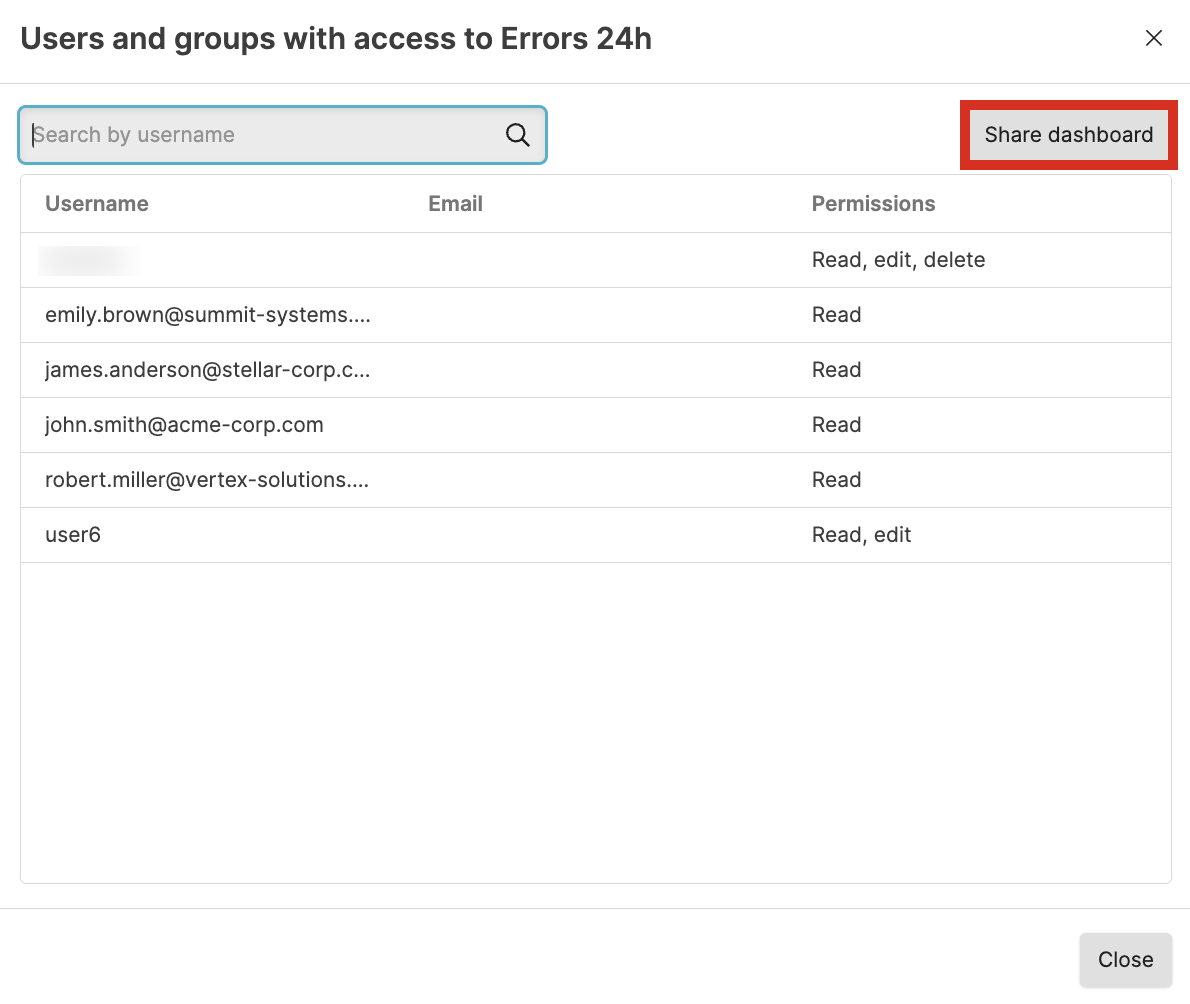
In the Users and groups with access window you see users who currently have access to the dashboard and what access they have.
Click .
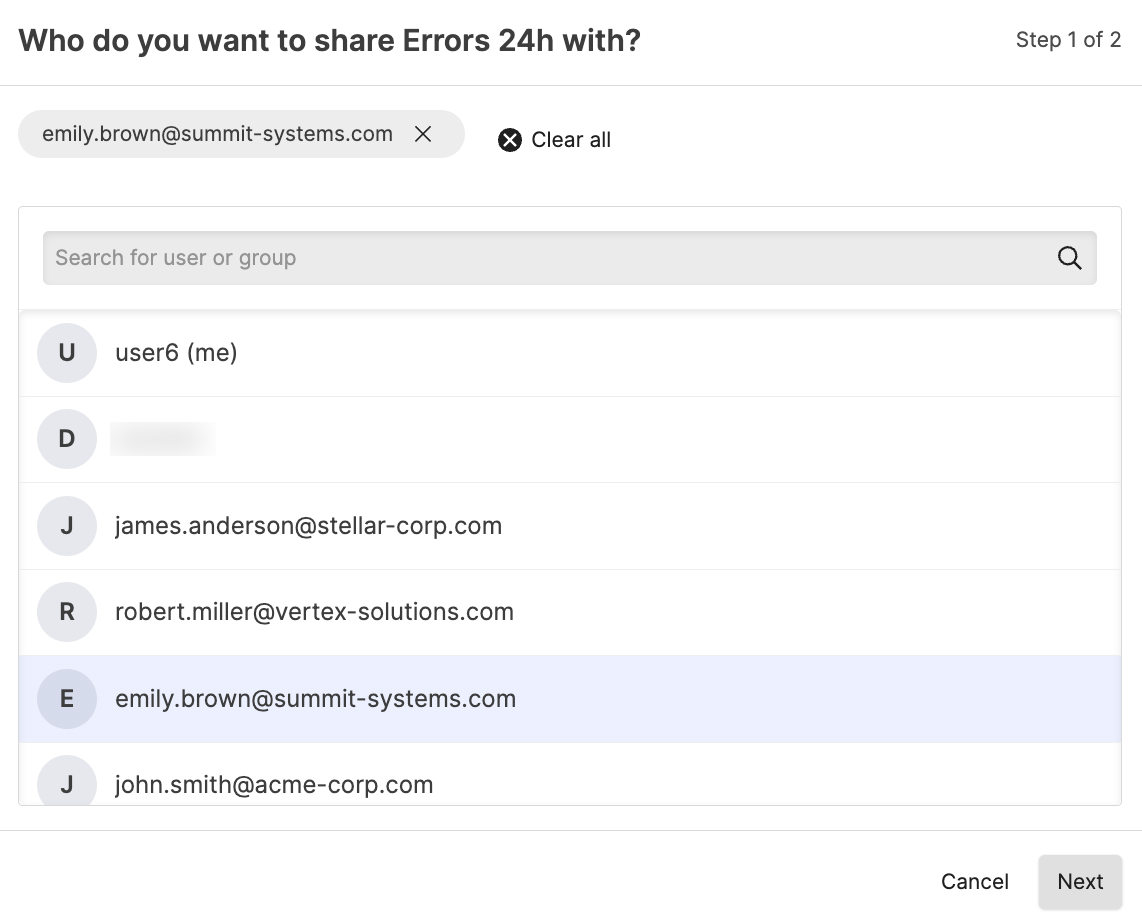
Click to select the user to get additional permissions. Note that you can only see users who already have read permission to the view. Click .
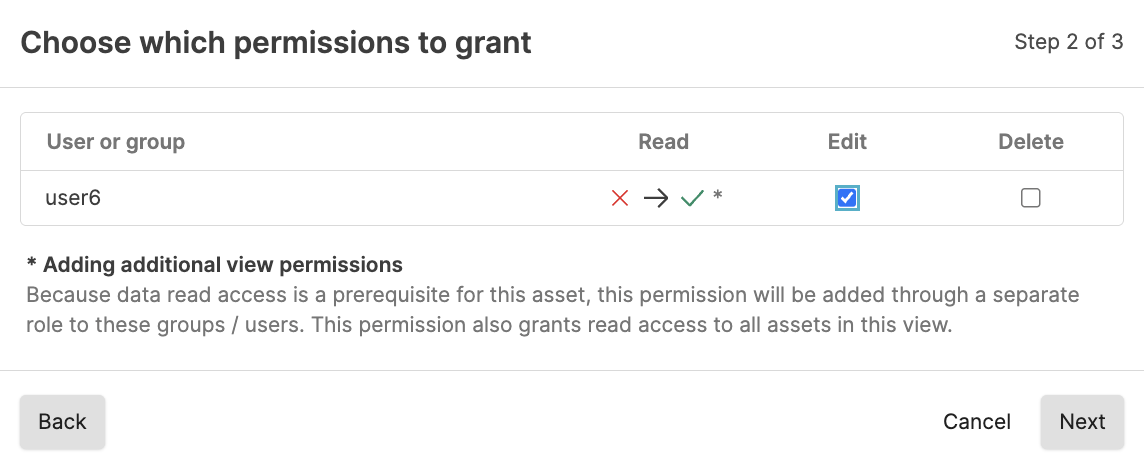
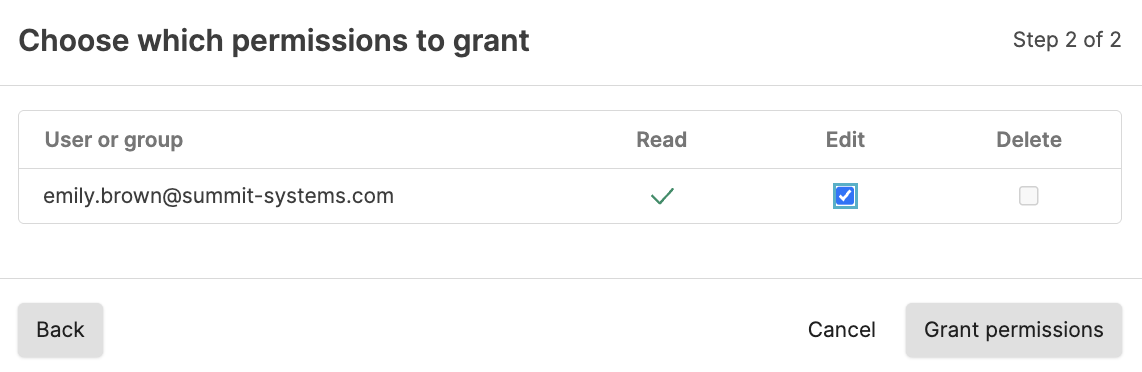
Select the appropriate permissions to assign. Click .
With
Change user accesspermission, you can grant permission to users, including read permission if the user does not have that, and permissions that you do not have yourself. You can also see groups and group members and what permissions they have in the Groups tab, but you cannot change the permissions for the group in the Groups tab. To be able to change the permissions directly from the group tab, you must haveChange organization permissionspermission.To grant additional permissions to a user that already has read access to the view:
Click ⋮ next to the dashboard you want to share and select .
In the Users and groups with access window you see users who currently have access to the dashboard and what access they have.
Click the button next to the user or group in the list.
Click to assign the permissions. Click .
Click .
If you have the
Change user accesspermission and you want to share permissions to the dashboard with a user or group not in the list, or you want to give a group that is in the list additional permissions:
Click .
Click to select the group or user who should get additional permissions. Click .
Select the appropriate permissions to assign. Be aware of the message that the user or group gets Read access to all assets in the repository automatically when assigning asset permissions for one asset in the repository. Click .
Confirm that you understand that you are granting Read access to all assets in the repository by adding the asset permission for the user or group. Click .
Click .