
Create Triggers
Security Requirements and Controls
Create triggerspermission
The documentation explains how to create triggers in LogScale, including step-by-step instructions for creating them from either the Triggers overview page or the Search page. Users with the 'Create triggers' permission can set up automated alerts by constructing queries, choosing appropriate trigger types (Filter, Aggregate, Scheduled search, or Legacy), and configuring properties through the Details panel, with the option to import triggers from templates or packages.
Triggers are constructed using queries and associated with one or more actions that will be triggered when the query runs. When creating a trigger, the type of trigger is suggested for you based upon the query. This adjusts which configuration options are available.
Create a trigger from the Triggers overview
Security Requirements and Controls
Create triggerspermission
Go to the Repository and Views page.
Select a Repository or View.
Go to and select . The full list of available triggers appears in the
Triggersoverview page: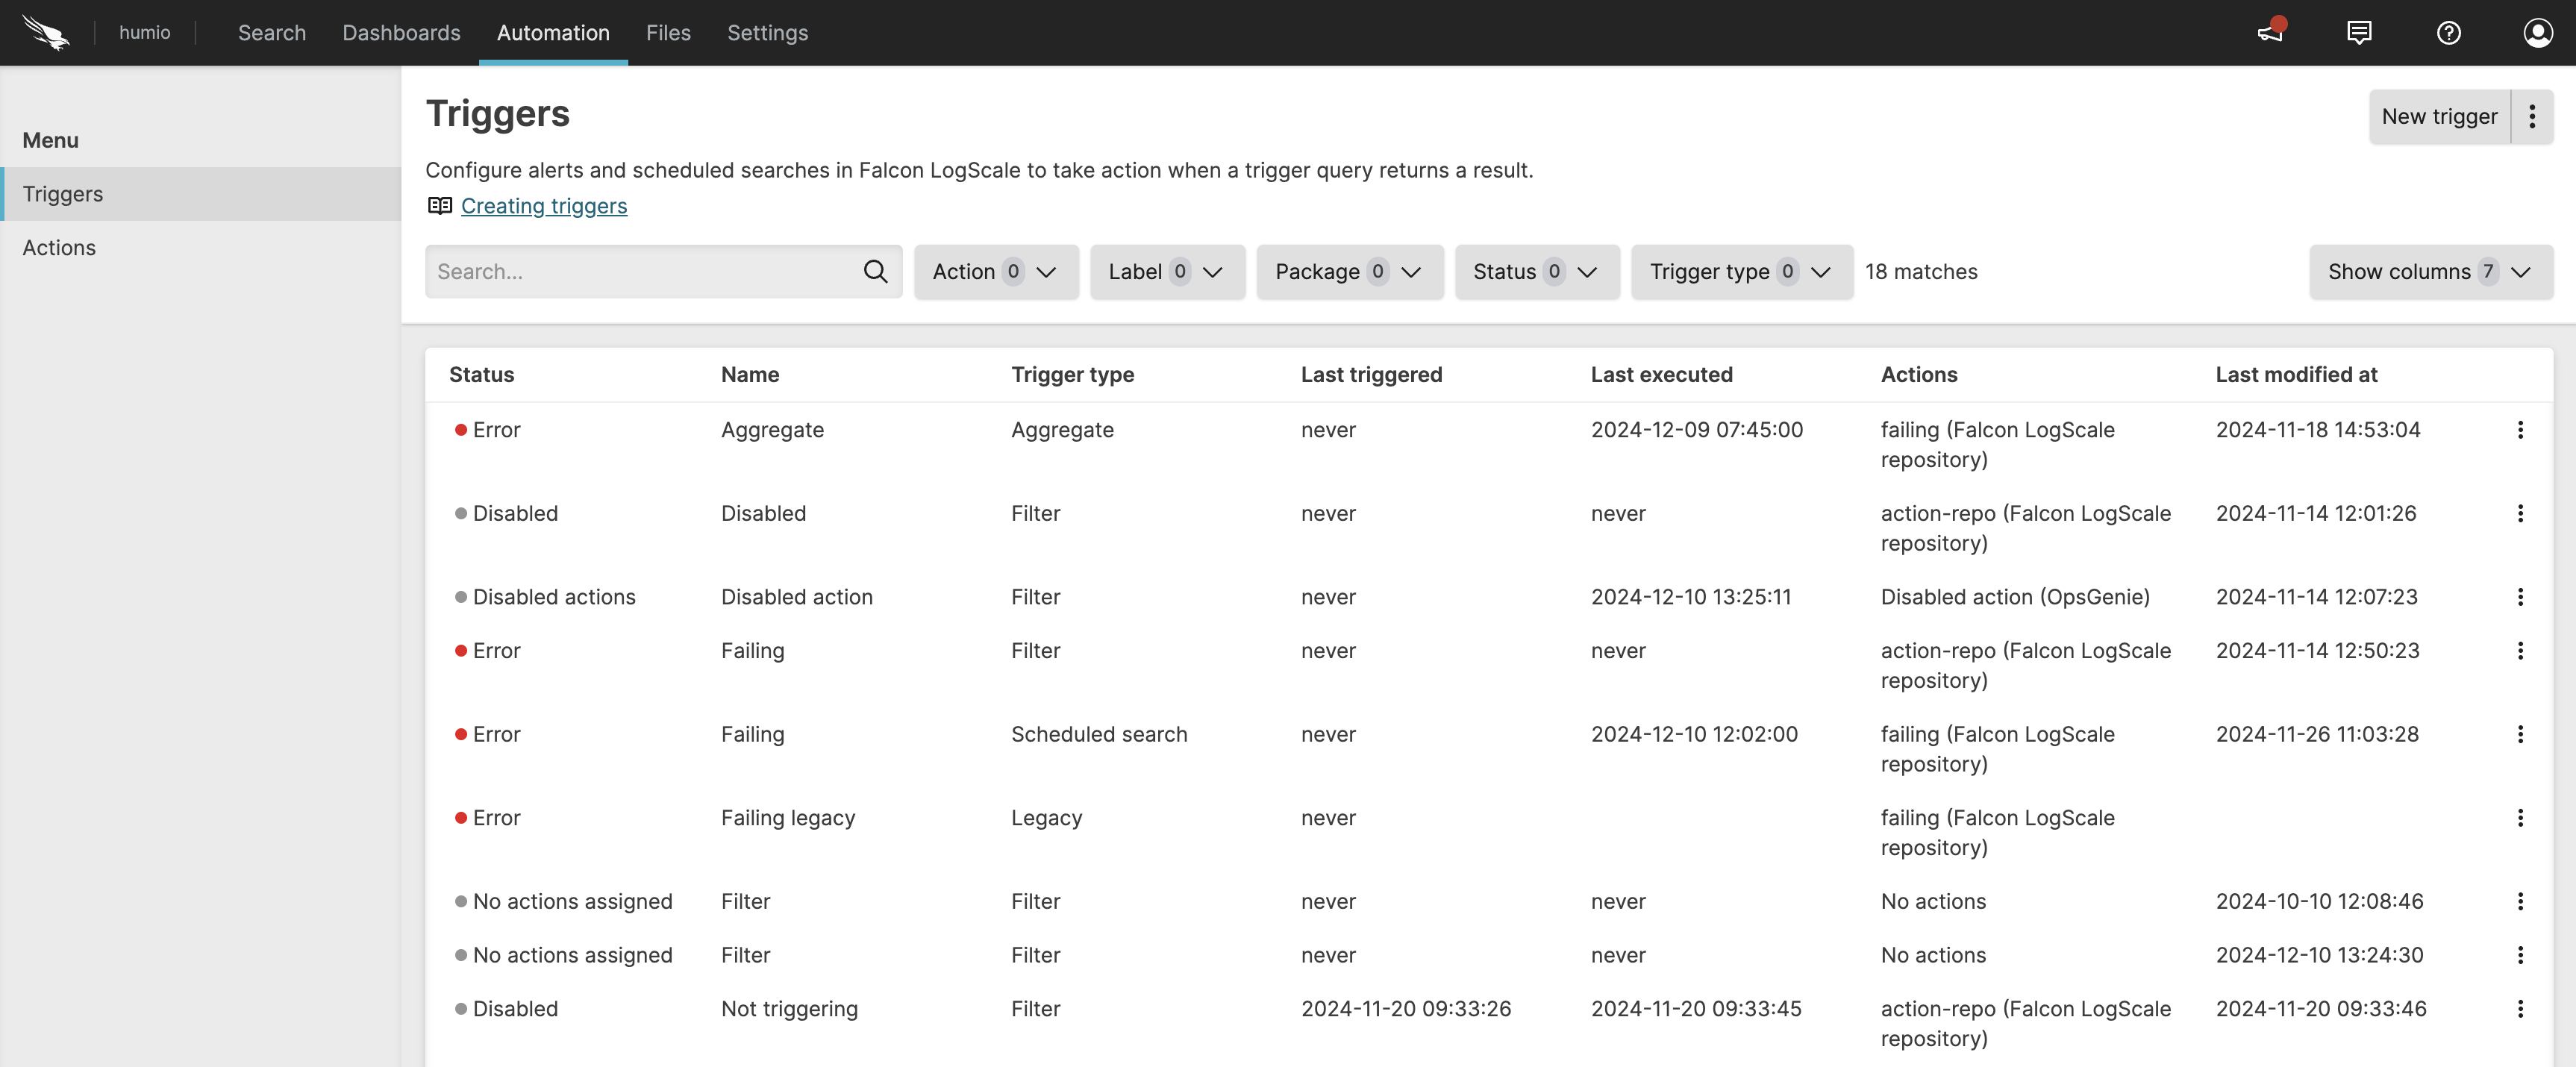
Figure 261. Triggers Overview
Click to display the
Searchpage in Creating new trigger mode.
Figure 262. Simplified Search page
Note
It is possible to create new triggers by importing them from a template or package. Click in the ⋮ menu on .
Choose , then browse for or drag and drop a template based on an existing trigger.
Choose to invoke templates that are part of a LogScale library package.
Type a query for your trigger and click .
Fill in the New trigger panel.
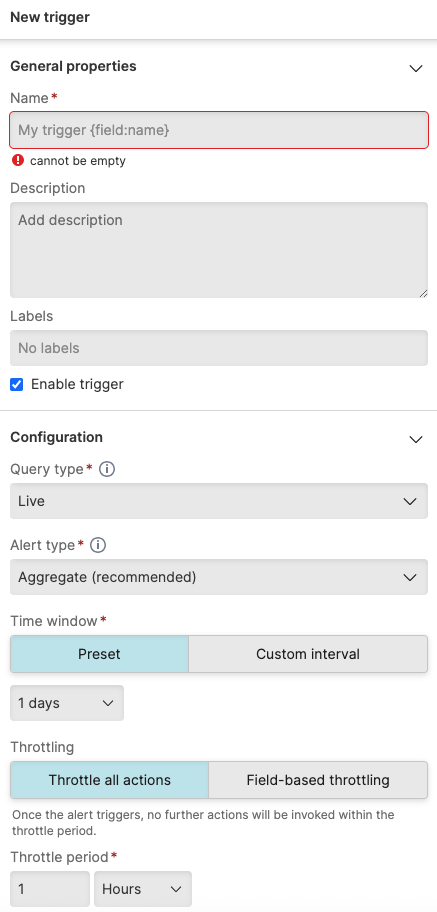
Figure 263. New trigger details
Click to display the new trigger in the
Triggersoverview, see Figure 267, “Triggers Overview”.
For a description of all trigger properties in the side panel, see Trigger Properties.
Create a trigger from the Search page
Security Requirements and Controls
Create triggerspermission
A query that has been typed in Search can
be converted to a new alert:
Go to the tab.
Type the query you need for your trigger and click .
Click and choose the option.
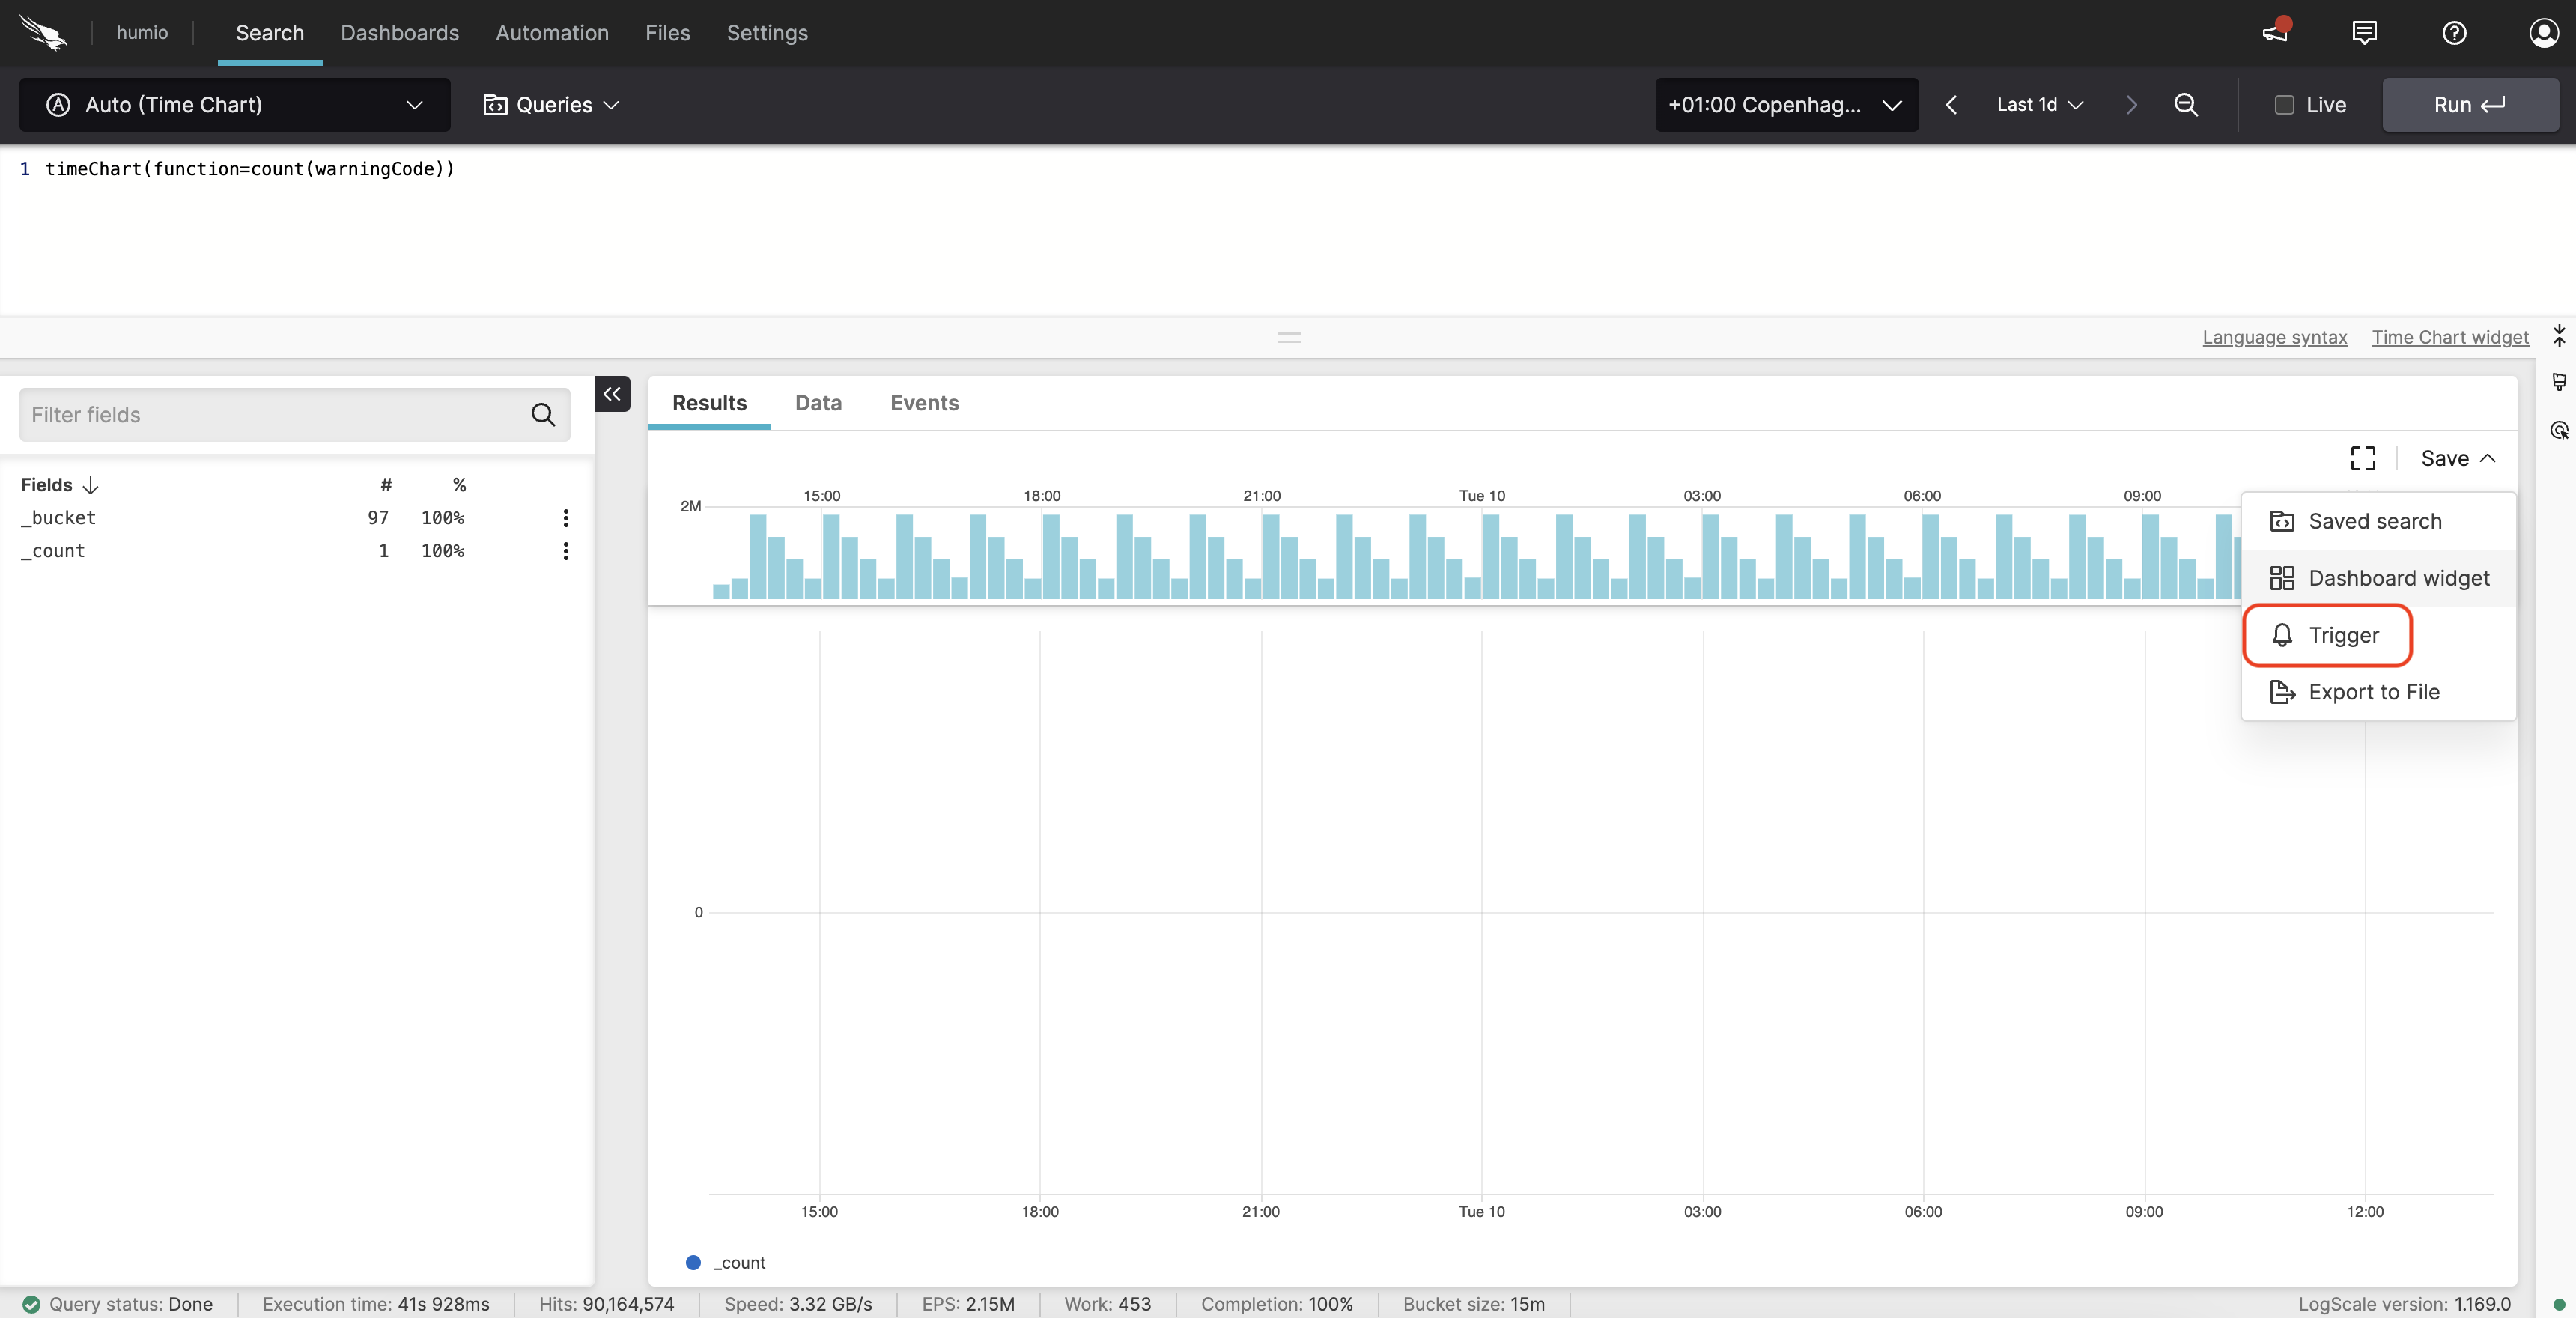
Figure 264. Save a query as trigger
Fill in the New trigger side panel as required (see Figure 263, “New trigger details”).
Click to complete the trigger creation: the new trigger is now displayed in the
Triggersoverview, see Figure 267, “Triggers Overview”.
For a description of all trigger properties in the side panel, see Trigger Properties.