
Create a Lookup File
Security Requirements and Controls
Create Filespermission
The methods to create lookup files are:
Create a lookup file in the Lookup files interface
You can create a new lookup file from the LogScale user interface, and then populate the content manually.
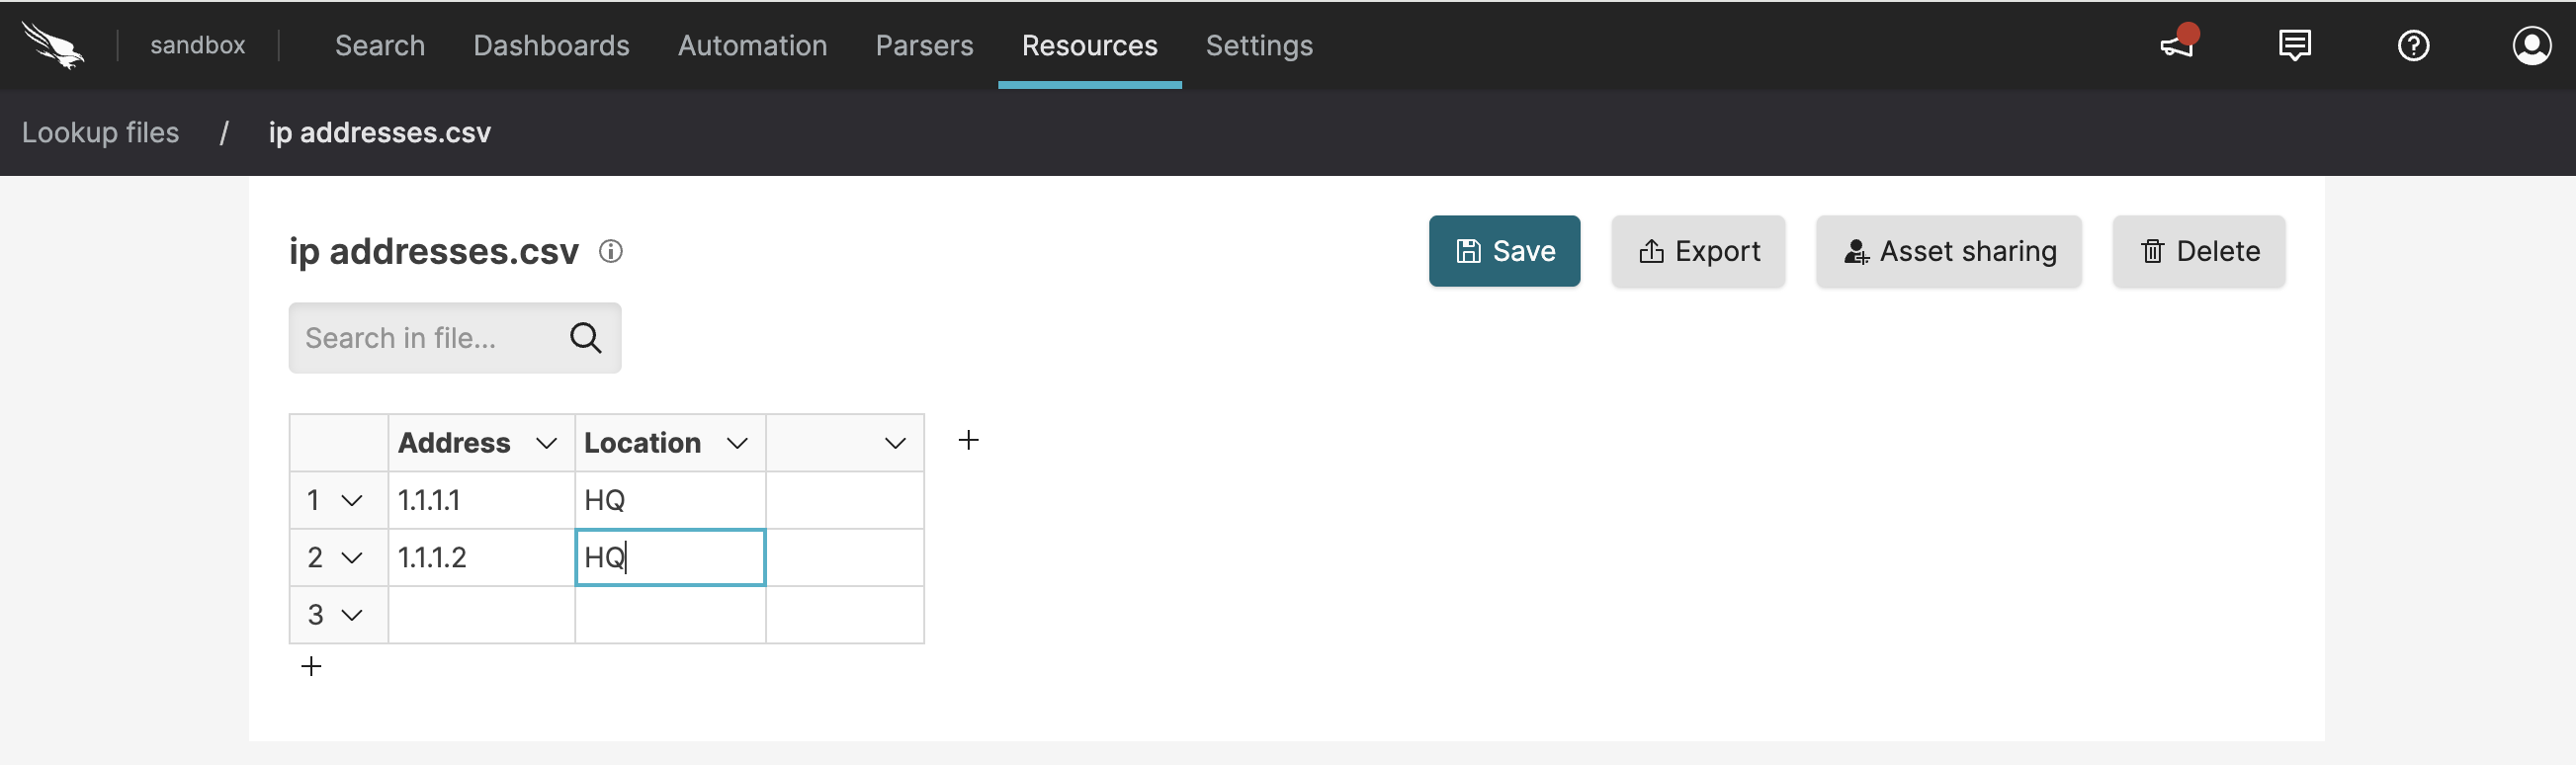
If you have many changes to make, editing a data table through the
Lookup files page can be tedious; click
and then save the file
to a location to edit it in a spreadsheet program or a simple text
editor.
Note
Files larger than 100 MB cannot be viewed in the UI. Files with more than 1000 lines cannot be edited.
When a file is referenced in a query, a tab bearing the same name of the
file shows up in the Search page. This
file tab will display the file content as a
Table widget. Alternatively, if the file
cannot be queried, a download link will be presented instead. For
example, executing the query:
groupBy([status])
| match(file="status_codes.csv", column="status", field=status, include=name)
will show a new tab named Table: status_codes.csv:
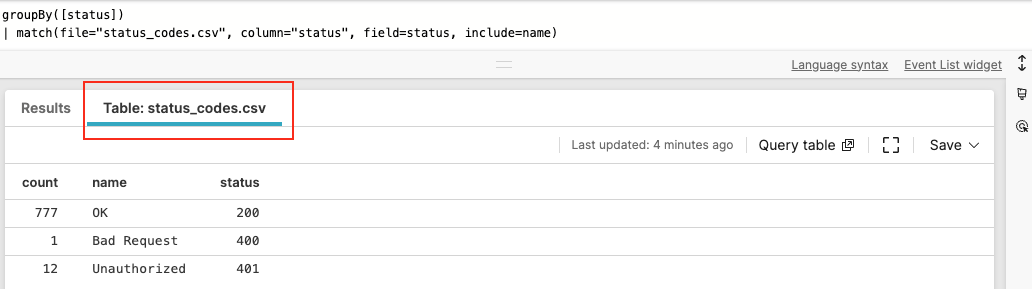 |
Figure 45. File Tab in Search View
Create a lookup file in the Search interface
Security Requirements and Controls
Create Filespermission
Available: Create a lookup file from the search interface v1.211.0
Create a lookup file from the search interface is available from version 1.211.0.
If you have executed a query and want to save the results as a lookup
file, you can do this in the Search
interface.
In the Results tab click and select Lookup file.
Enter a name for the lookup file.
Click .
Upload lookup files
Security Requirements and Controls
Create Filespermission
If you created or edited a lookup file in an external system, you can upload it to LogScale.
Click the three dots next to → .

Figure 46. Import CSV File
Drag and drop your file or browse for the file to upload. You can import multiple files at once. Maximum allowed size is 209.72 MB.
You can upload a CSV file containing text like what you see below, which is essentially a lookup table that you can use for labels or value lookups.
csvuserid,ip,username,region 1,"212.12.31.23","pete","EU" 2,"212.12.31.231","bob","EU" 3,"98.12.31.21","anders","EU" 4,"121.12.31.23","jeff","US" 5,"82.12.31.23","ted","AU" 6,"62.12.31.23","annie","US" 7,"122.12.31.23","joe","CH" 8,"112.11.11.21","alice","CH" 9,"212.112.131.22","admin","RU" 10,"212.12.31.23","wendy","EU"Once it has been uploaded, it will look like what you see in Import CSV File.
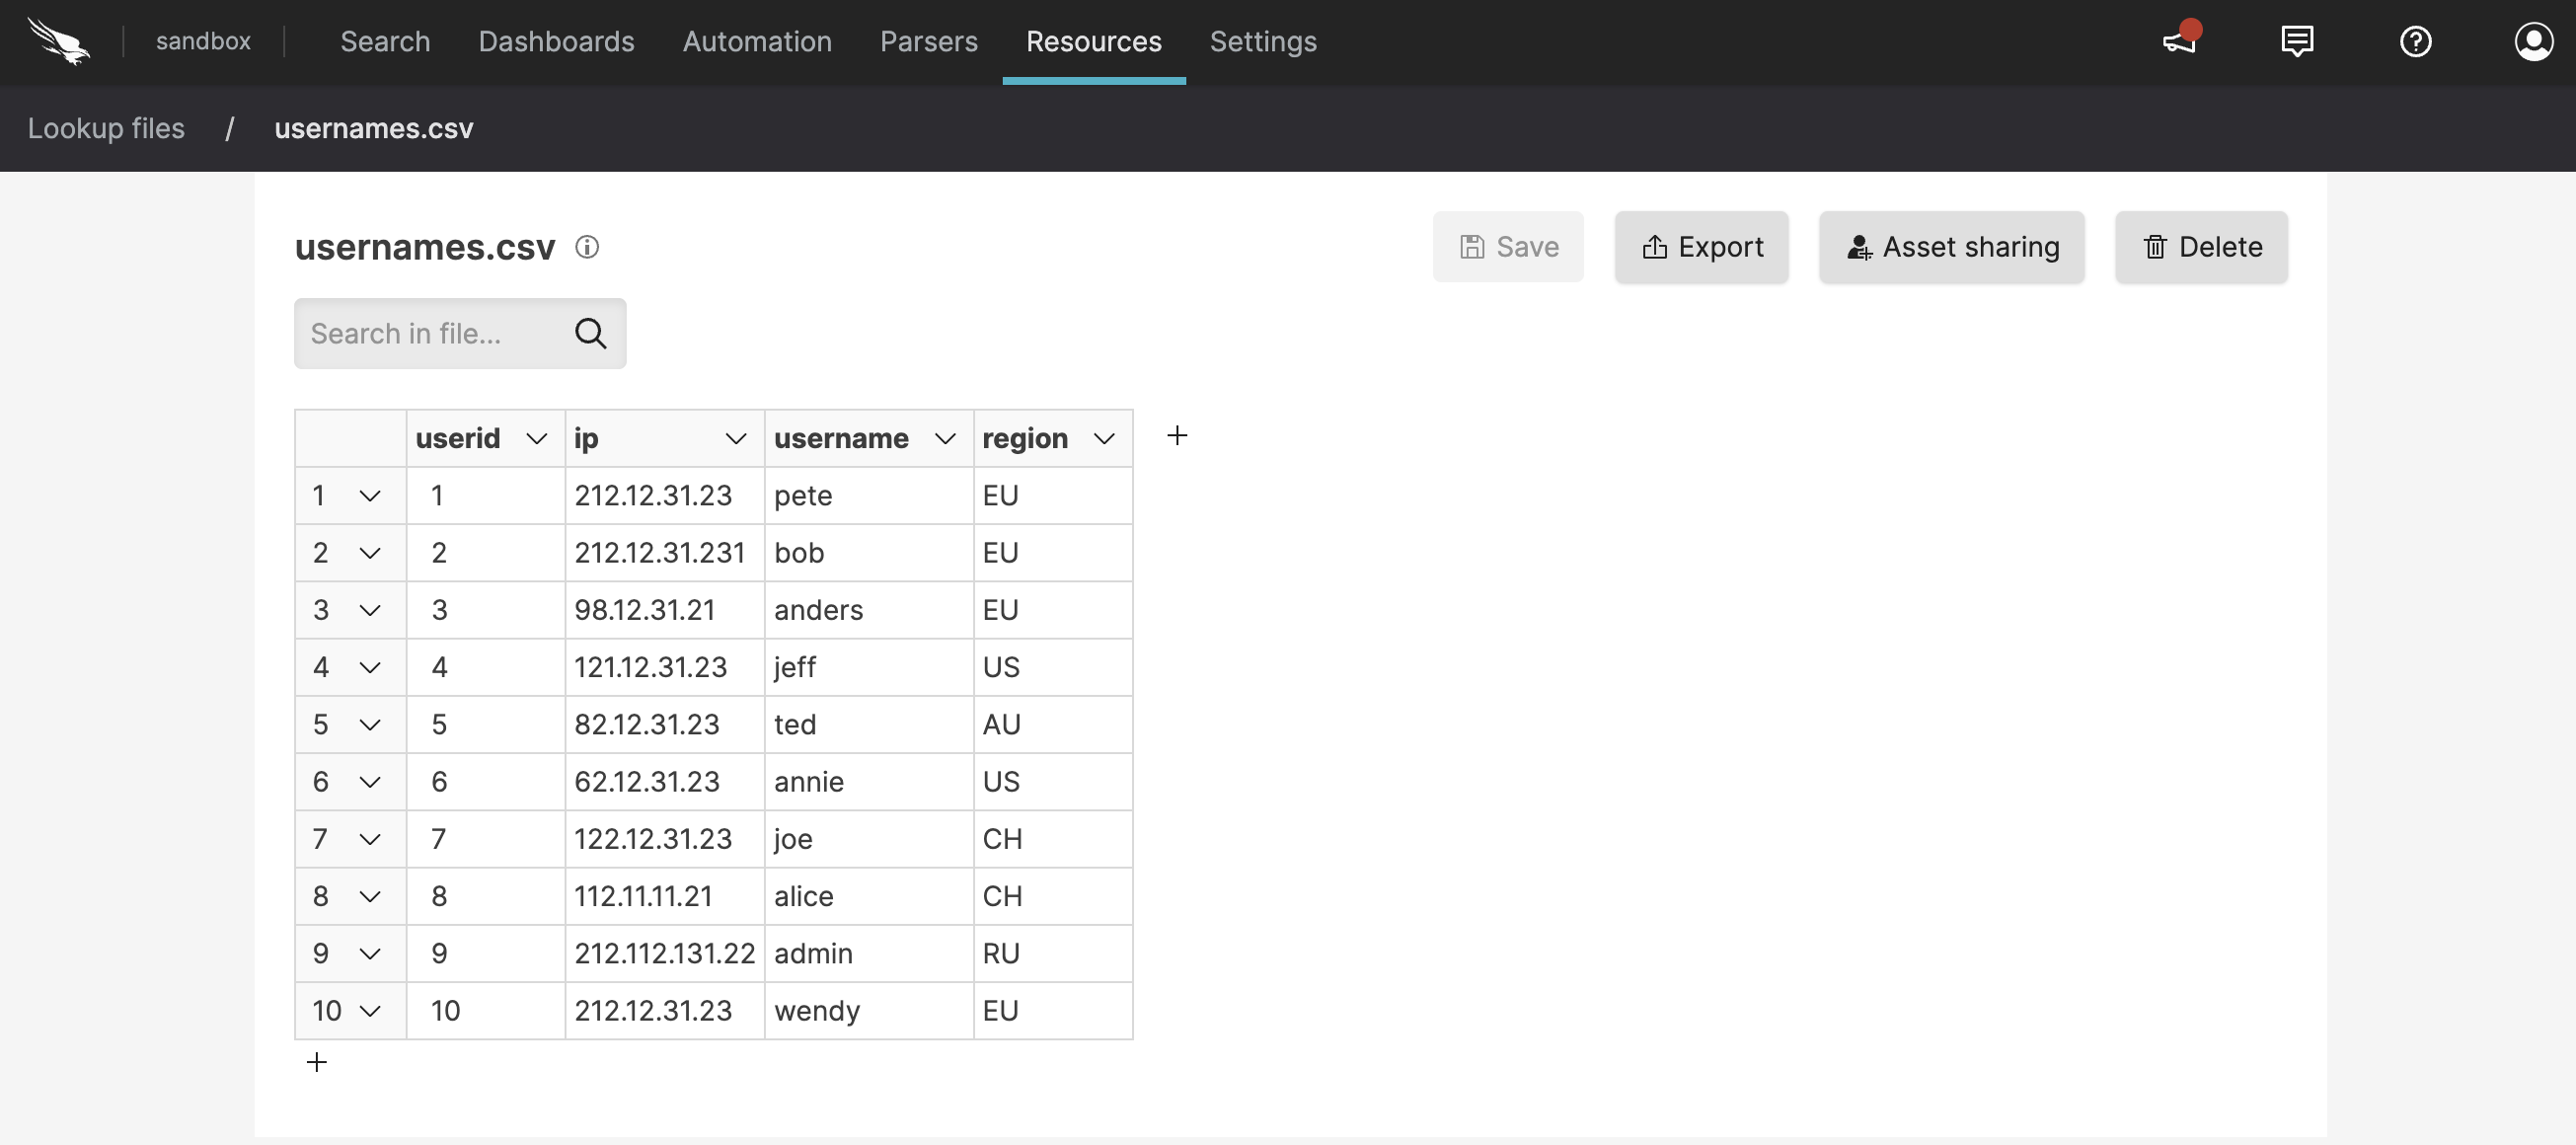
Figure 47. Import CSV File
Typically, the content is used within the
match()to lookup fixed reference information. Notice that the values are in quotes, except for the ones for userid, which are integers. See the Lookup API reference page for more information on this topic.Once created or uploaded, the file can be edited and updated within the user interface. Additional columns and rows can be added to the file using the button. Clicking the tiny information icon next to the file name displays metadata info about the file (created by, time it was created, etc.)
Important
Only CSV files can be edited once uploaded within the user interface.
Once you have finished editing, click , or click if you wish to download the edited file.
Create a lookup file through a trigger action
Security Requirements and Controls
Create ActionspermissionCreate FilespermissionUpdate Filespermission
It is possible to create and update a lookup file with an action connected to a trigger. This means that the first time the action triggers, a lookup file will be created. And then, the lookup file will be changed on subsequent action triggers.
For more information about how to create an action that creates a lookup file, see Action Type: Lookup File.