Managing Scheduled Reports
Security Requirements and Controls
Update Scheduled Reportspermission
Scheduled reports can be managed from the Scheduled
reports page. To access:
Navigate to the tab of your repository or view
Select from the left navigation menu. If the option is grayed out, ensure to have the
Create Scheduled Reportspermission. For more information, see Scheduled Reports Security.
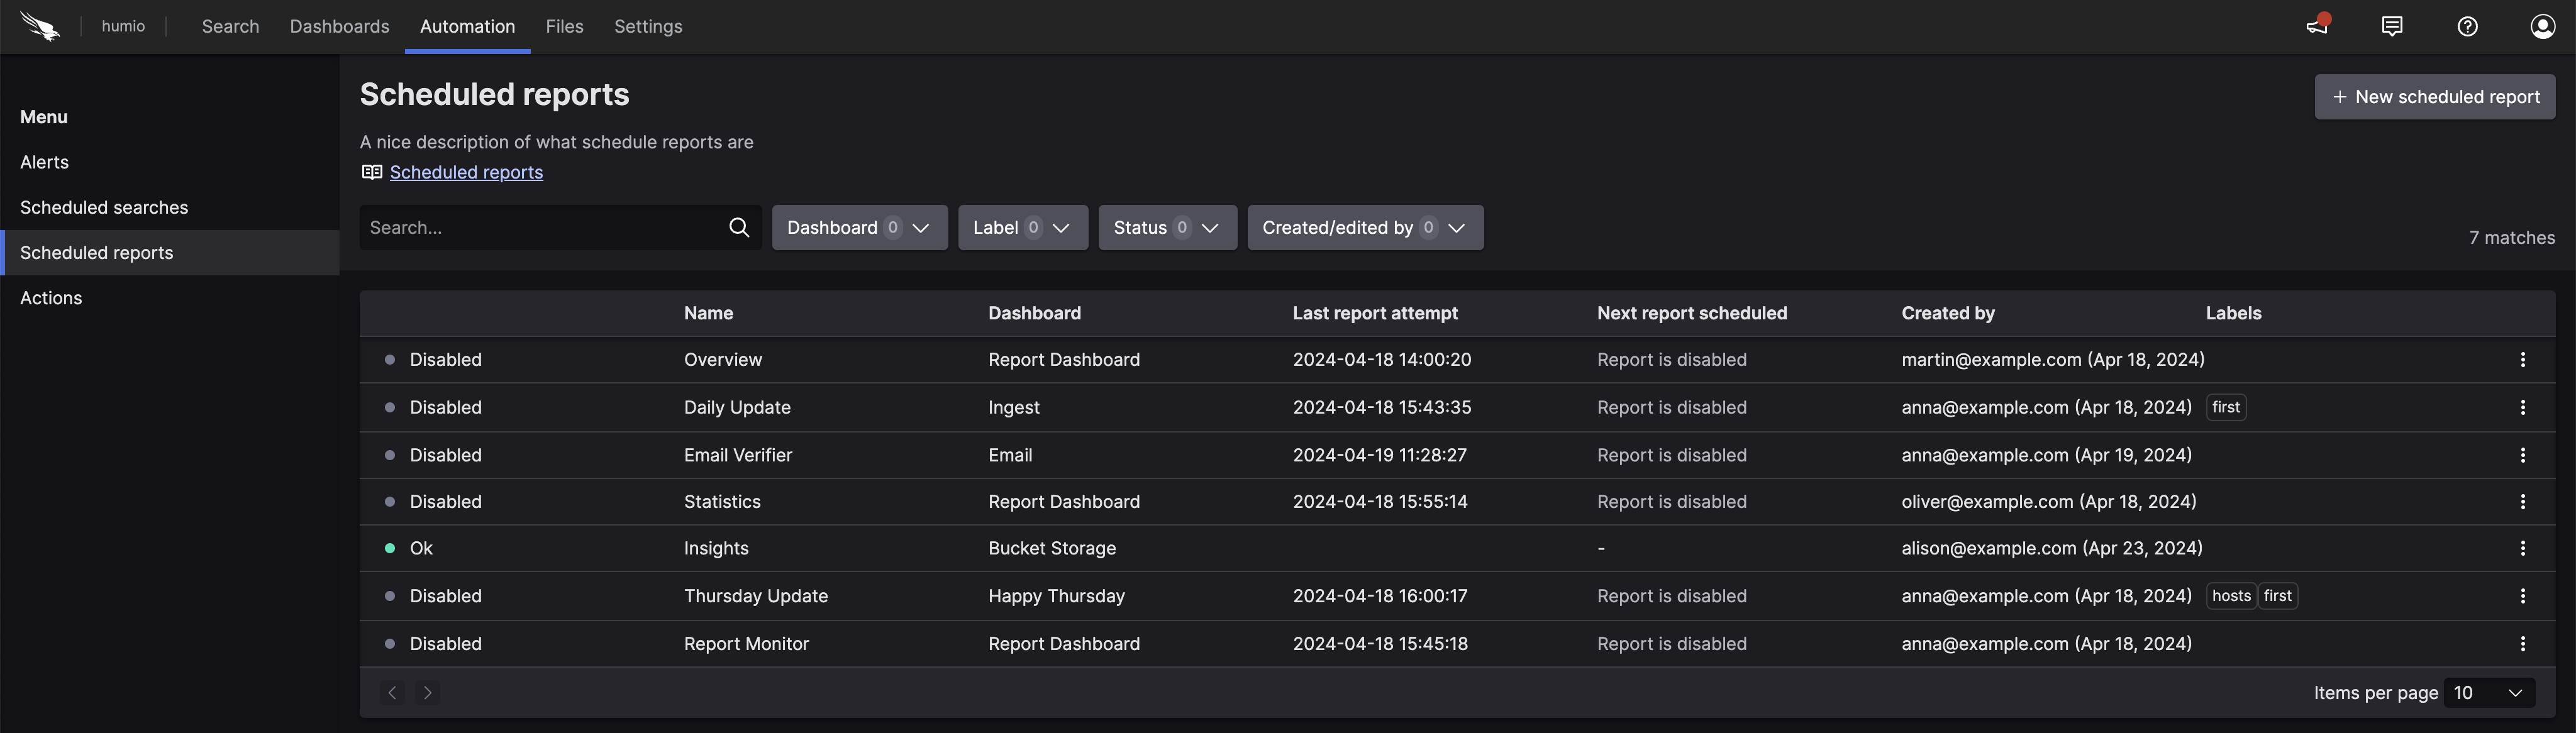 |
The Scheduled reports
page allows you to:
Review the list of all reports created in the repository or view
Create a new scheduled report using the button
Use the quick filters on top to search the list by:
Dashboard (the source dashboard)
Label
Status
Created/edited by
Use the Search... box to filter the list by report name
Manage reports: pause, resume or delete reports
Edit reports.
The reports' list show the following attributes:
Status — status of the last report job, one of:
Pending report is scheduled to start in the future.
OK no detected problems
Warning warnings detected, open the side panel to inspect
Error errors detected, open the side panel to inspect
Disabled disabled status is displayed in two scenarios:
the report has been disabled by the user, or the scheduled end time is in the past
the report encountered a configuration error (for example, the source dashboard was deleted)
Name — name of the scheduled report
Dashboard — source dashboard used for the report
Last report attempt — last time the report was triggered
Next report scheduled — date and time when the next report is scheduled to run
Created by— user who created or edited the report
Labels — list of the labels assigned to the report
Three-dot menu ⋮ to pause, resume, delete, or share access to the report.
Permissions for scheduled reports
Security Requirements and Controls
Change user accesspermission
Sometimes you might want to collaborate with another user on a scheduled report, but that user does not have permissions to scheduled reports in the view. If you have permissions to do so, you can grant permissions to that user to edit and delete a particular scheduled report in a view. For more information about asset permissions, see Asset permissions.
If you do not have
Change user access
permission on the repository, you will see a list of users only (no
groups) that already have at least Read permissions on the repository.
You can select from these users and give them more permissions (up to
the same permissions you have).
To grant access to edit or delete a scheduled report to another user or group:
The creator of an asset and regular users can share the same permissions that they have to the asset with users who already have read access to the view. You cannot share access with users who do not have read access to the view. You cannot share access with groups at all.
Click ⋮ next to the scheduled report you want to share and select .
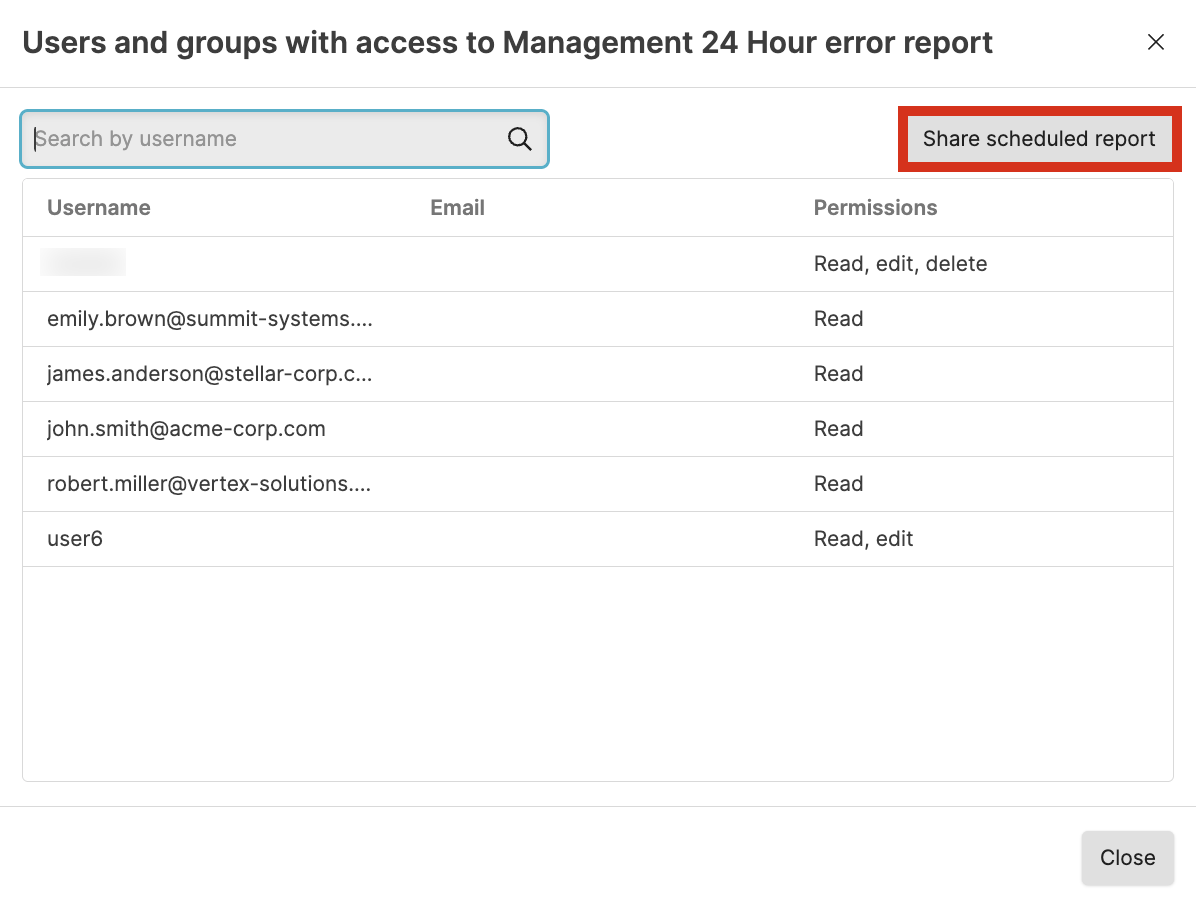
In the Users and groups with access window you see users who currently have access to the scheduled report and what access they have.
Click .
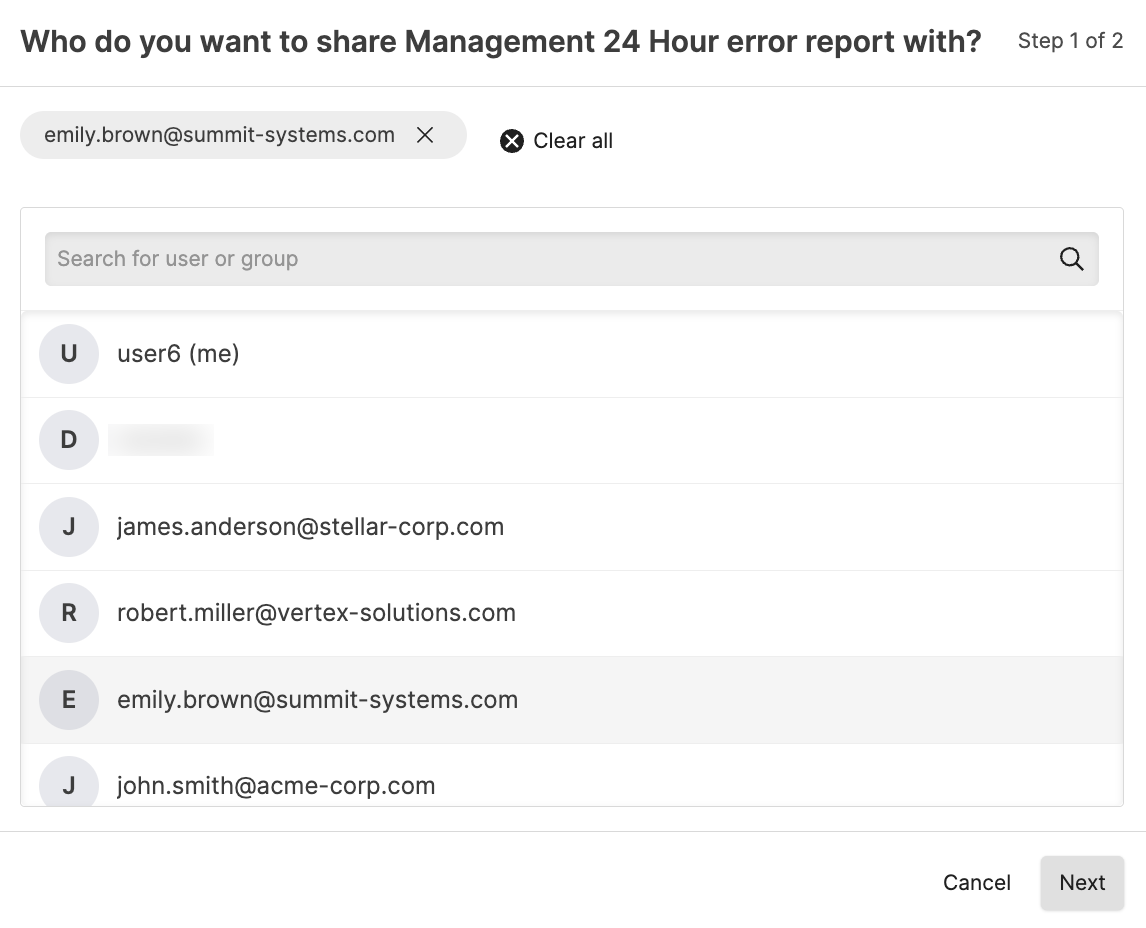
Click to select the user to get additional permissions. Note that you can only see users who already have read permission to the view. Click .
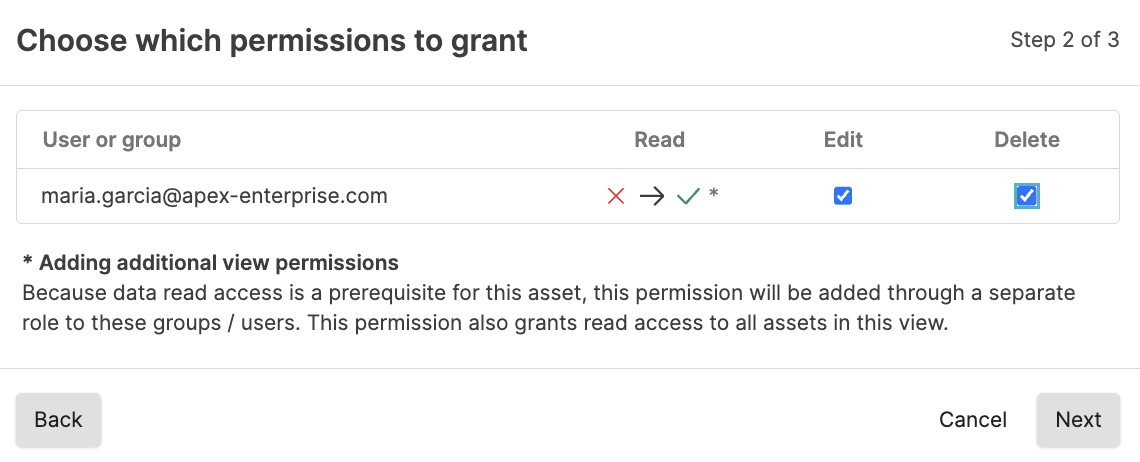
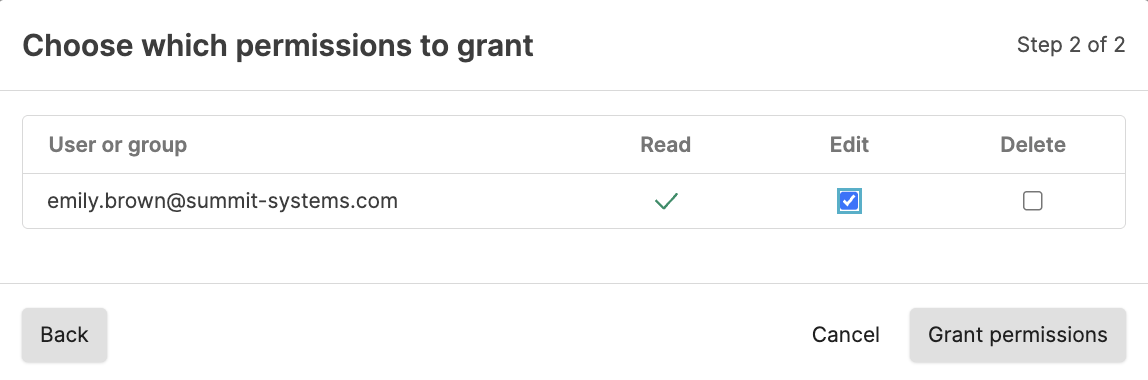
Select the appropriate permissions to assign. Click .
With
Change user accesspermission, you can grant permission to users, including read permission if the user does not have that, and permissions that you do not have yourself. You can also see groups and group members and what permissions they have in the Groups tab, but you cannot change the permissions for the group in the Groups tab. To be able to change the permissions directly from the group tab, you must haveChange organization permissionspermission.To grant additional permissions to a user that already has read access to the view:
Click ⋮ next to the scheduled report you want to share and select .
In the Users and groups with access window you see users who currently have access to the scheduled report and what access they have.
Click the button next to the user or group in the list.
Click to assign the permissions. Click .
Click .
If you have the
Change user accesspermission and you want to share permissions to the scheduled report with a user or group not in the list, or you want to give a group that is in the list additional permissions:
Click .
Click to select the group or user who should get additional permissions. Click .
Select the appropriate permissions to assign. Be aware of the message that the user or group gets Read access to all assets in the repository automatically when assigning asset permissions for one asset in the repository. Click .
Confirm that you understand that you are granting Read access to all assets in the repository by adding the asset permission for the user or group. Click .
Click .