
Event List Interactions
Security Requirements and Controls
Change interactionspermission
Event List Interactions allows to interact actively with the data and explore it in deep detail. These interactions are added as options in the Event List, and work as quick workflows triggered directly from the search results.
For example, every time an event includes an IP address, you can:
Trigger a look up in an external system directly from the Event List — a kind of "WHOIS" search based on the IP address found in the event.
Control the context in which the interaction should be displayed, to only show it in events that actually have the field IP address — because this interaction makes sense only if such specific condition is met.
Event list interactions are available within a certain scope — that is, they apply to some given Manage Repositories and Views.
These scoped interactions are collected in an overview page from which to create more preset interactions, or where other users in the Organization access to reuse the interactions you have created, see Figure 110, “Overview of your interactions”.
Not every user can see, configure or edit these interactions, this depends on the permissions set for them in the given repository.
Once created, these interactions are displayed in the Event list for every search within a repository.
For the steps on how to configure event list interactions, see Access and Create Event List Interactions.
Access and Create Event List Interactions
To create a new interaction:
Click the avatar icon → select :
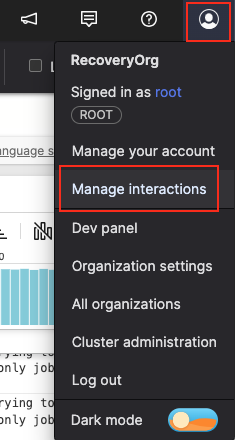
Figure 109. Access Interactions from the Profile Menu
The
Interactionsoverview page is displayed, showing all interactions you have previously created: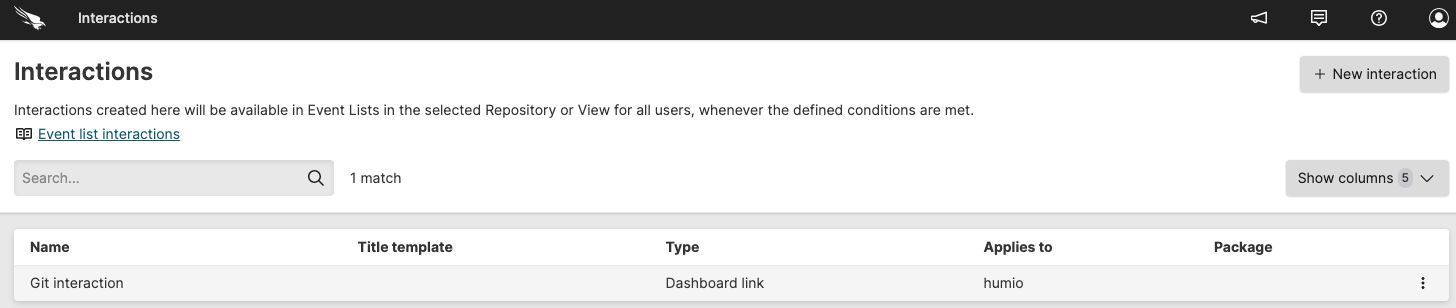
Figure 110. Overview of your interactions
To see the available interactions created by other users for a specific repository, open the
Resourcestab within a repository → click Interactions from the left-hand navigation panel: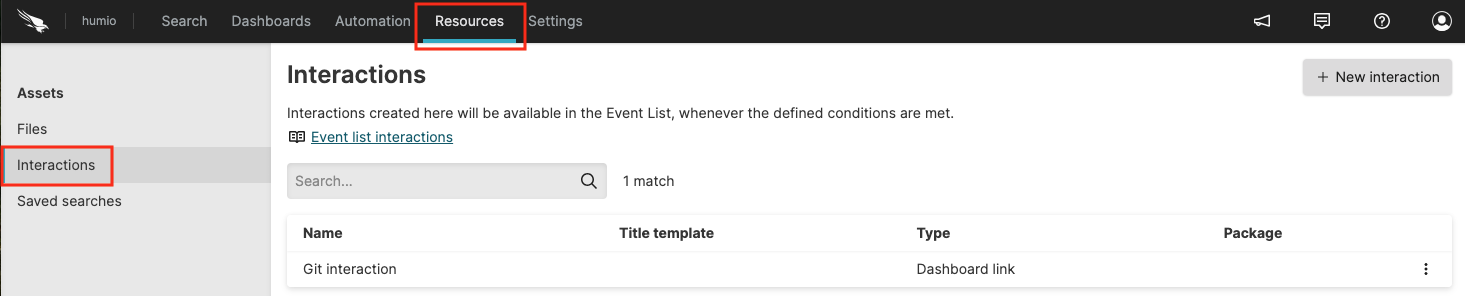
Figure 111. Repository Interactions by multiple users
For information on the available interactions metadata in this page, see Asset Type Interface Elements.
Click . The Create new interaction dialog box opens, which allows you to configure the new interaction.
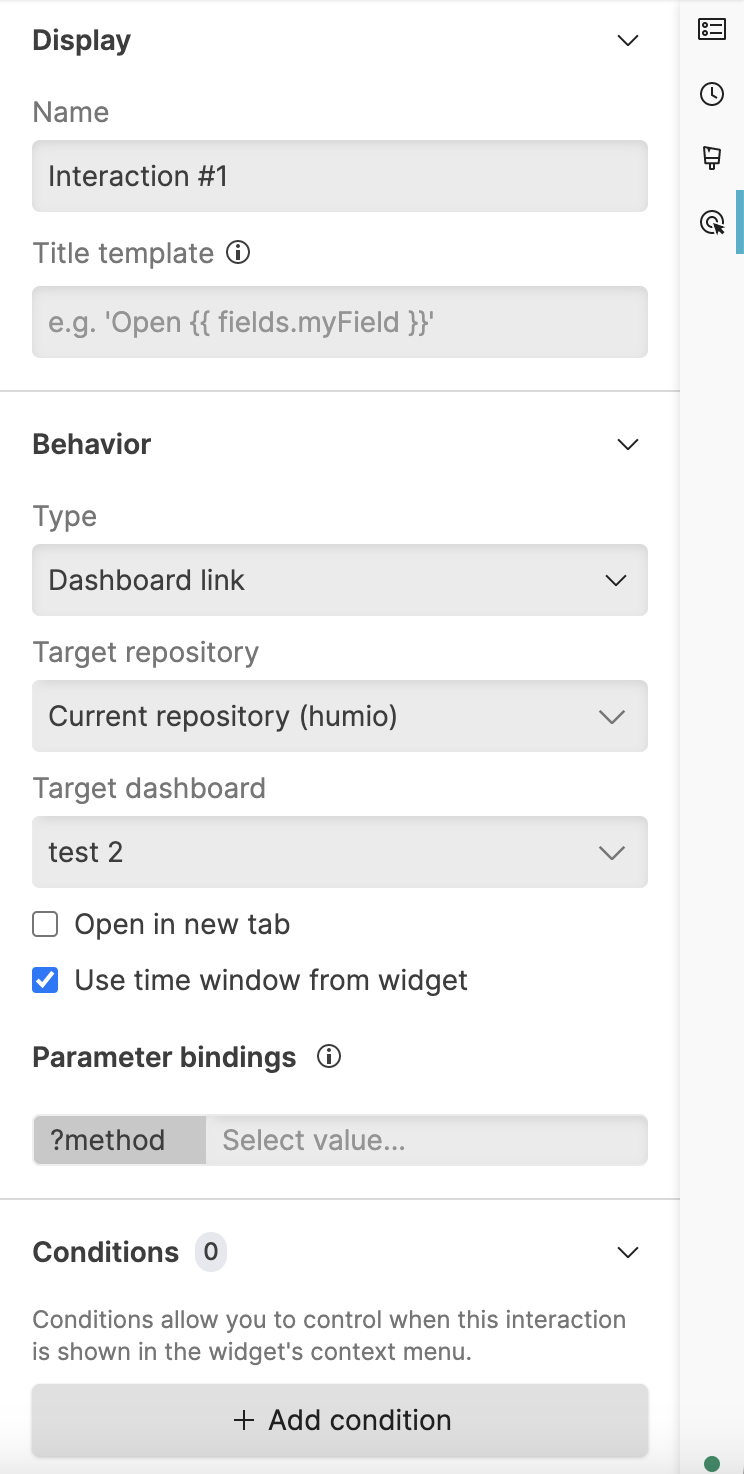
Figure 112. Create new interaction
Enter the Name — the name assigned to the interaction, by default
Interaction
            #1
, which you can change for example,Lookup IP.Enter the Title template — A template for the text that appears in the interaction menus. Values for fields are entered using a required language syntax, the Template Language. For example, to use the aid field from FDR data, the syntax would be
{{ fields.aid }}.If you want to provide a more precise label for the interaction, you can add it here: for example, for an element or row where the field IPAddress is set to
172.17.0.30, the title of the interaction in the Event List when clicking on that element or row would be Lookup 172.17.0.30, see Figure 114, “Event List Interaction”.If left empty, Name will be used to label the interaction.
Specify the Scope — the repository or view where you want the new interaction to be added.
Specify the Behavior — the destination you want your widget to interact with, between:
— lookup for an item in a related dashboard.
You can open the destination dashboard to a new tab, and either use the time from the current dashboard or the time from the destination dashboard. See Make your Dashboard Interactive for more information on how to configure this type of interaction.
— lookup for an item in an external location by linking your widget to the destination URL. See Make your Dashboard Interactive for more information on how to configure this type of interaction.
— allows navigation to the page by running a query detected from the dashboard. See Make your Dashboard Interactive for more information on how to configure this type of interaction.
Set the Parameter bindings (only visible if is selected) — use fields from within events and bind them to the parameters in the destination target. The value can be static text and/or variables such as parameters and fields, for example,
{{
            fields.myField }}
— see Template Variable Types.You can choose whether to bind the parameter to some defined values or keep it unbound (to retain the default behavior of the target destination when the interaction is triggered). To keep it unbound, leave the input field empty.
Other parameter options are:
Empty list alias.
In case of Multi-value Parameters, you can also specifically bind the parameter to an empty list of values by selecting the
empty listalias in the input field — it is available as an option along with the other input values. This option acts as a parameter binding with no values selected for that parameter, and will serve as an argument to the parameter itself.Unused parameters bindings.
When creating or editing interactions you may need to change the target query, resulting in some parameter bindings no longer mapping to any parameters in the current query. The interaction panel shows such unused parameter bindings, and gives you the option to remove them via the UI.
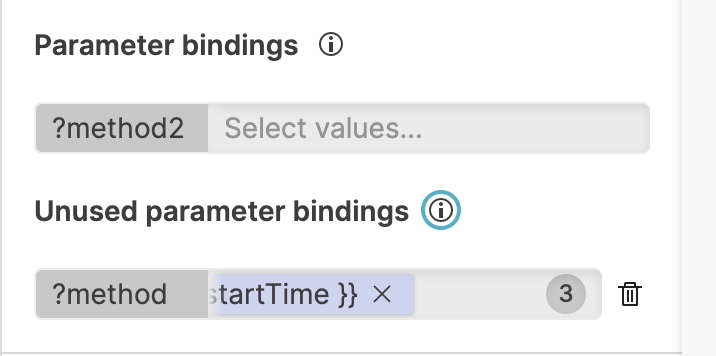
Figure 113. Unused Parameter Bindings
Use the Template Language to populate values based on the widget you are interacting with.
Under Conditions, click to set when you want the interaction to be shown, given some specified conditions. This allows to show the interaction only when a given field in the Event list is equal to a specified value, for example #event_simpleName field equal to
NetworkConnectIP4value.Note
Field names and values with spaces (for example, field: Alert Name, value: Network Scans Count) must be put without quotes in the Conditions field.
With quotes around them (for example, "Alert Name") the condition does not work, and the contextual menu disappears.
Click the icon next to each event in the Event List to see the interaction in the contextual menu (under and menu options). See Show in Context.
In the following example, the interaction looks for a specific IP found in the event.
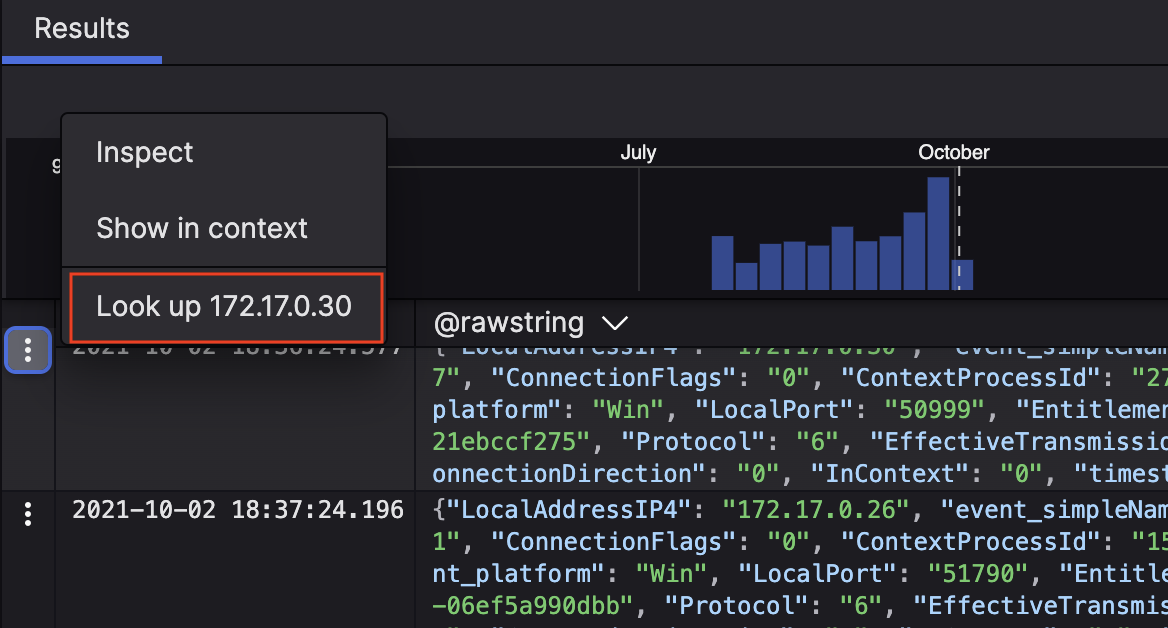 |
Figure 114. Event List Interaction
Deleting and Duplicating Event List Interactions
It is possible to delete or duplicate an existing interaction.
From the
Interactions
overview page, click the
icon next to a
specific interaction and select the relevant option to either delete
or duplicate it.
Clicking opens the Create new interaction dialog box where you can make appropriate changes.
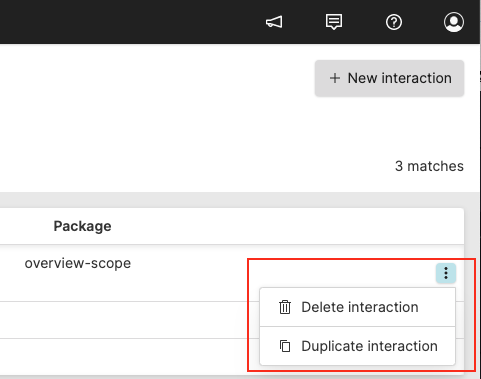 |
Figure 115. Interaction Context Menu