Grant permissions to specific assets to groups

Security Requirements and Controls
  1. Click on the profile menu icon and select Organization SettingsGroups.

  2. Click the name of the group to view or edit from the list.

  3. Click the Asset permissions tab. The list shows all available assets for the repositories and views the group can access. Use the filter buttons to narrow the list of assets.
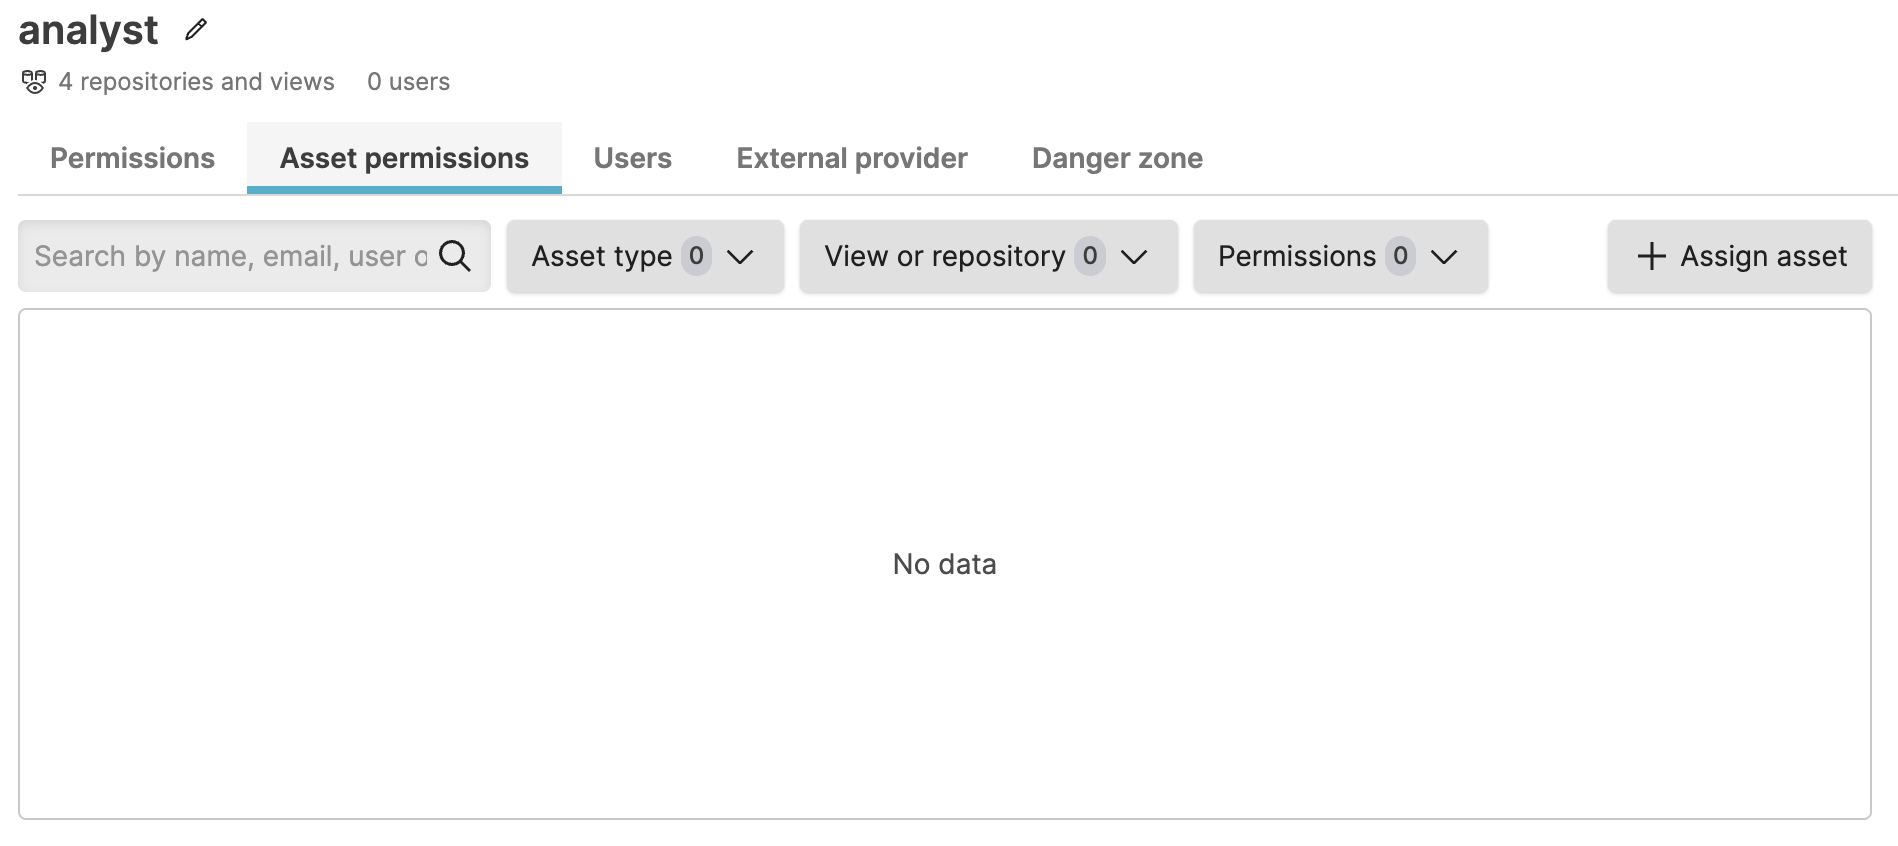
    Screenshot of the LogScale Asset permissions interface showing a filterable list of all assets to which a selected group has access. The screen displays the Asset permissions tab with asset names, their types, associated repositories or views, and the specific permissions granted to the group for each asset. Filter buttons at the top allow administrators to narrow the displayed assets by various criteria, while a prominent '+Assign asset' button provides the entry point for granting additional permissions.

    Figure 77. Asset permissions list for group


  4. Click +Assign asset.

  5. Select the asset to give the group access to and click Next. Use the filter buttons to limit the list of assets.
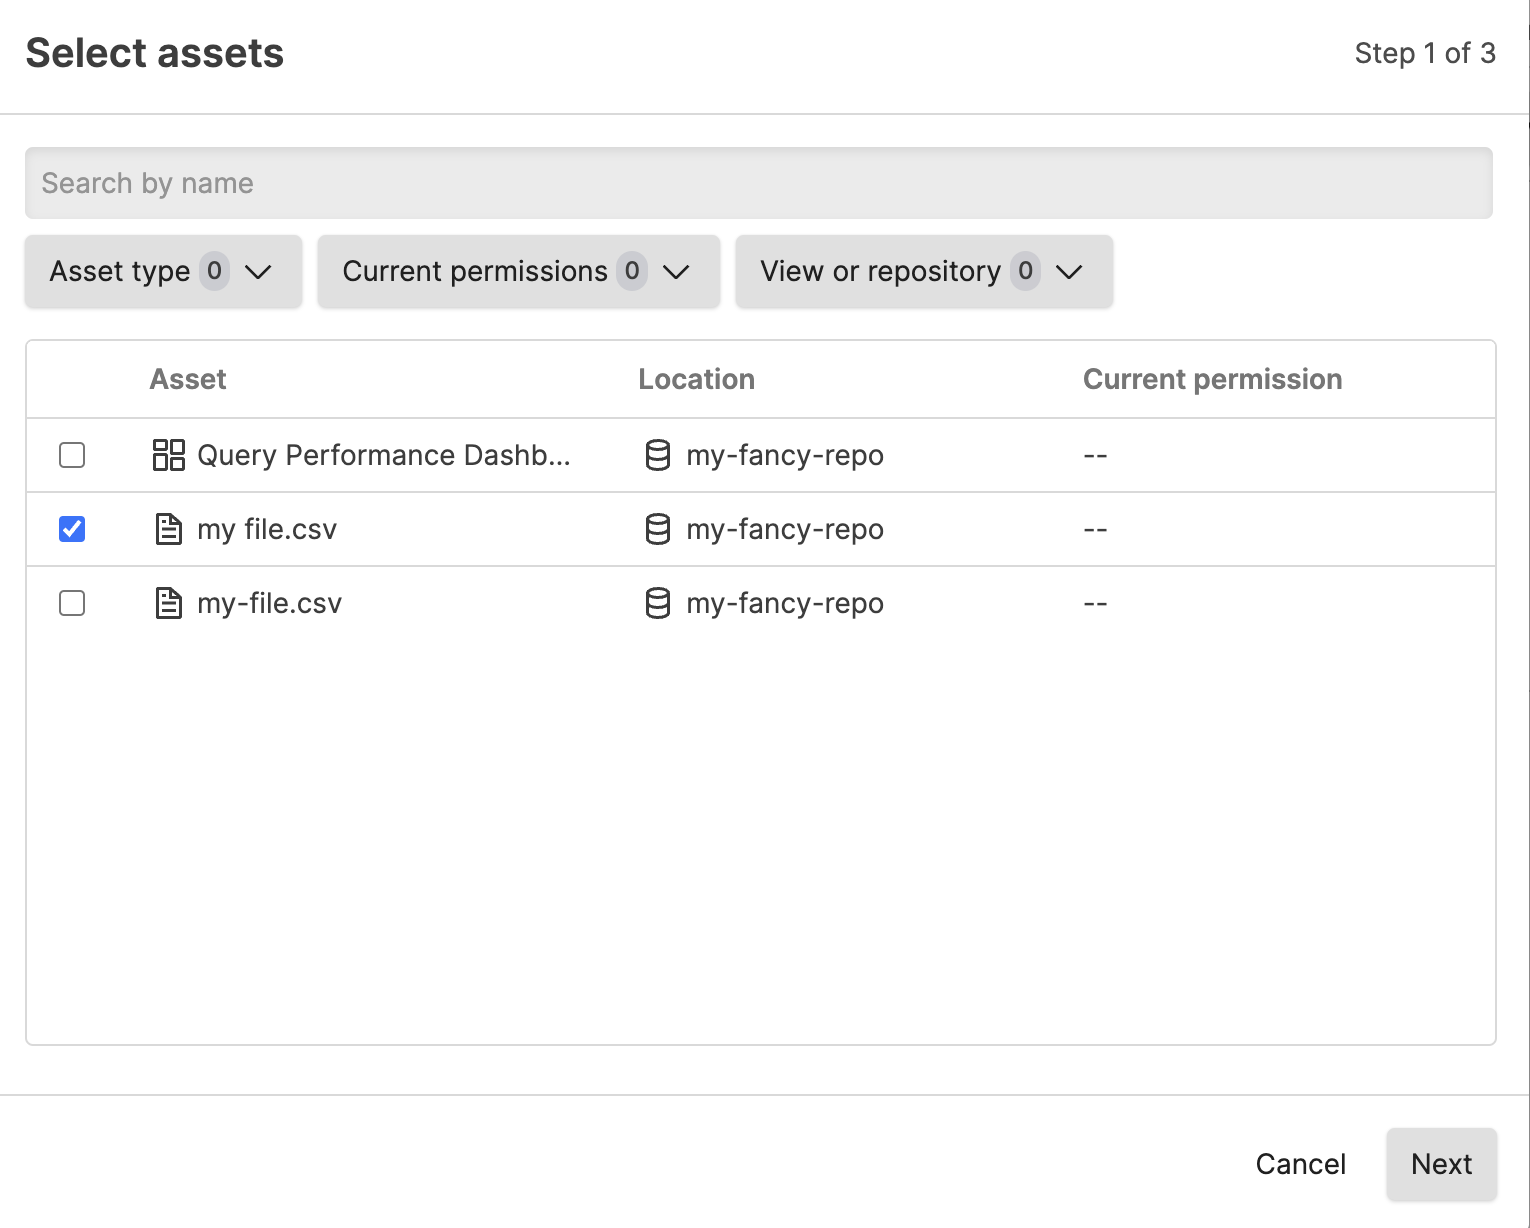
    Screenshot of the 'Select asset to assign' dialog showing a filterable list of available assets that can be assigned to a group. The interface includes filter buttons at the top to narrow down assets by type or location, a scrollable list of assets organized by repository or view in the main area, and a 'Next' button at the bottom to proceed with the permission assignment workflow. This dialog appears after clicking '+Assign asset' in the Asset permissions tab and allows administrators to precisely select which specific asset will receive custom permission settings for the entire group.

    Figure 78. Select asset to assign


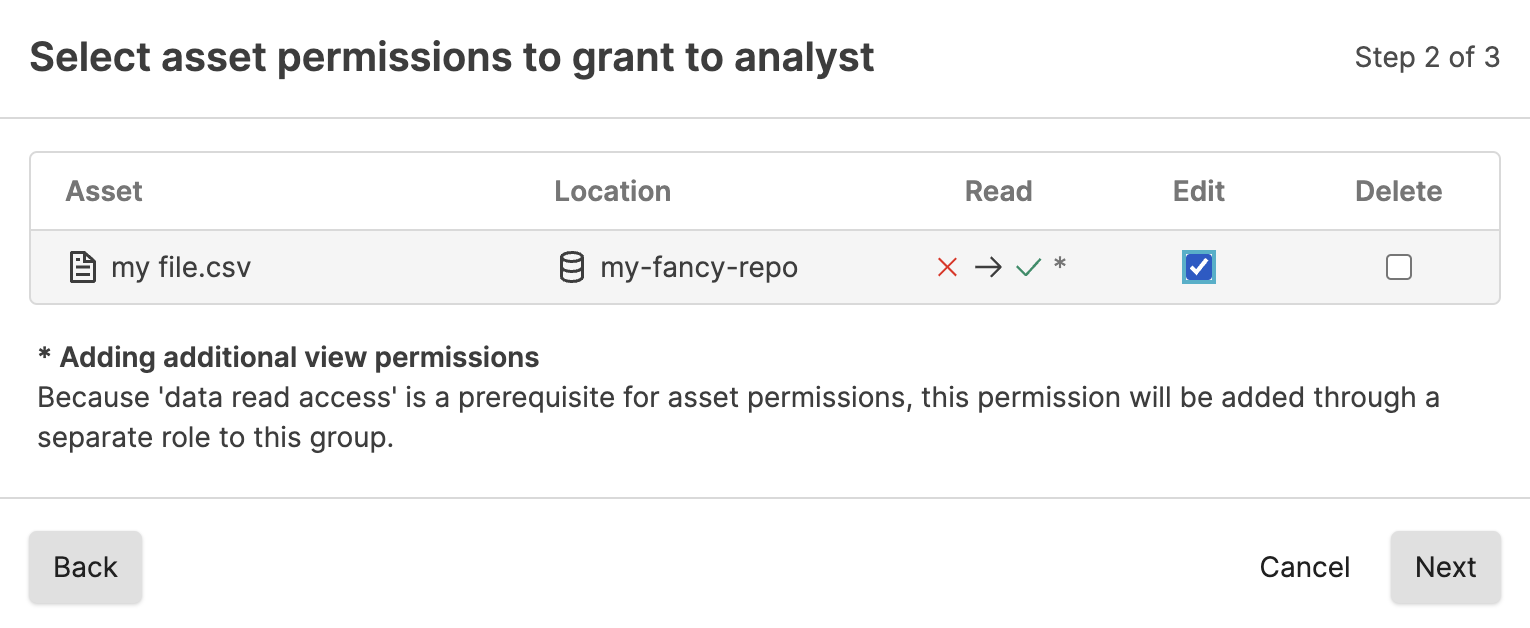
    If the asset is in a repository to which the group does not have read access, you see a dialog when setting the additional asset permissions that the group will be granted read permissions automatically to ALL assets in the view.

    If the group already has read access to the view where the asset is located, you will not see this dialog.
    Screenshot of a warning dialog that appears during the asset permission assignment process when the selected asset belongs to a repository or view to which the group does not currently have read access. The dialog alerts administrators that proceeding will automatically grant the group read access to ALL assets in that view, not just the selected asset. This critical notification requires administrator acknowledgment and understanding of the broader permission implications before specific asset permissions can be assigned.

    Figure 79. Select asset to assign when group has no read access to view


    When granting permission to an asset in a repository or view the group does not have permissions to, you are required to acknowledge that by granting permission, the group is automatically given read access.

  6. Select the permission(s) to assign to the group for this asset. Click Next and then Confirm.

    If assigning permissions to an asset in a view for which the group does not have read access, you must check the box that you understand that the group will be granted read permission to the view before you can click Confirm.

Direct asset permission assignments are automatically removed from a group if that group loses all access to the view.