
Manage Roles
Security Requirements and Controls
Manage userspermission
All roles available and the permissions granted via the roles are displayed in the User Interface in the page.
Depending on the permission level selected, you can assign different permissions for any new role you create. For example, you can create an Organization management role type and name it, say, "Operations", which grants permissions such as the capability to view all internal notifications, or to manage other users.
LogScale comes with a predefined set of roles: Reader, Admin, Member and Deleter. All of these roles (except Reader) may be customized to your specific needs. For more information about the default roles, see Default Role Permissions. Keep in mind that it is generally a good idea to grant as few permissions as possible and to add more as needed.
See the full list of available permissions along with descriptions of their usage at Repository and View Permissions.
To get a list of roles with your own application, use the GraphQL API, in particular the roles() query. For information on a specific role, use the role() query. It will give you a list of roles, which permissions granted with the role and which users have been assigned the role.
Note
You need to be an Organization owner on Cloud or a
root user on self-hosted installations to have access to the
page and assign roles to users. Or you
need to have the Change user access permission.
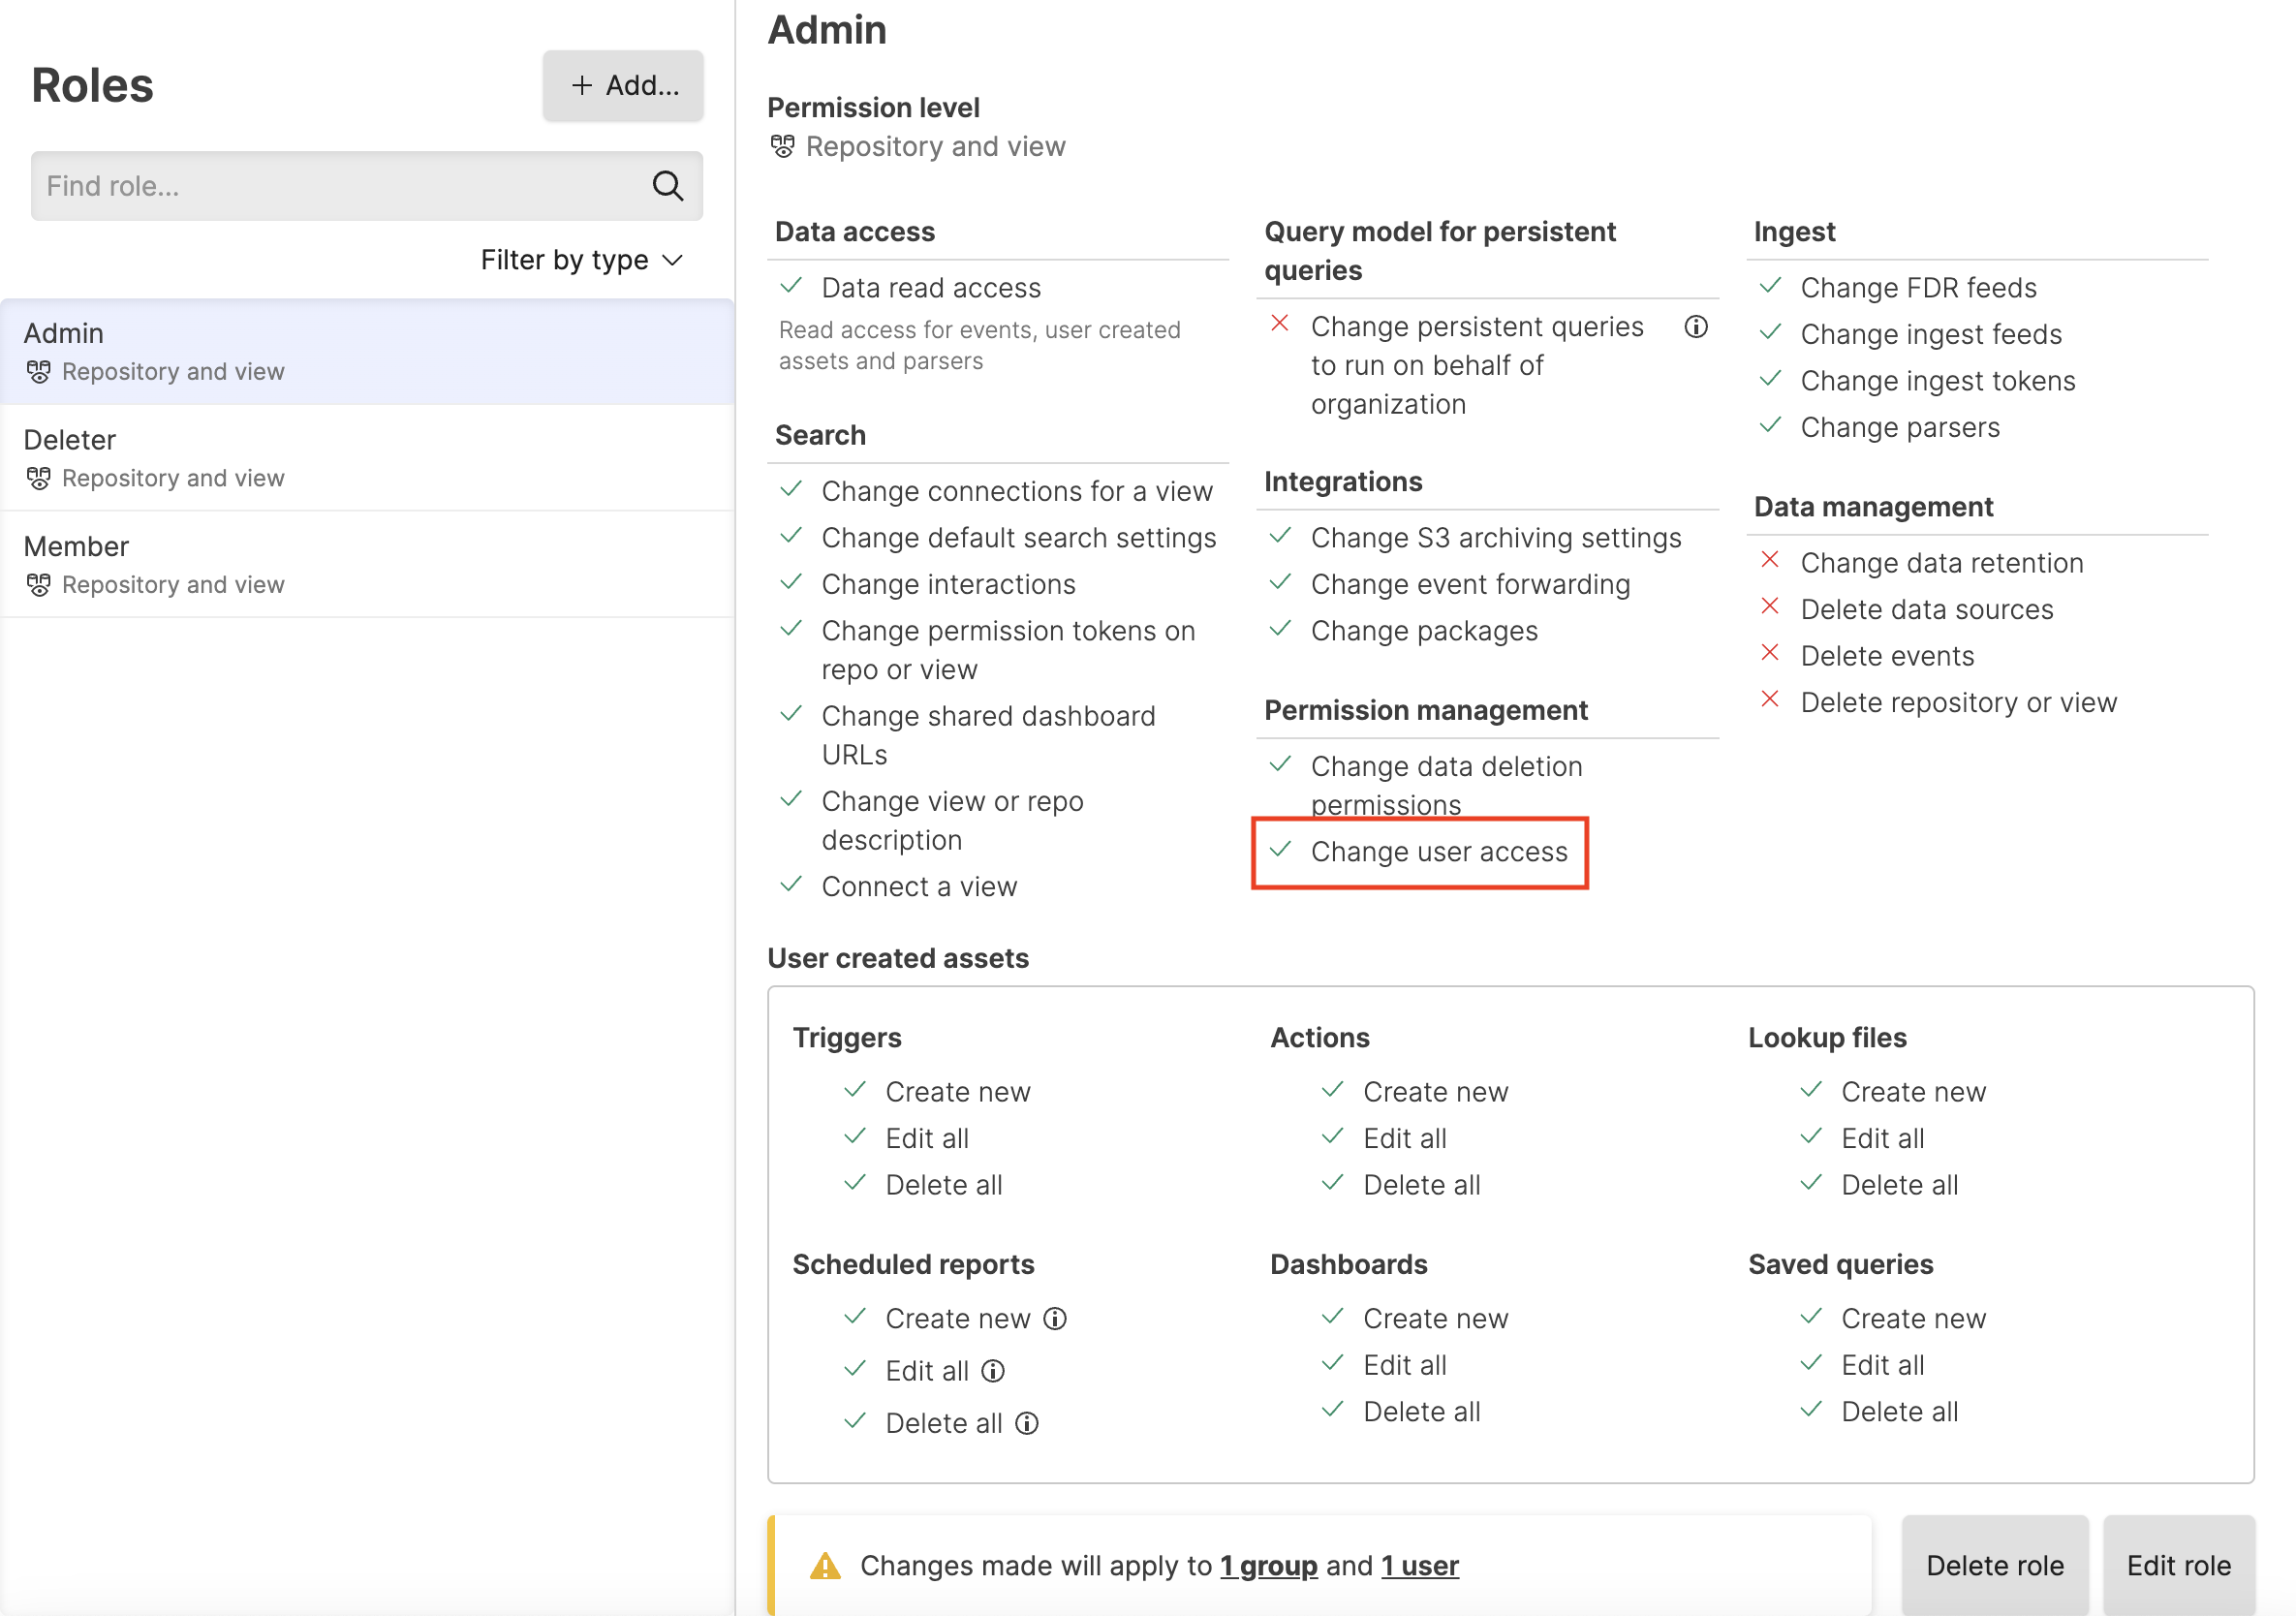 |
Figure 48. Change User Access
Add a role
To add new roles or customize existing roles, do the following steps:
Click on the user menu icon and select → .
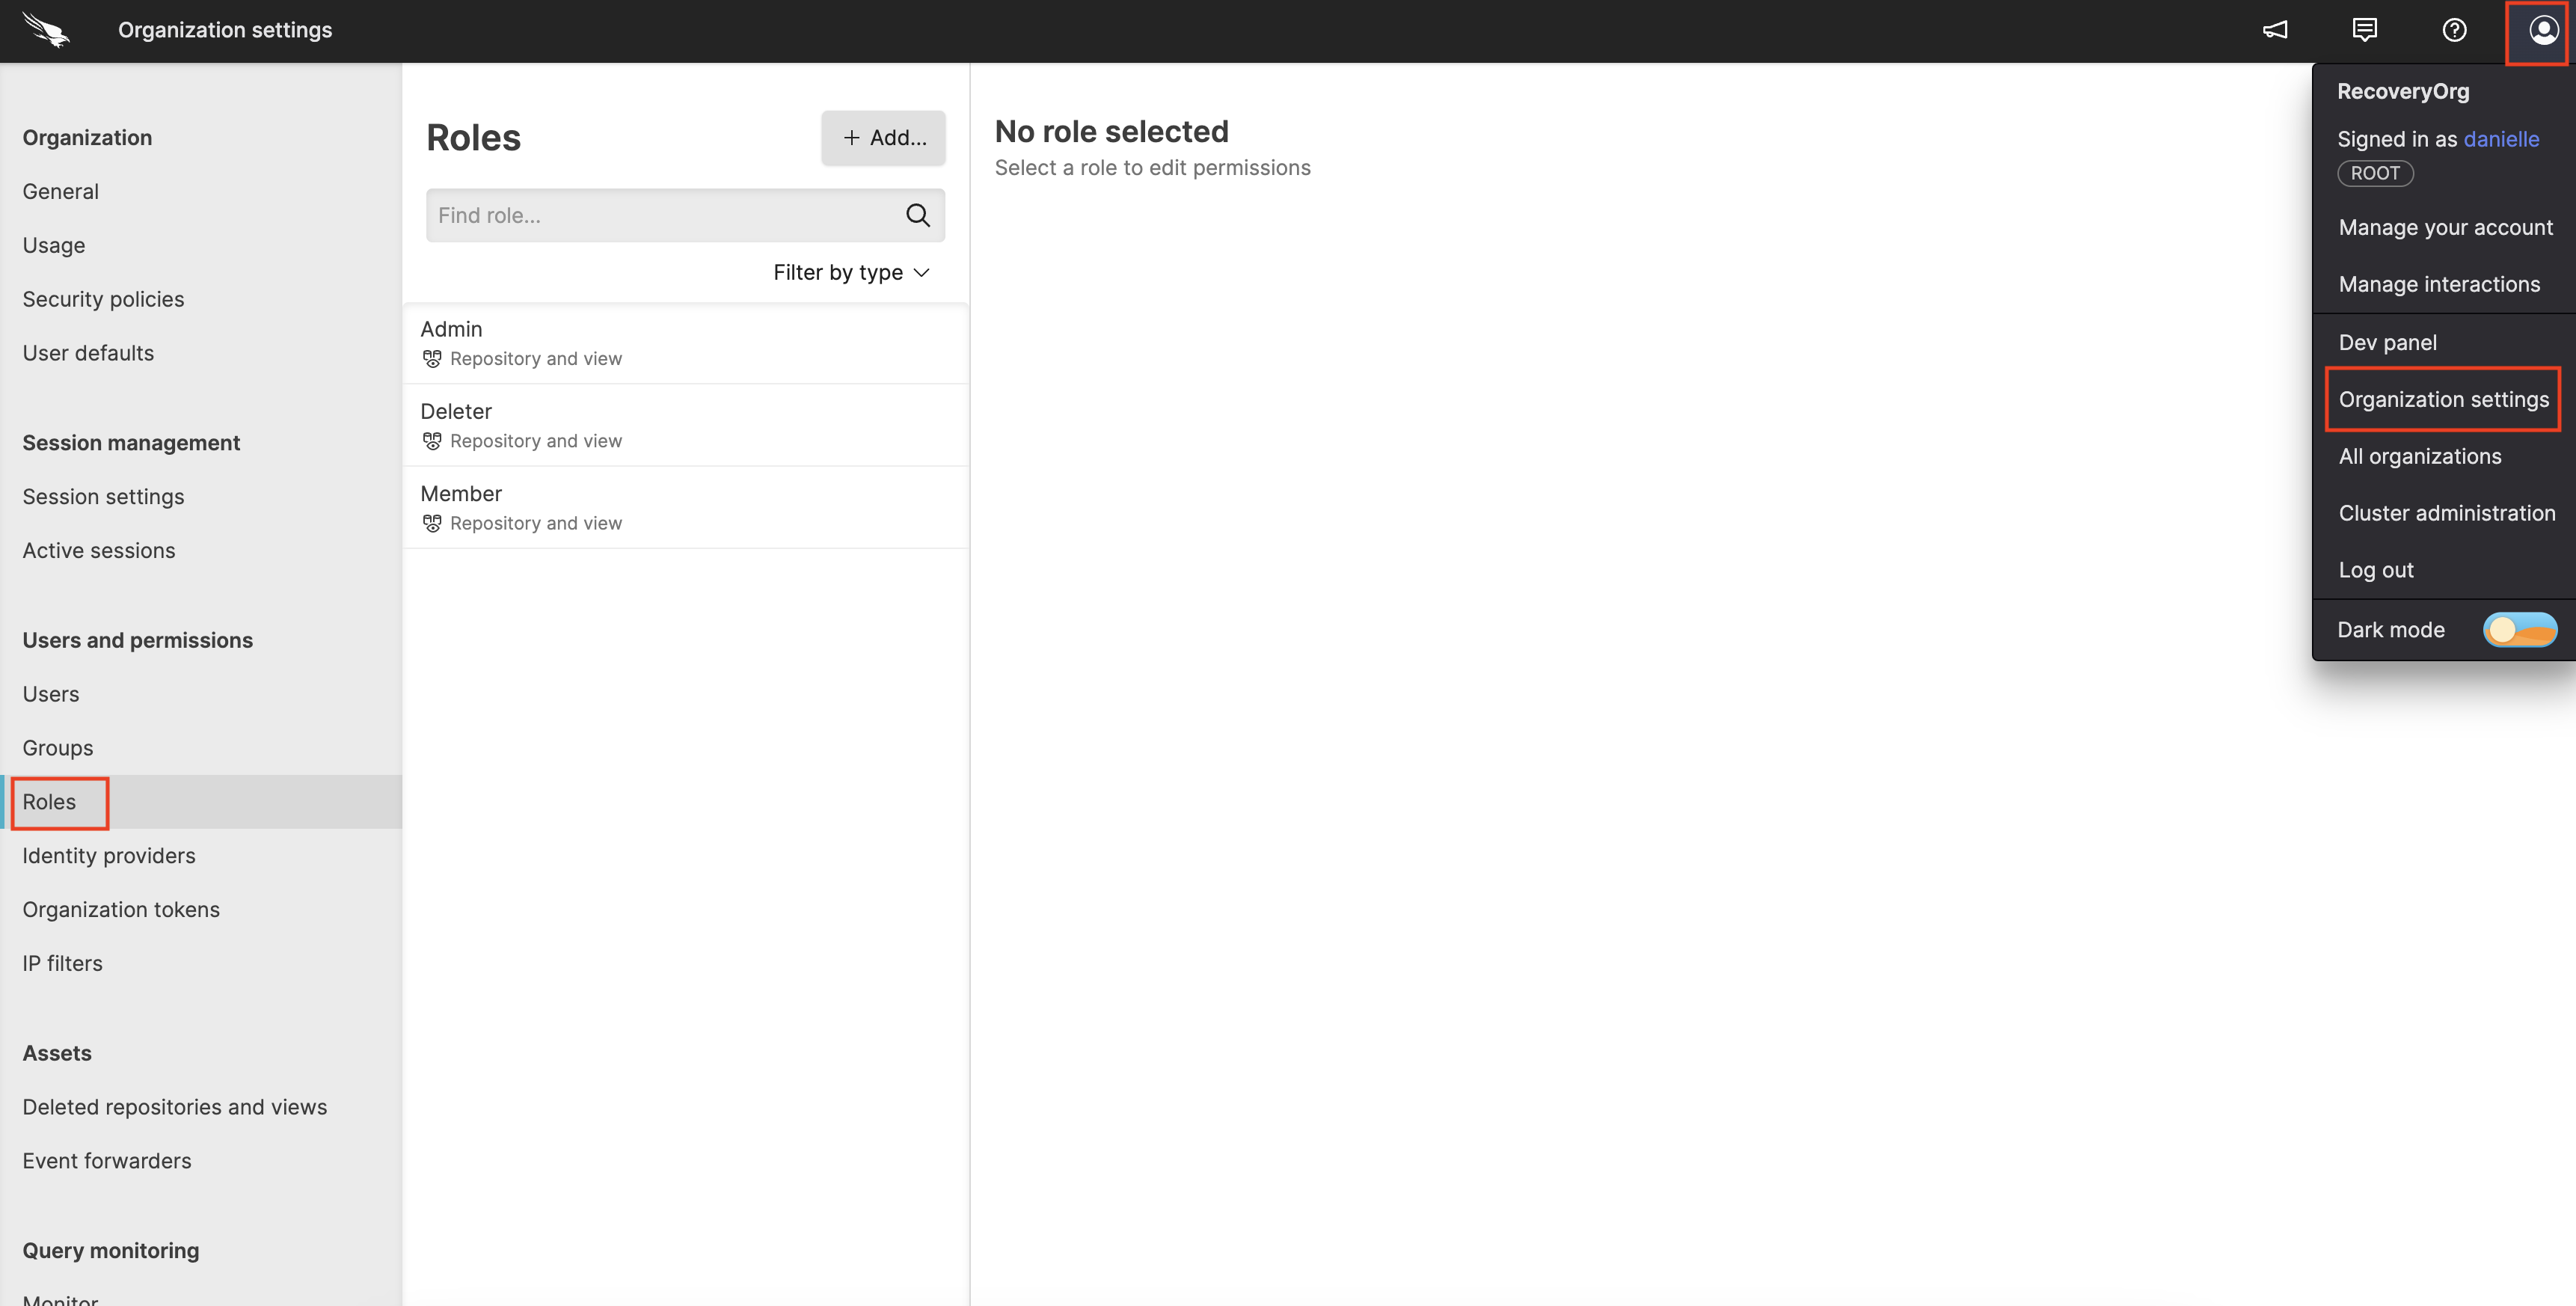
Figure 49. Roles
Click to create a new role; enter a name for the new role such as "Operations", and select a Permission level for the role, for example, .
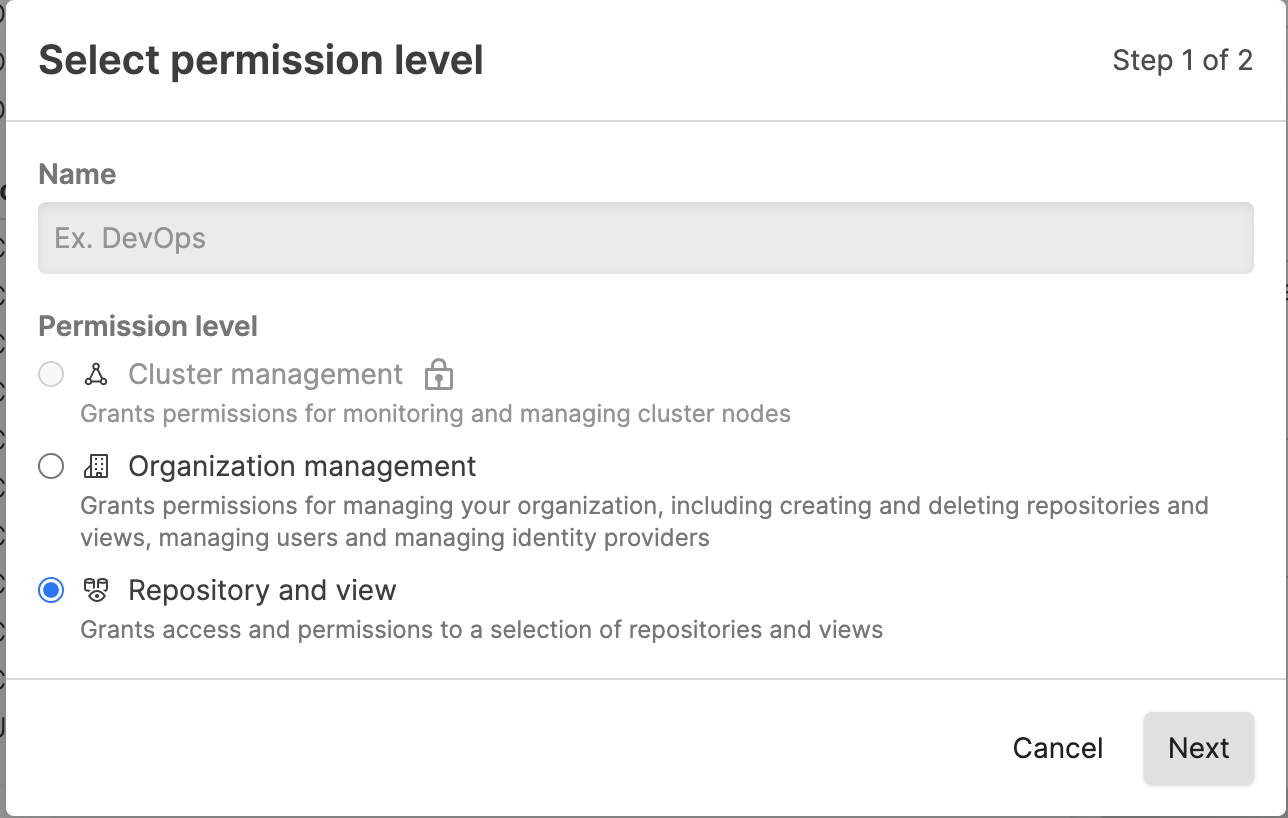
Figure 50. Add Roles
Set the permissions for the role. For example, if you wish to create a strictly read-only role, select the Data read access checkbox and nothing else, then click :
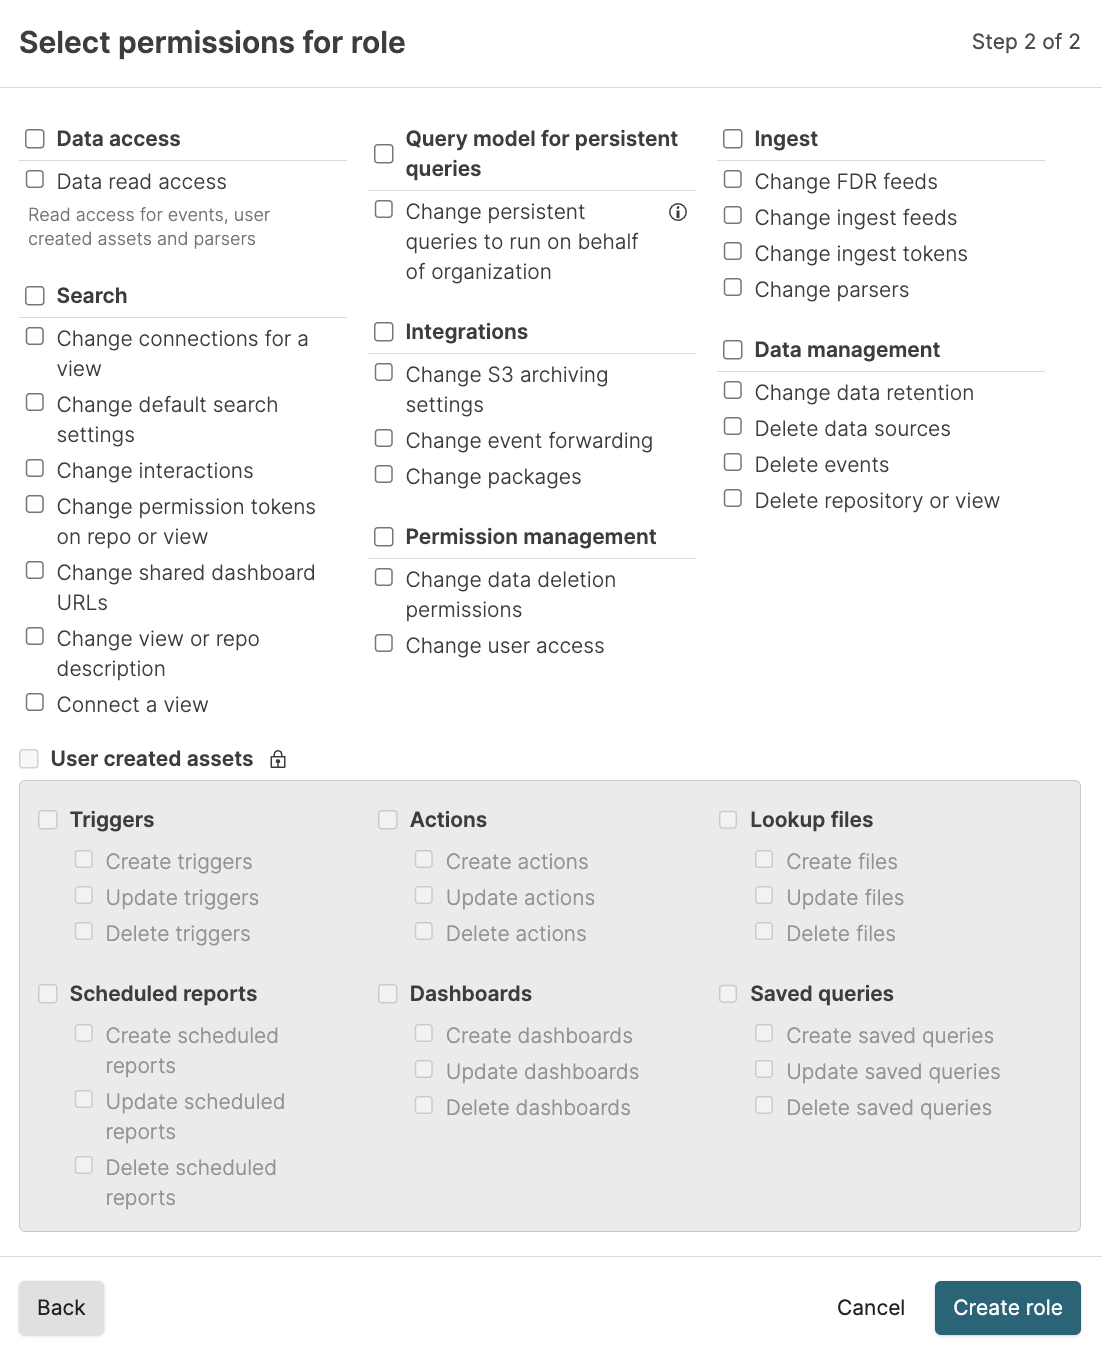
Figure 51. Assign Permissions to Roles
User asset permissions allow users with this role to create, edit, and delete the asset types selected. Asset permissions can only be added to a role if the role has
Data Read
          Access
; otherwise they are not available.The new role can now be assigned to groups via the page of the User Interface, where you are prompted to configure the permission levels for a group. For more information, see Figure 38, “New Group Created”.
Change role permissions
You may change an existing role and its permissions, as well as delete the role. To make these changes, do the following:
Select the role you want to change and click as shown in this screenshot.
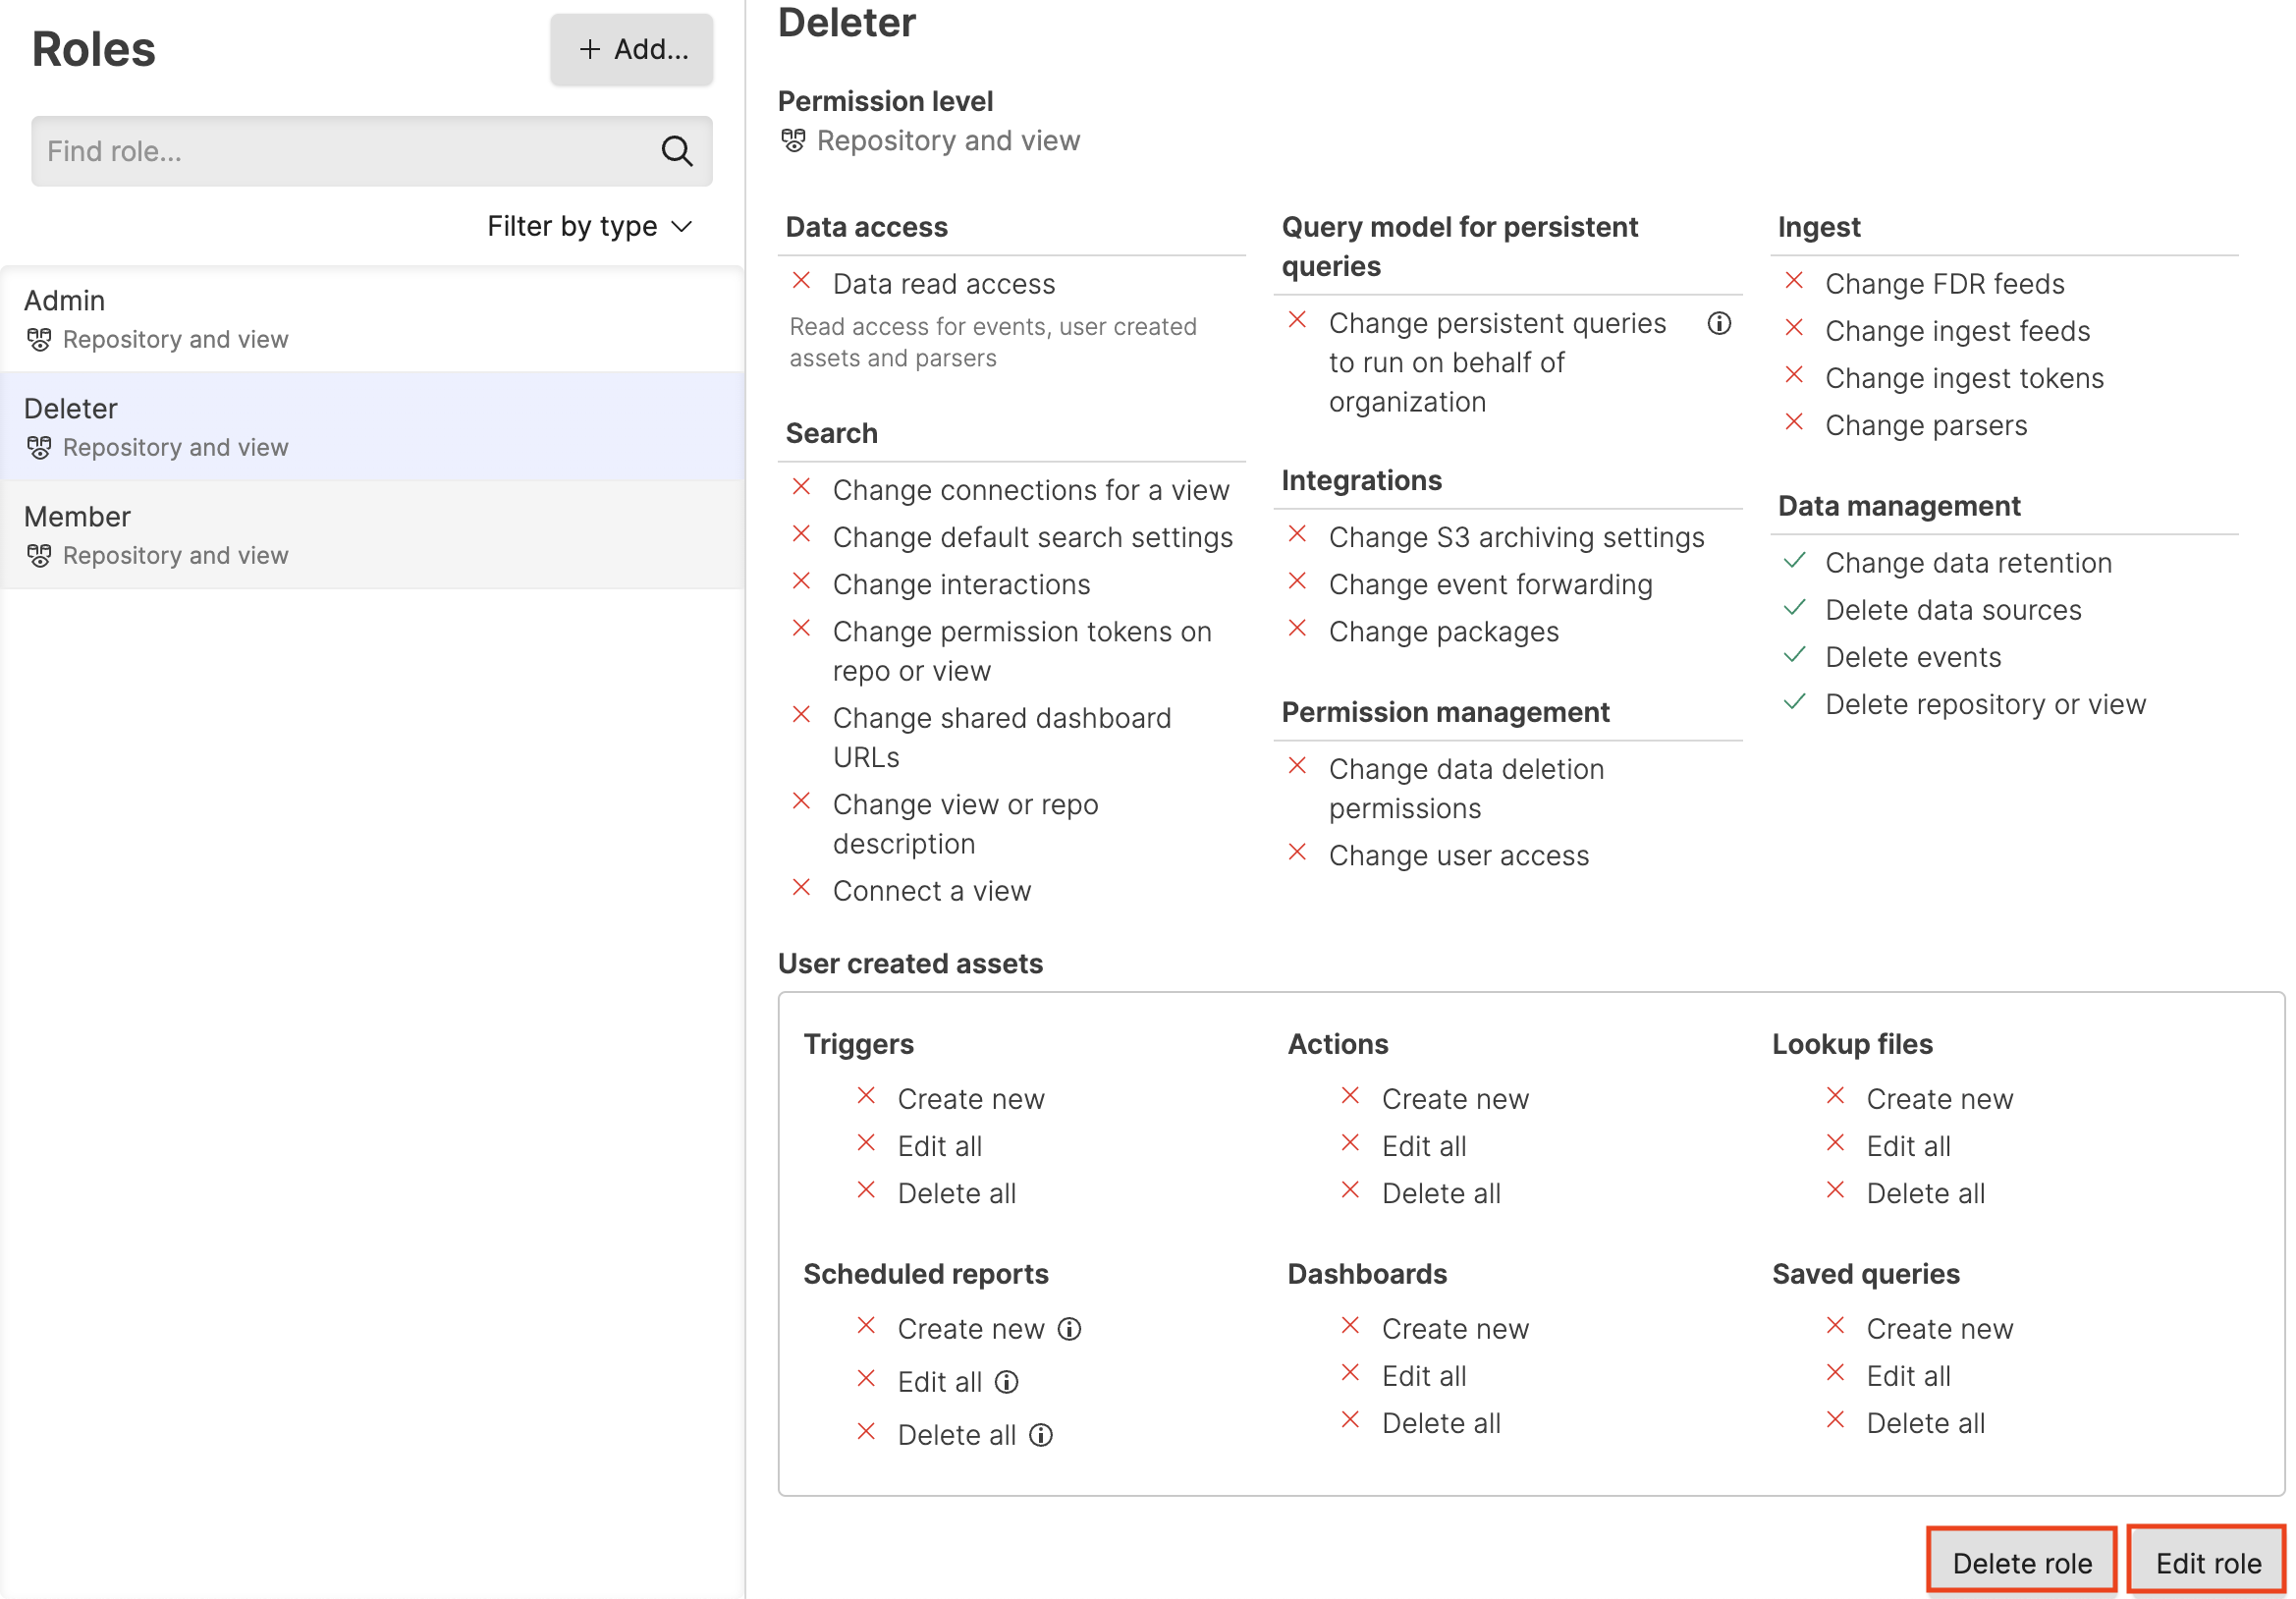
Figure 52. Customize or Remove Roles
Next, a dialog box will appear showing all of the permissions available for the role with a check mark next to the ones given. Check the permissions you want to add; uncheck the ones you want to revoke for the role. When finished, click .
To delete a role, instead of clicking the button, click .
To edit a role using the GraphQL API, use the updateRole() mutation. To delete a role, use removeRole(). You'll need the unique identifier for the role, though for both mutations. To get that before make changes or deleting a role, use the roles() query.
Aggregate permissions
Security Requirements and Controls
Manage userspermission
When you have defined more than one role under a Repository and View, Organization, or Cluster, you can get a combined view of the available permissions for all roles — all permissions in a specific repository, for example. This gives you an overview if you want to know exactly which permissions you have.
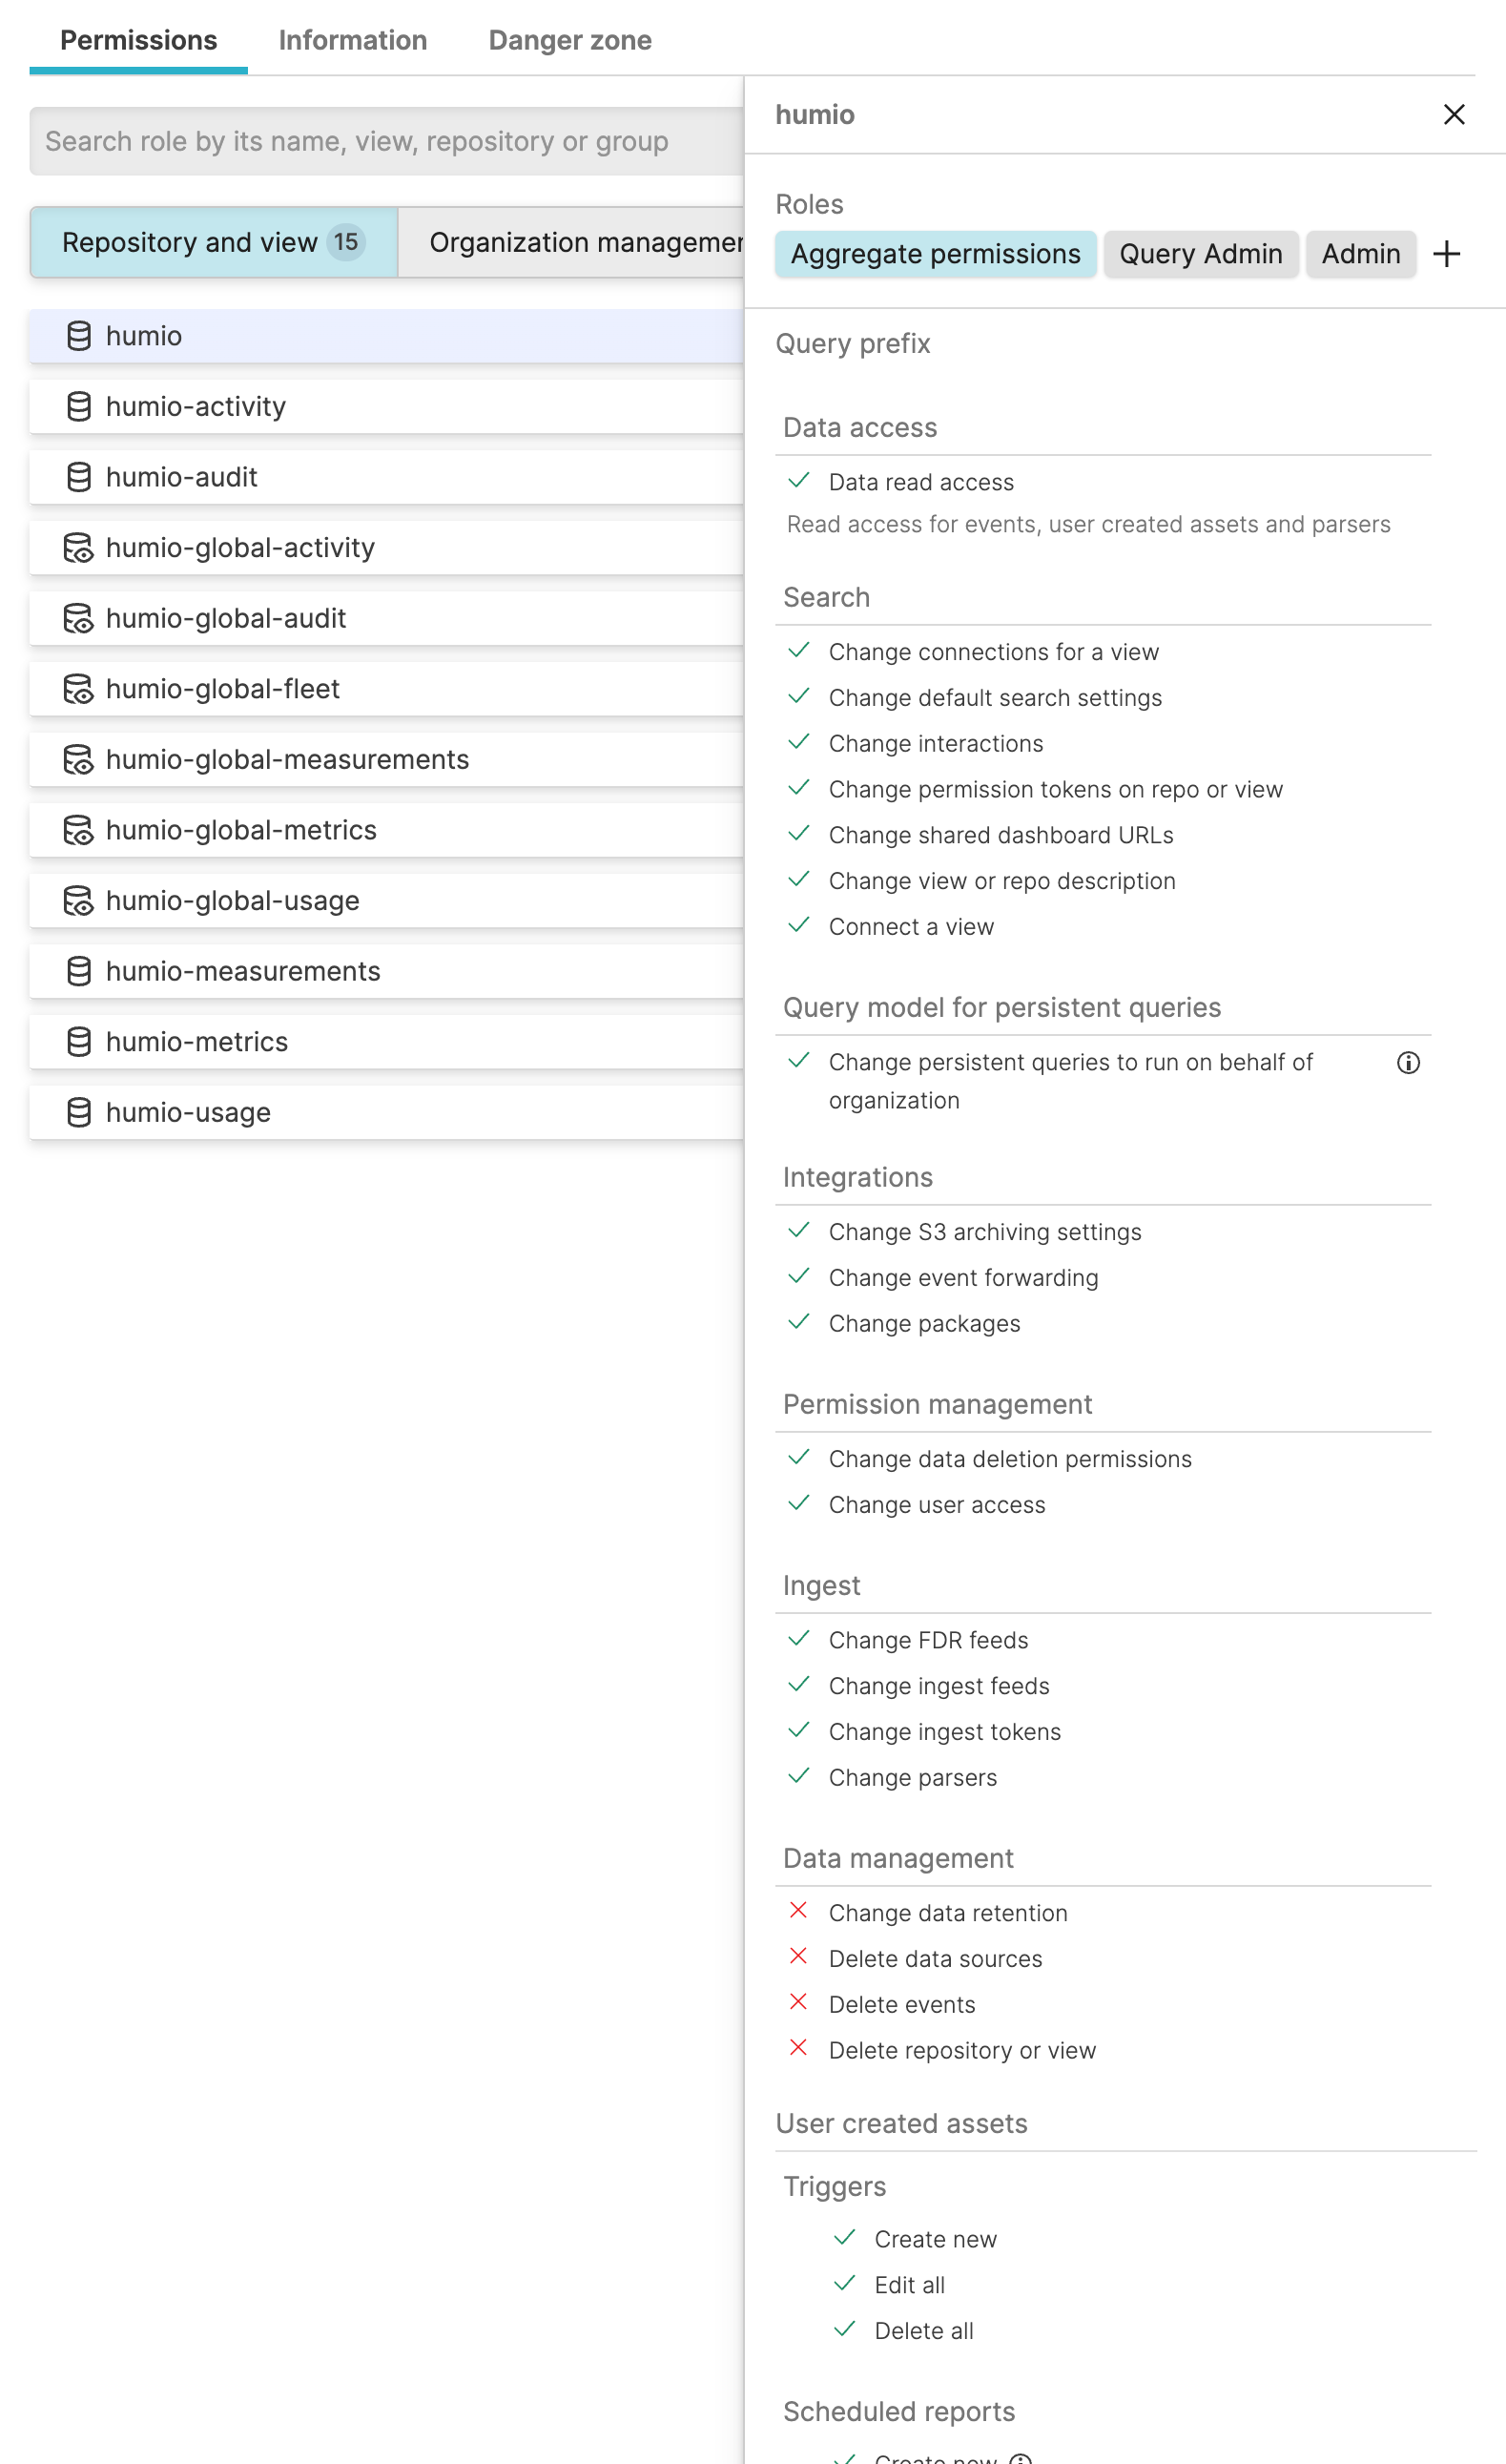
You can always select a single role instead to see only the permissions for that role.
Note
When evaluating aggregate permissions and the query prefix set for
roles, all assignments are evaluated, and their prefixes are put
together in an OR statement, for example,
prefix_A OR prefix_B OR prefix_C. The
roles with an empty prefix are considered as having the prefix *
(wildcard).
If a role assignment does not grant read access to the view, then the query prefix is ignored when computing the combined prefix because this means that role assignment doesn't grant access to query in the view at all.