Add and Remove Fields
To optimize the data visualized you can select which of the result fields should be displayed or hidden.
Fields can be added/removed from both the Fields panel and the Tool panel under . From the Tool panel you can add formatting to the Event list (field properties, size, etc.).
Fields Panel
To add a new field:
Run a query as explained in Writing New Queries.
In the Fields panel, click the or signs next to each field (see Figure 77, “Fields Panel”):
adds the field to the currently displayed result.
removes the field from the currently displayed result.
Note
By default, LogScale displays fields coming from 200 events at most. You can display more data by clicking .
From the Fields panel, you can also click on a field name and get quick access to filtering options:
⊜ — Match value in query
— Exclude value in query
Tool and Format Panels
From the Tool panel you can access the following functionality:
Fit-to-query icon
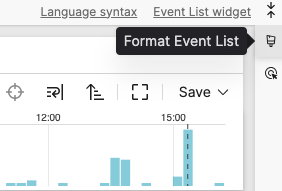
Style icon that opens the Format panel
Interaction icon that gives access to Event List Interactions
To add and format a new field:
Run a query as explained in Writing New Queries.
From the Tool panel, click the style icon to access the formatting options.

Figure 81. Expanding the Format Event List Panel
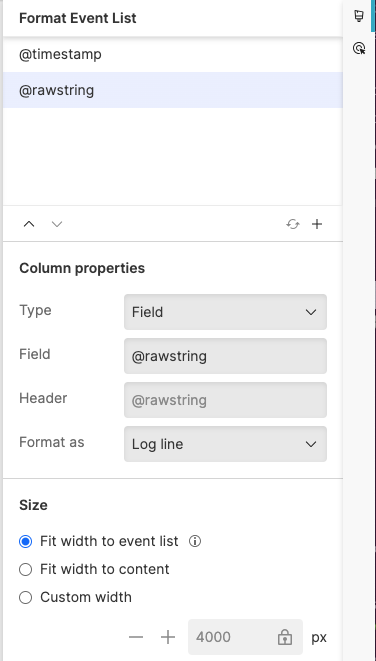
The Format panel stands as a separate area on the side and shows only the fields added as columns in the Event list.

Figure 82. Format Panel
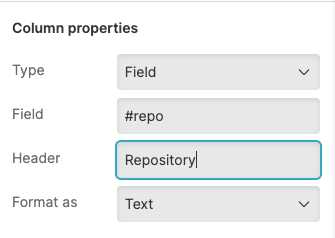
Click to add a new column in the Event list and format the field accordingly.
Clicking removes the field from the currently displayed result. See Column Properties.

Figure 83. Adding a New Field from the Format Event List Panel
Reset to default results
Click the 🔄 icon in the Fields panel to reset and remove any fields recently added and display the default results only.