
Manage Groups
Security Requirements and Controls
Manage userspermission
Assigning permissions to individual users in larger organizations can be a cumbersome task. LogScale allows you to create groups and either manage user memberships directly in LogScale or by synchronizing with an external system.
Either way, you need to create groups in LogScale first.
Then you need your group to have users and permissions assigned to it. Any
user who is assigned the Change user access permission can assign permissions to groups for a
repository.
Note
You need to be a root user or have the
Manage Users on self-hosted
installations to create groups and assign them users and permissions.
Note
If you intend to administer access to repositories and views centrally by
an organization owner or root only, be sure not to grant the
Change user access
permission to anyone. In practice, this means removing the permission from
all roles thus not allowing any users to go to a repository or view and
add another user or group directly.
Create New Groups
Security Requirements and Controls
Manage userspermission
Click to create a new group.
Enter a group name, such as "Operations", and select the permission levels to apply to the new group. (See all types described at Permission levels.) Then click :
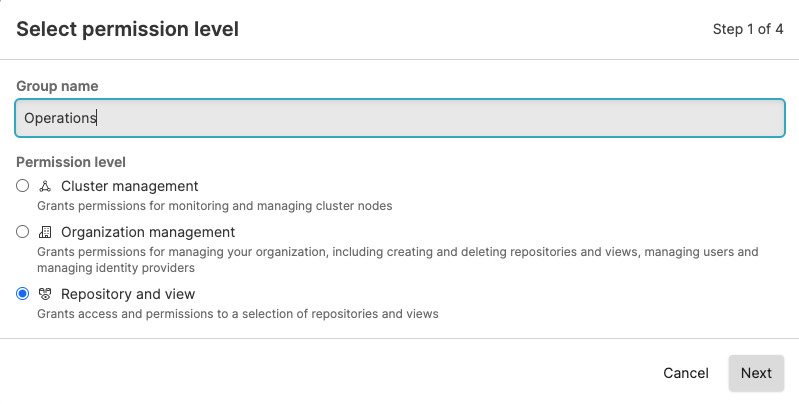
Figure 39. Create Groups
For the Repository and view level, choose whether the group should apply a role to a selection of repositories and views or to all current and future repositories and views. Select the preferred repositories or views and click .
Select a role for the new group, for example, Admin, then click . You now have an empty group with no users assigned but the Admin role is given to all the selected repositories or views:
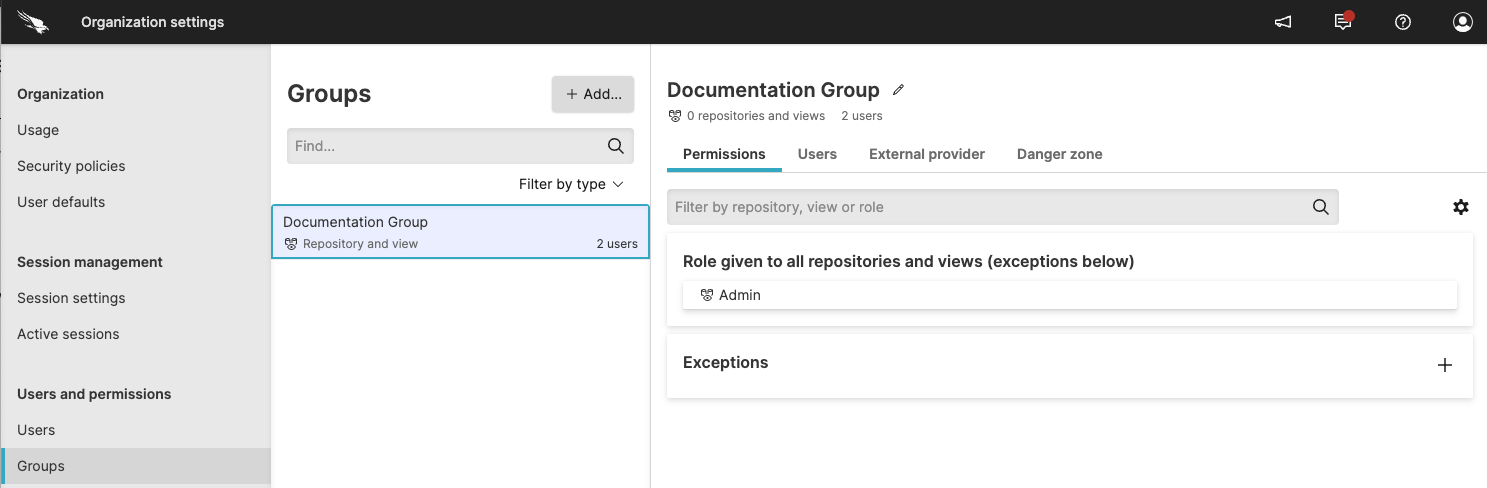
Figure 40. New Group Created
Afterwards, the added users are in the list.
If you have a few repositories that need to be treated differently, click Exceptions to apply different permissions to selected repositories.
To get add a group through your own application, use the addGroup() mutation of the GraphQL API.
Note
Only users who have accepted the email invitation and completed the first log-in process can be added to a group.
Add Users to Groups
You can assign users to a group from the user interface. Below are the steps to do this:
Click on the user menu icon and select . Under the heading, click .
Next, select a group to which you want to add users. In the group panel, click the Users tab.
On the right will be a button labeled, . Click it and then a box will appear with a list of users, like the one in the screenshot below:
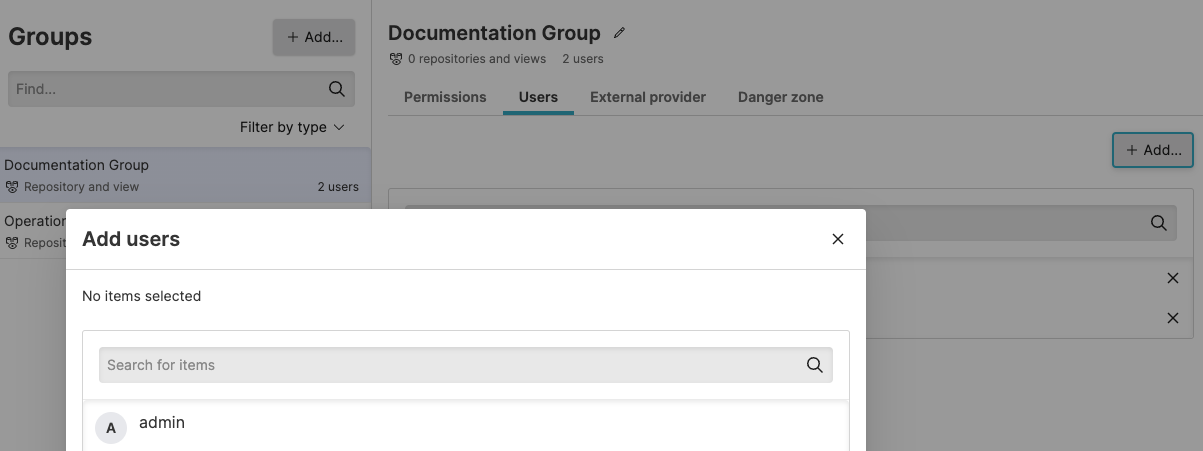
Figure 45. Assign Users to Groups
Select the user you want to add to the group. You may add more than one. Ones that are already added will remain in the group.
When you're finished, click . The users you selected will then be added and shown under the Users tab for the group.
To add a user with your own program or from the command-line, see the addUsersToGroup() page in the GraphQL API documentation.
Grant permissions to specific assets to groups
Security Requirements and Controls
Manage userspermission
Click the name of the group to view or edit from the list.
Click the Asset permissions tab. The list shows all available assets for the repositories and views the group can access. Use the filter buttons to narrow the list of assets.
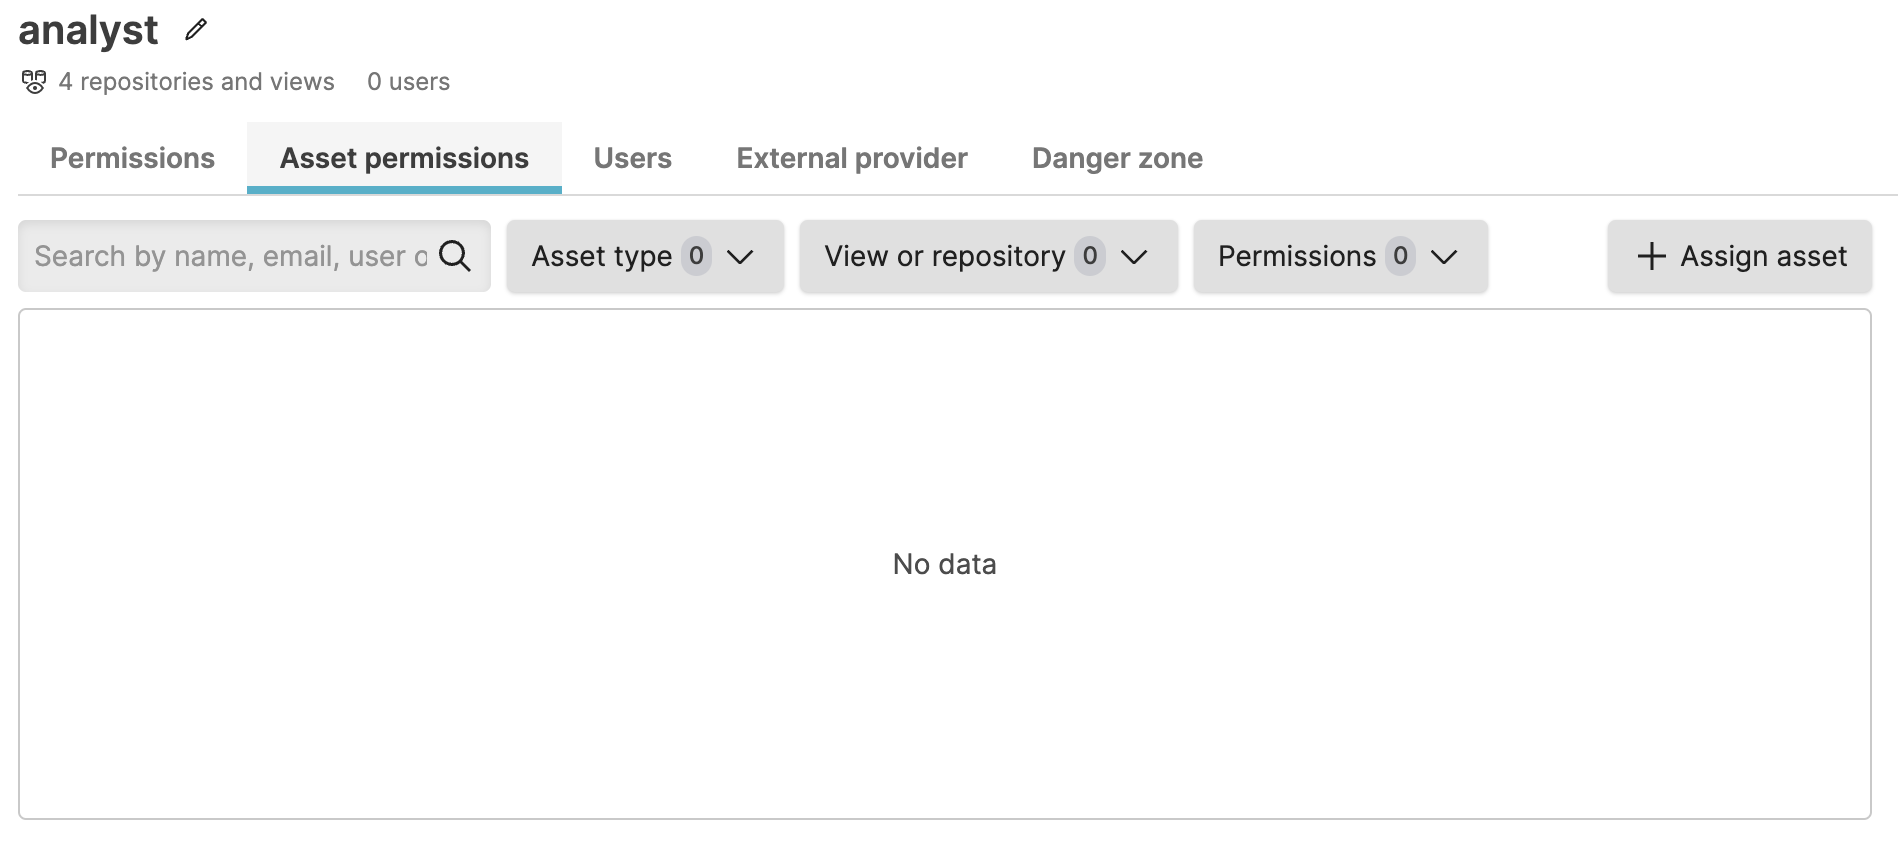
Figure 46. Asset permissions list for group
Click .
Select the asset to give the group access to and click . Use the filter buttons to limit the list of assets.
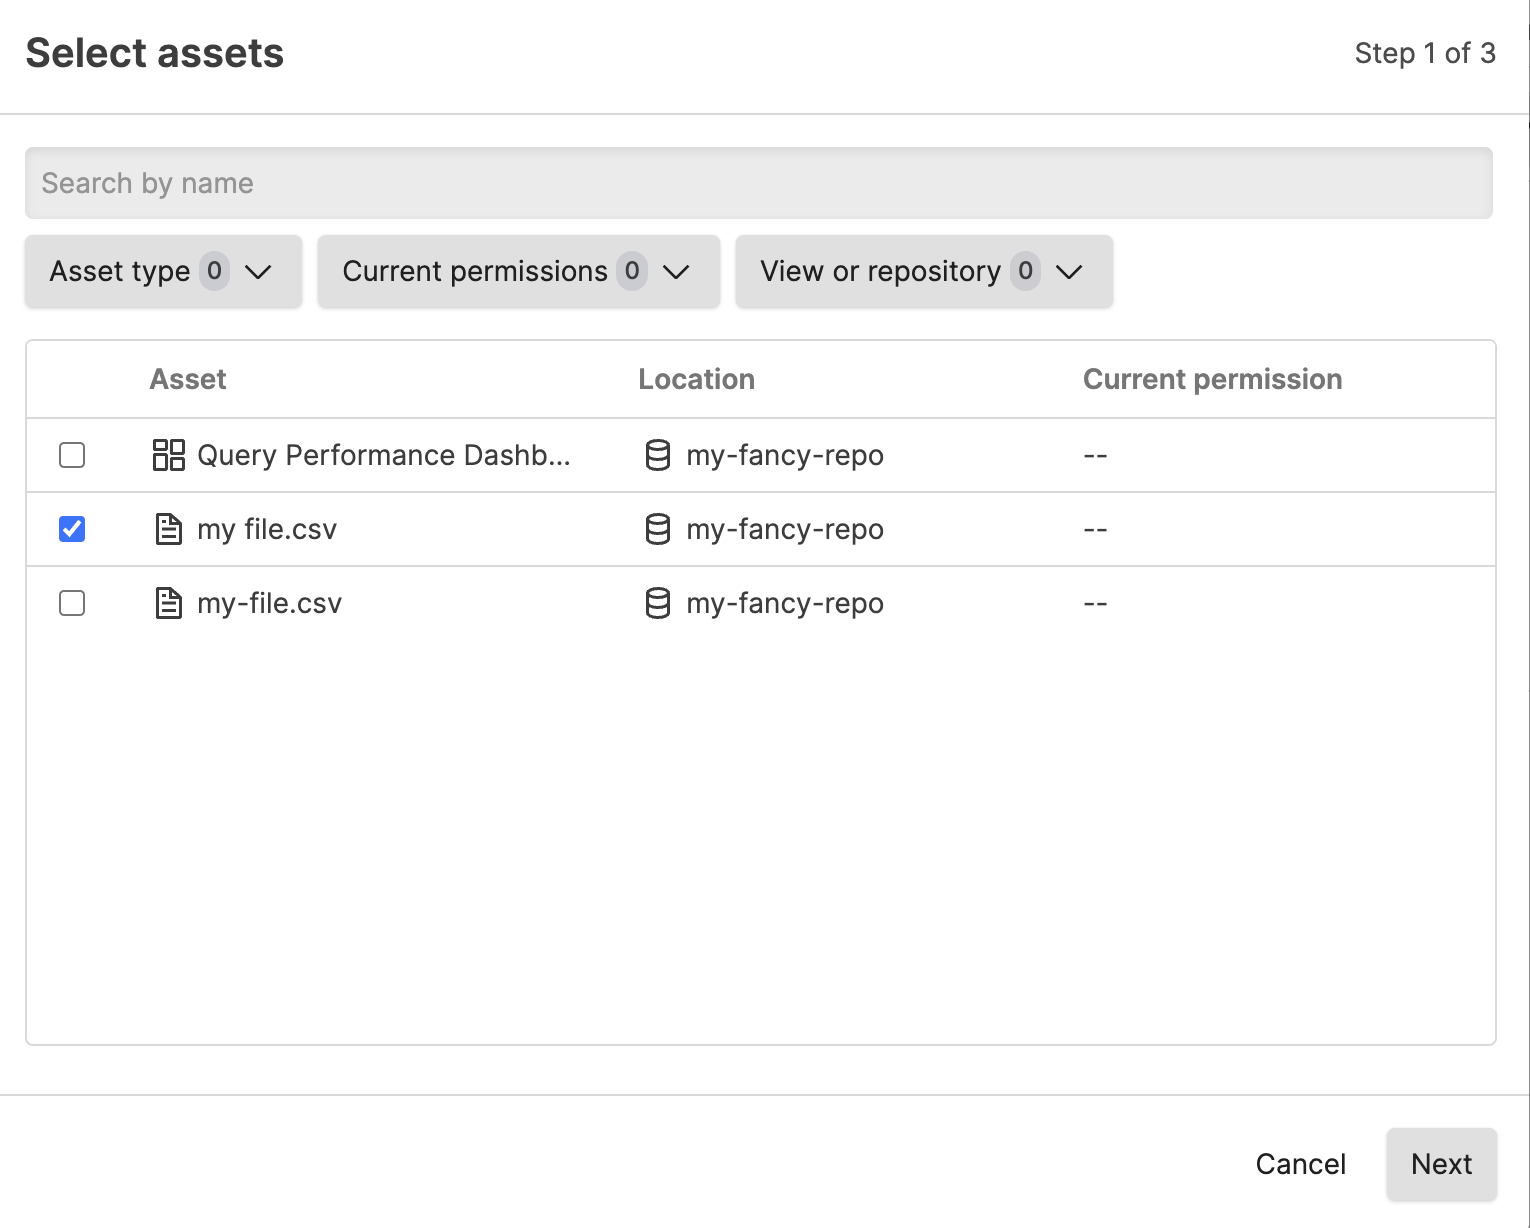
Figure 47. Select asset to assign
If the asset is in a repository to which the group does not have read access, you see a dialog when setting the additional asset permissions that the group will be granted read permissions automatically to ALL assets in the view.
If the group already has read access to the view where the asset is located, you will not see this dialog.

Figure 48. Select asset to assign when group has no read access to view
When granting permission to an asset in a repository or view the group does not have permissions to, you are required to acknowledge that by granting permission, the group is automatically given read access.
Select the permission(s) to assign to the group for this asset. Click and then .
If assigning permissions to an asset in a view for which the group does not have read access, you must check the box that you understand that the group will be granted read permission to the view before you can click .
Direct asset permission assignments are automatically removed from a group if that group loses all access to the view.