
Create Repository API Tokens
Security Requirements and Controls
Change permission tokens on repo or viewpermission
Repository API tokens have the following parameters that will be unique to each API token created:
The permissions granted apply only to the repository or view in which the API token is created. The same token cannot be used to access or manage other repositories.
The permissions chosen from the token provide granular access to the specific area of API functionality. For example, granting only the specific permission Change data retention only provides the ability to change the data retention; access to other management functions on the repository will fail.
Tokens can be modified if the
Update permissionssetting is enabled within the Repository token security policy.Repository tokens can be given an expiration time expressed as the number of minutes, hours or days from creation.
An IP filter can be configured to limit access to specific networks or hosts.
To create a new View API token:
Go to the repository list and select the repository that you want to create an API token for.
Click in the top menu.
Select Tokens under Access Control to go to the Repository tokens page.
Click .
Give the token a name.
If the security policy allows for setting a custom IP filter, you can select the named IP filter from the pop-up. For more information on IP filtering, see IP Filters and Repository and View API tokens security policy for more information.
If the security policy allows, you can set an expiration for the API token, based on the number of minutes, hours or days until the API token expires. If the security policy does not specify an expiration, you can optionally create an API token without an expiry time.
Click .
Select the permissions that you want to grant to the token. You can select as many permissions as required for the API token. Asset permissions can only be added to a token if
Data Read Accessis granted to the view; otherwise they are not available. For information on the permissions and what API endpoints they support, see Repository and View permissions.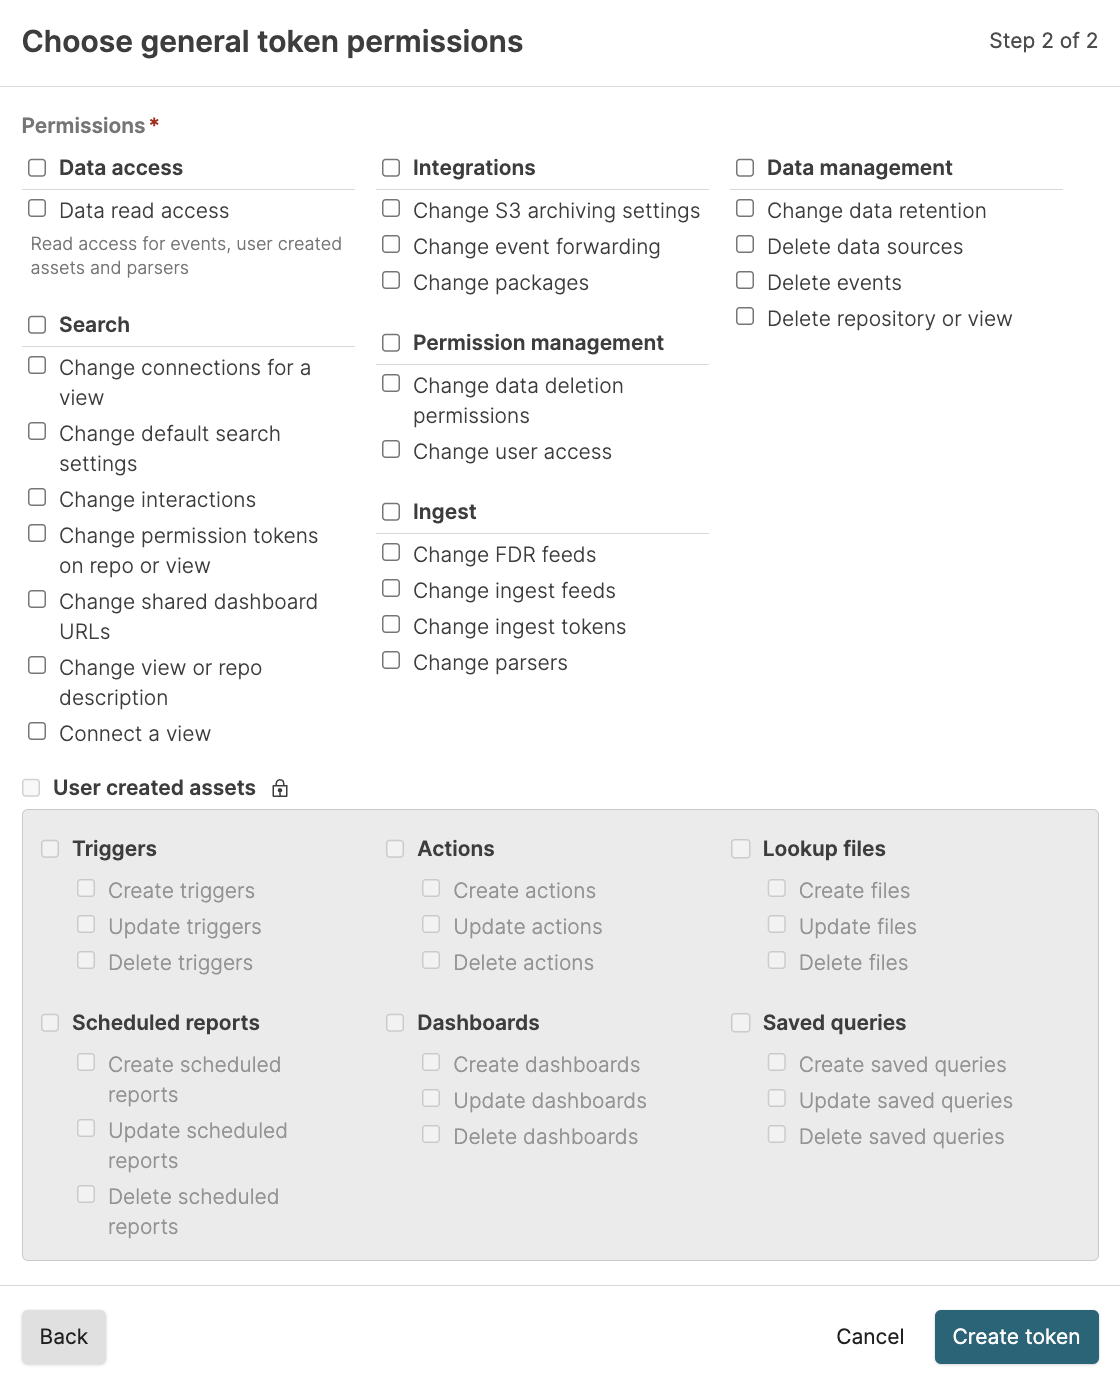
Figure 40. Create Repository Tokens
Note
Support for organization owned queries are implied for all view tokens.
Click to create the token. This shares the API token string and the ability to copy the string to your clipboard. This is the only time the API token string will be shared, so the token should be copied and stored in a safe place.

Figure 41. Repository Token String
Click OK.