
Assign Roles to Groups
Security Requirements and Controls
Manage userspermission
Any user who is assigned the Change user access permission (see
Figure 50, “Change User Access”)
can assign permissions to groups for a repository. Groups can also be
assigned permissions from the page by an
organization owner or root.
Note
If you intend to administer access to repositories and views centrally
by an organization owner or root only, be sure not to grant the
Change user access
permission to anyone. In practice, this means removing the permission
from all roles thus not allowing any users to go to a repository or view
and add another user or group directly.
Add or change roles
Security Requirements and Controls
Manage userspermission
You can add a role to a group or change the role assigned to a group — that is, its set of permissions — at your convenience.
Go to → and select your group from the list of available groups. You can search if the one you are looking for is not immediately visible in the list, or filter by type.
Click the Permissions tab of the selected group, click on a role and click .
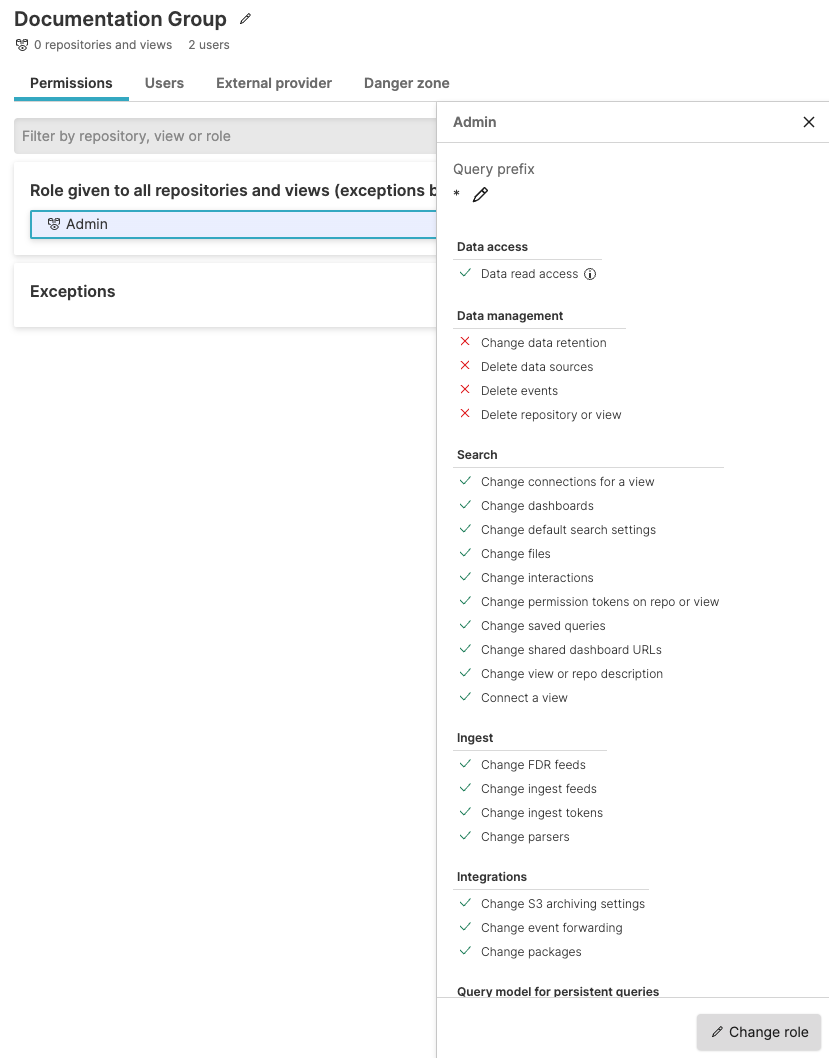
Figure 41. Change Permissions for Groups
You can select a different group role from the available roles (for example, Admin) to switch to a new role. Or you can click to create a new role with different permissions to apply to the group.
Click to update the role for the entire group.
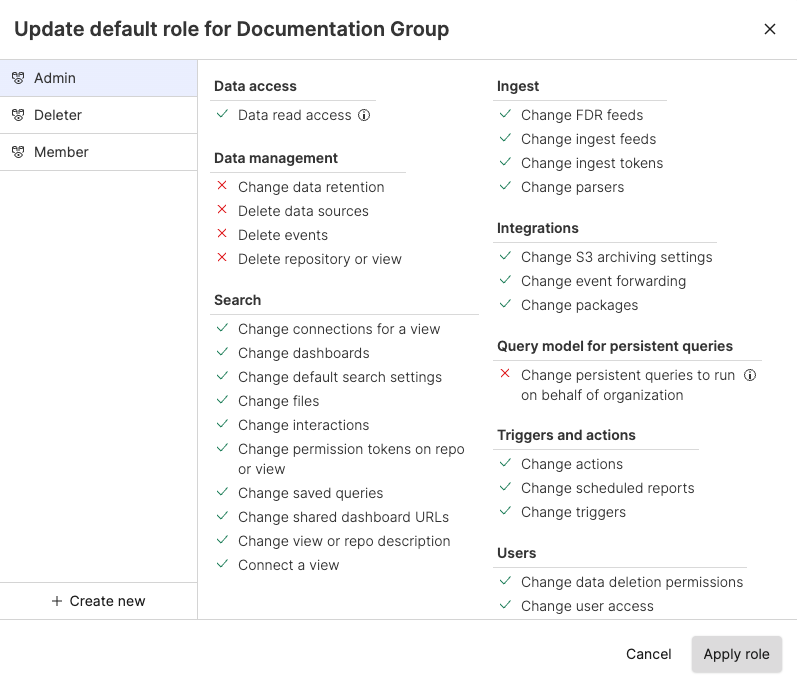
Figure 42. Apply Roles to Groups
If you have permissions, you can click the button to from the same role dialog in the Permissions tab if you need to remove a role from a group.
For information about query prefixes on a role assigned to a group, see Query prefix for roles assigned to groups.
To assign a group to a role through your own application, use the assignRoleToGroup() mutation of the GraphQL API. To unassign a role from a group, use unassignRoleFromGroup().
Assign default role for groups
Security Requirements and Controls
Manage userspermission
If you do not want to administer groups and roles as new repositories are created, you have the option of defining default permissions for a group here as well. This allows administrators to assign roles that will apply either globally to all repositories and views or selectively to individual ones. For more information about default roles, see Default Role Permissions.
Go to → and select your group from a list of available groups. You can search if the groups you are looking for are not immediately visible in the list.
To assign default permissions to the group click the Permissions tab, click the cog icon to assign the default permissions of a role to all repositories and views or to individual ones, then click .
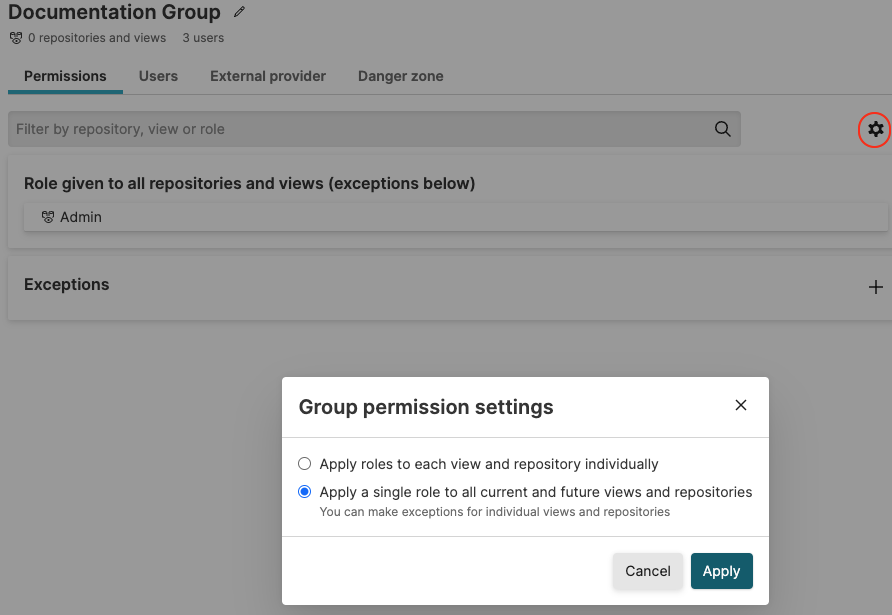
Figure 43. Assign Default Permissions to Groups
Click All repositories and views and the default Role:Admin.
In the Select Role section, select the role you want the group to have for those repositories and views. For example, the Member Role is a good choice for regular users that need to search, setup dashboards and configure alerts. While leaving the responsibility of configuring ingest, user access, integrations and data retention to others.
Query prefix for roles assigned to groups
Security Requirements and Controls
Manage userspermission
In the Query prefix area, you can define a query prefix which is effectively a search filter applied to any search.
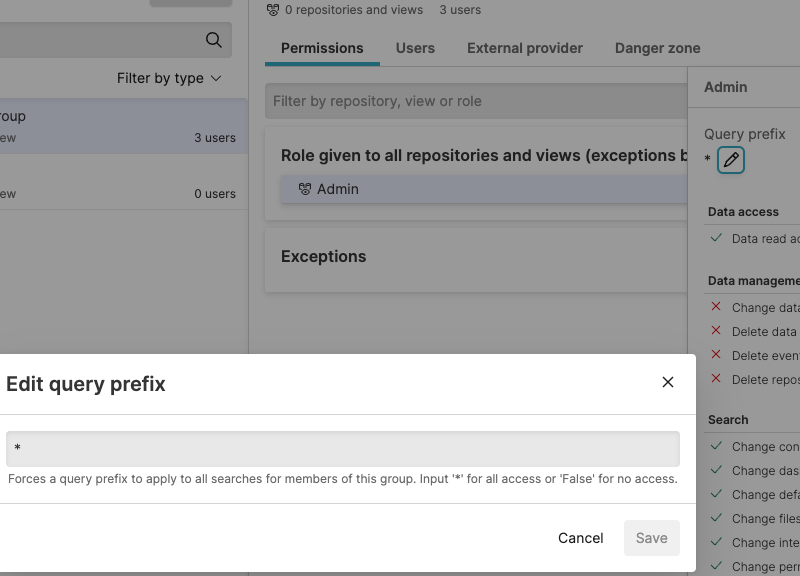 |
Figure 44. Query prefix
For example, you may add a query prefix
host=web* for the group. This is a
LogScale query that acts as a filter when any member of the
group searches the repository developer. In effect, a user of the group
is only allowed to see log lines that have a host field that starts with
web, for example,
web-server01,
web-server02 and so on. This
allows partitioning of data at search time.
Note
Query prefix only accepts Query Filters, whereas Query Functions are not allowed.
It's also possible to define a default query prefix if a default role has been selected. Meaning the default query prefix will be applied to all searches in all repositories unless an exception is defined.