
Set up a New AWS Ingest Feed
The steps required to create a new ingest feed are partially on LogScale and partially on AWS as ID's created during the creation of an ingest feed must be used during the creation of policies on AWS.
AWS Ingest can process source files that are compressed using Gzip
compression. To enable, select the
Auto or
Gzip option.
The configuration has been divided into three phases to simplify the process. Phase 1 and 3 is performed on LogScale and phase 2 must be performed on AWS.
LogScale Ingest Feeds Steps Phase 1
The first step is to create the new ingest feed configuration:
Go to page and select a relevant repository in which you want to ingest the data.
Click , under on the side menu click .
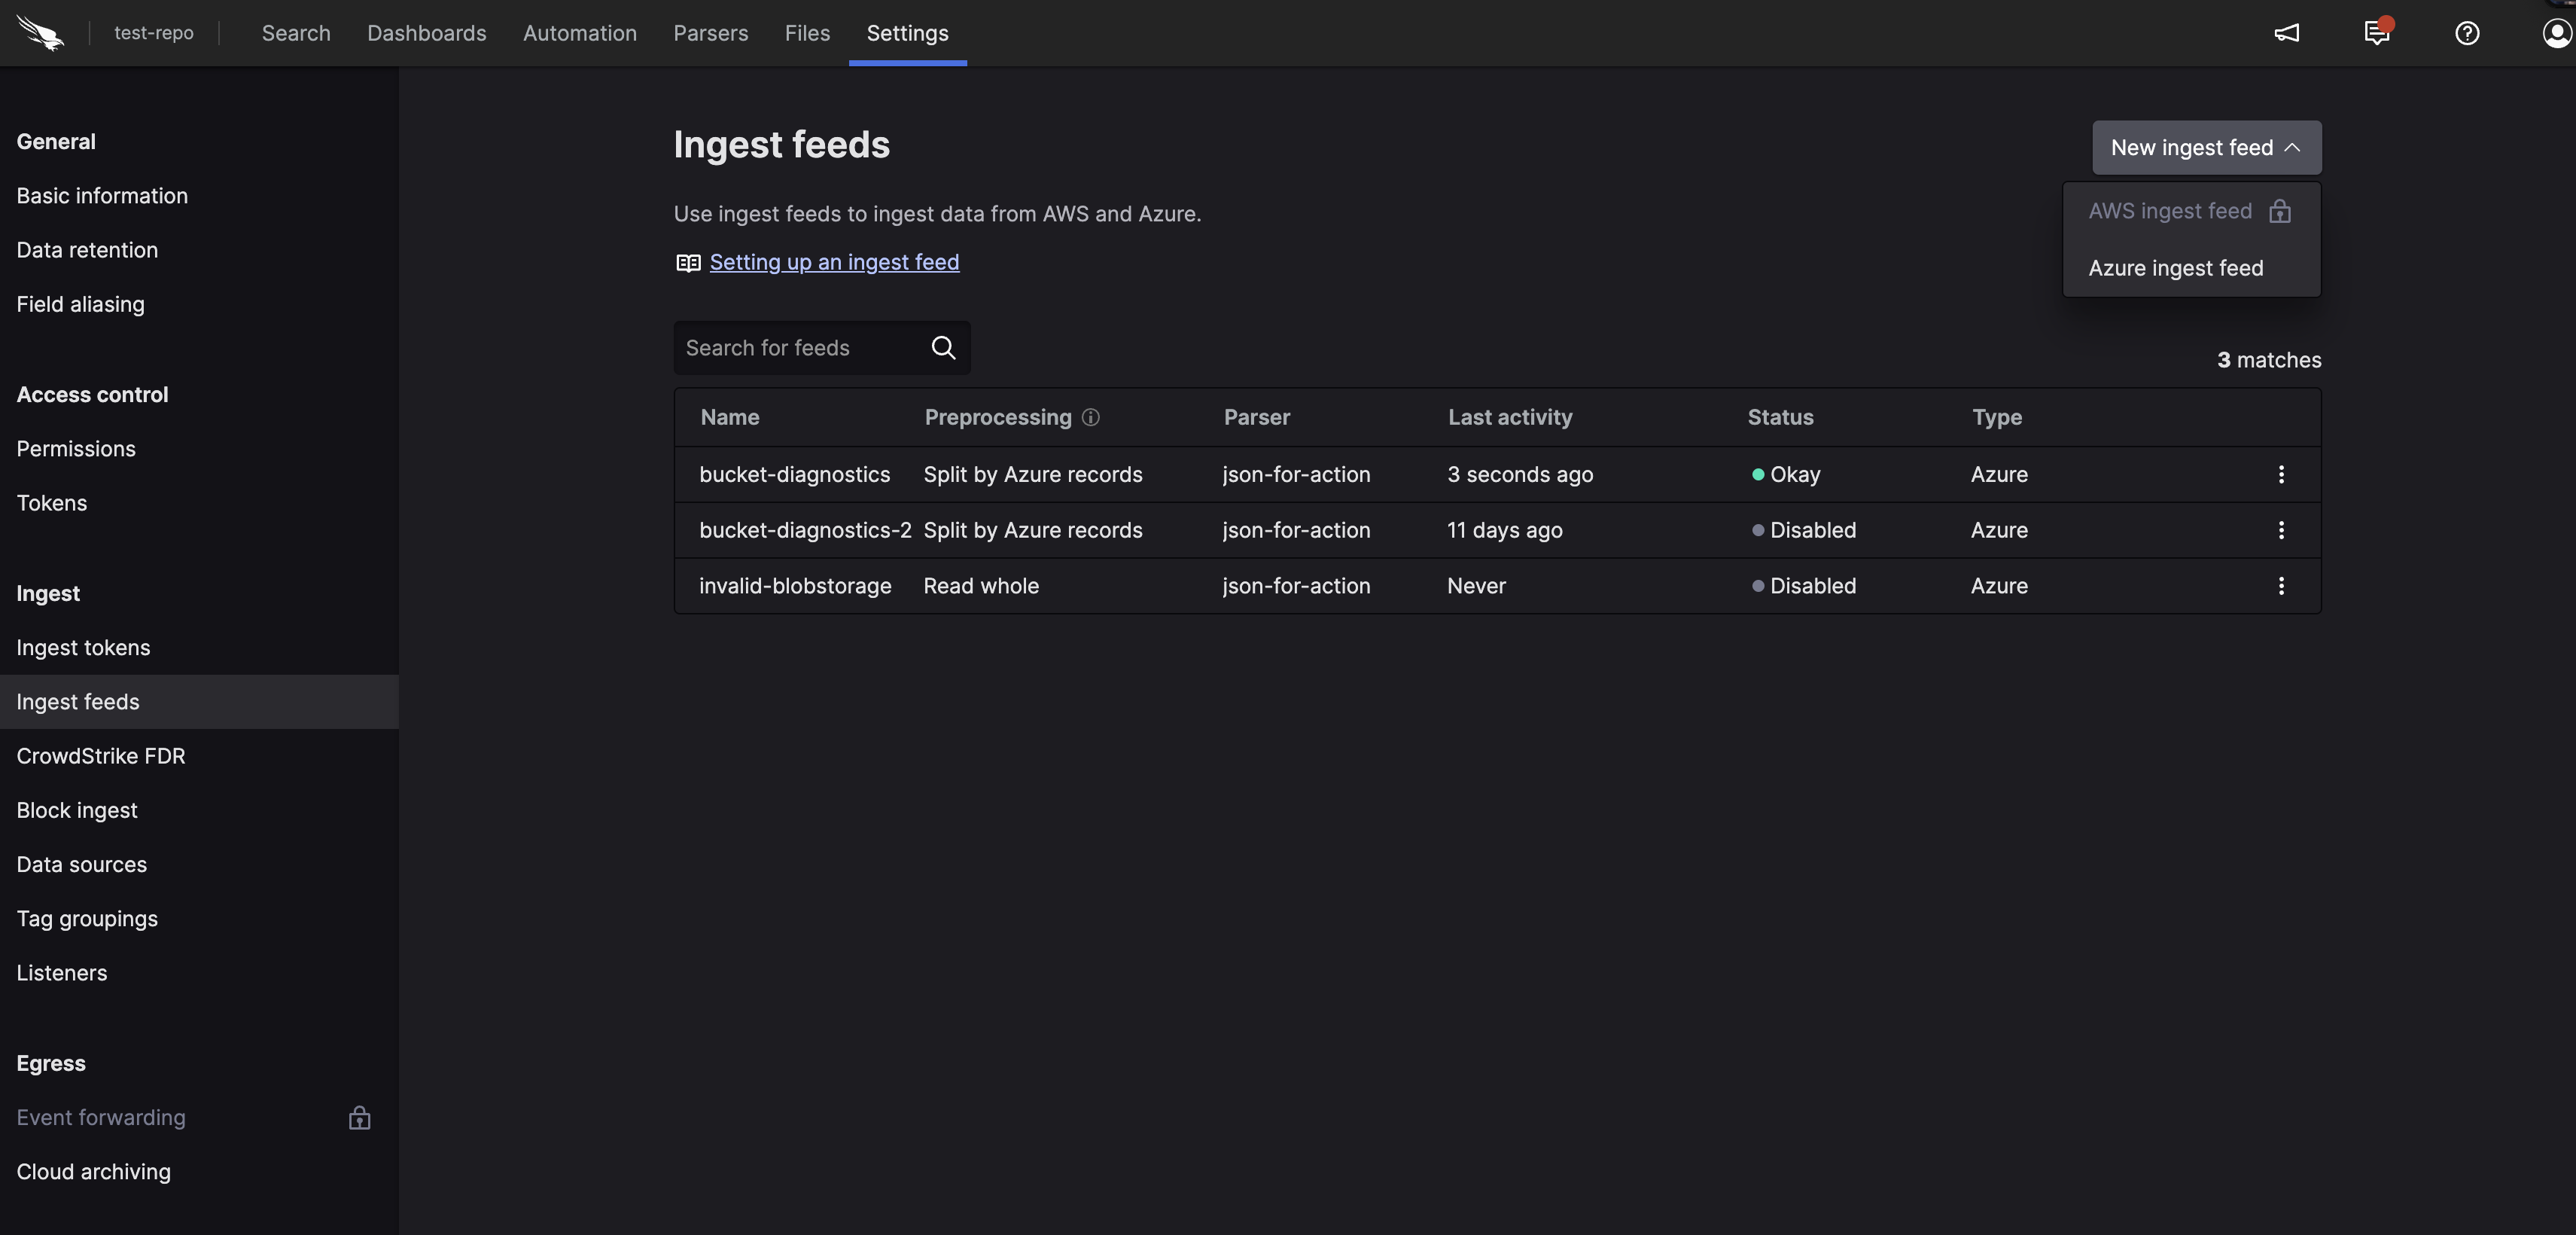
Figure 122. Ingest Feeds
On the
Ingest feedspage, click and specify the following:Name
Enter a name for the feed (required).
Description
Enter a meaningful description for the feed.
Compression
Select a compression type from the list. Auto (default) uses decompression (for example Gzip); the MIME type and file extension is used to identify the compression used and the method for decompressing during ingest.
Preprocessing
Define how the data is processed prior to ingestion, it can be split by AWS records or by new line. The way data should be preprocessed depends on the log source.
Parser
Select the parser to apply to ingest data (required). The parser can be any parser that is on repository, predefined, from a package, or custom. See Parse Data for more information.
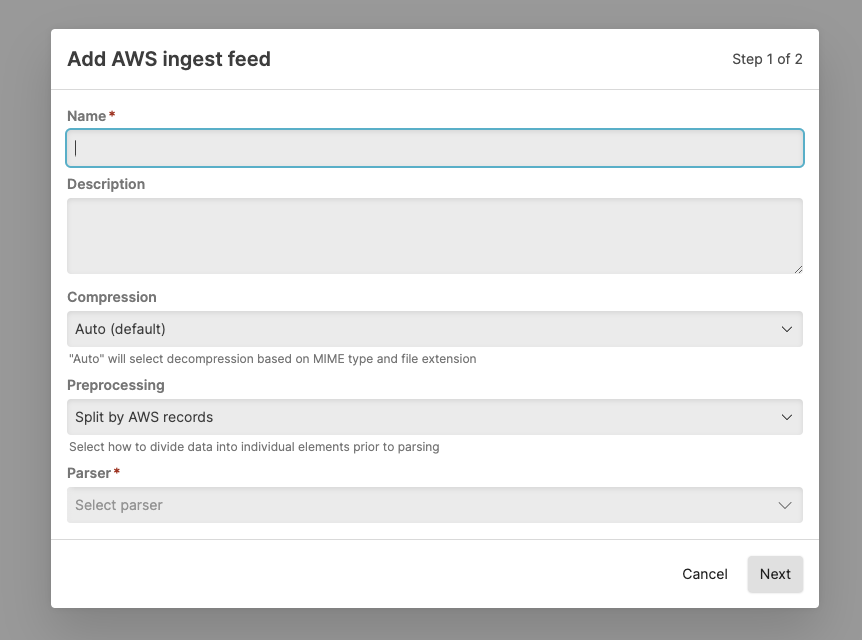
Figure 123. Ingest Feeds - Add
Click .
In the Add credentials dialog box, click the copy icon to copy your IAM identity as you will need this identity along with your External ID to configure AWS.
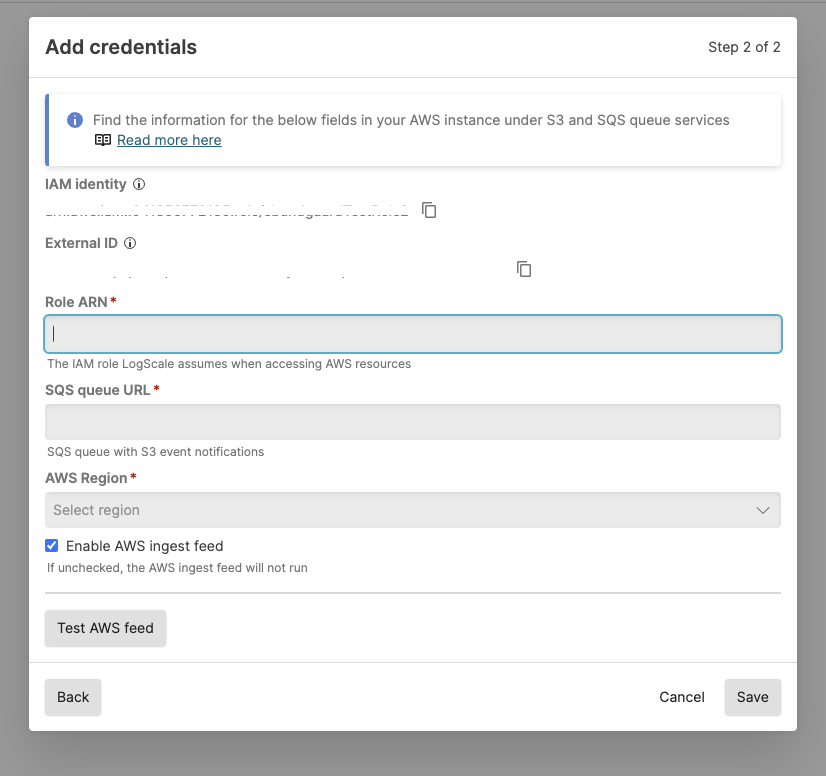
Figure 124. Ingest Feeds - Add Part 1
AWS Steps Phase 2
The following is an example configuration with minimal permission to access the data to ingest. You will need:
To create a role in AWS.
To make sure that STS is activated on your AWS account.
The ARN of the role you create for the ingest feed in LogScale.
To configure an SQS queue or an SNS topic with event notifications.
The following SQS permissions are required:
inisqs:ReceiveMessage sqs:GetQueueAttributes sqs:DeleteMessage sqs:ChangeMessageVisibility
Create a standard SQS queue in AWS with the following configurations:
Name
Specify a name for your queue.
Message retention period
We recommend setting this to 14 days (max).
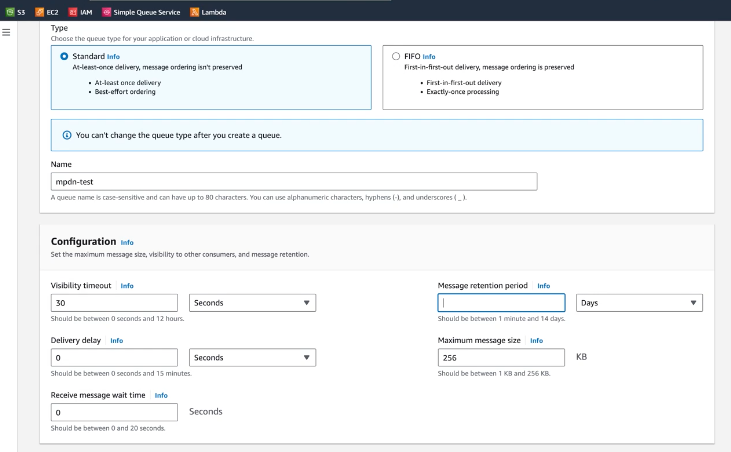
Figure 125. Ingest Feeds - SQS Queue
Create a dead-letter queue (recommended). See Amazon documentation for more information.
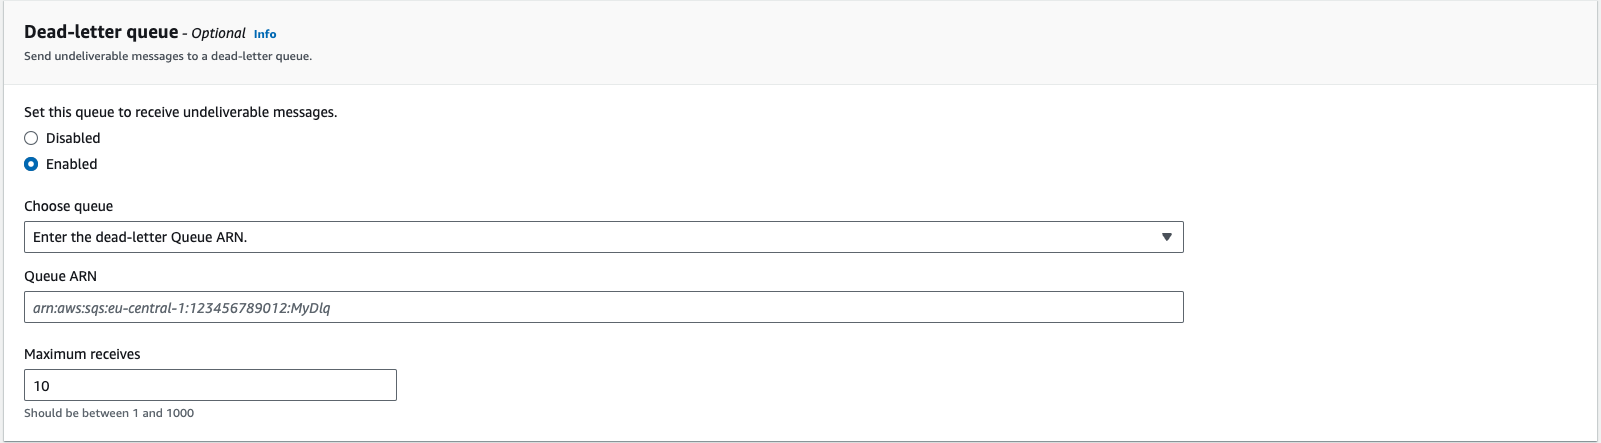
Figure 126. Dead-letter Queue
You need to grant access to the S3 Bucket or SNS topic, click under Access policy and copy and paste this snippet and:
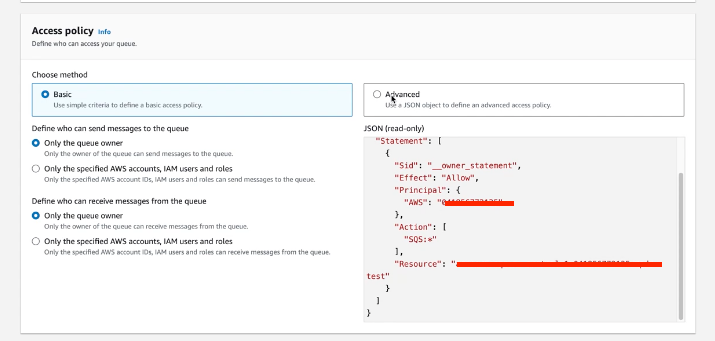
Figure 127. Ingest Feeds - Policy
Replace the
MY_ARNwith the ARN of your S3 bucket or SNS Topic.
json{ "Version": "2012-10-17", "Statement": [ { "Sid": "", "Effect": "Allow", "Principal": { "Service": "s3.amazonaws.com" }, "Action": "sqs:SendMessage", "Resource": "arn:aws:sqs:*", "Condition": { "ArnEquals": { "aws:SourceArn": "MY_ARN" } } } ] }Click .
Configure the SQS queue or SNS Topic to create an event notifications, go to Create event notification on you SQS Bucket and configure it so that All objects create events.
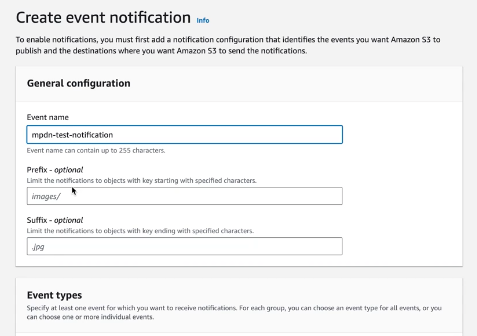
Figure 128. Ingest Feeds - Events
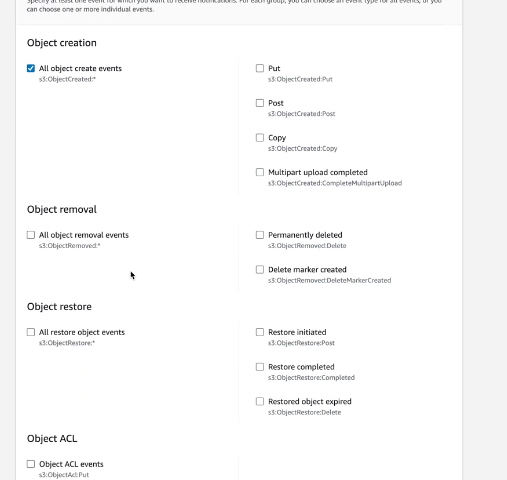
Figure 129. Ingest Feeds - Events 2
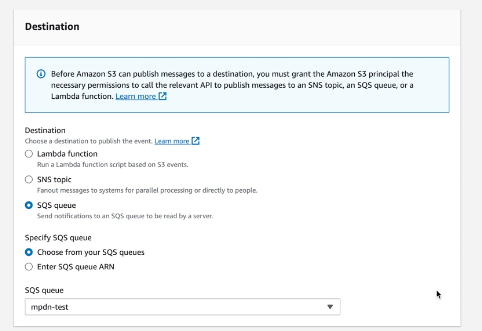
Figure 130. Ingest Feeds - Events 3
Set the SQS Queue or SNS Topic as the destination, then click . Notifications will now appear in the bucket.
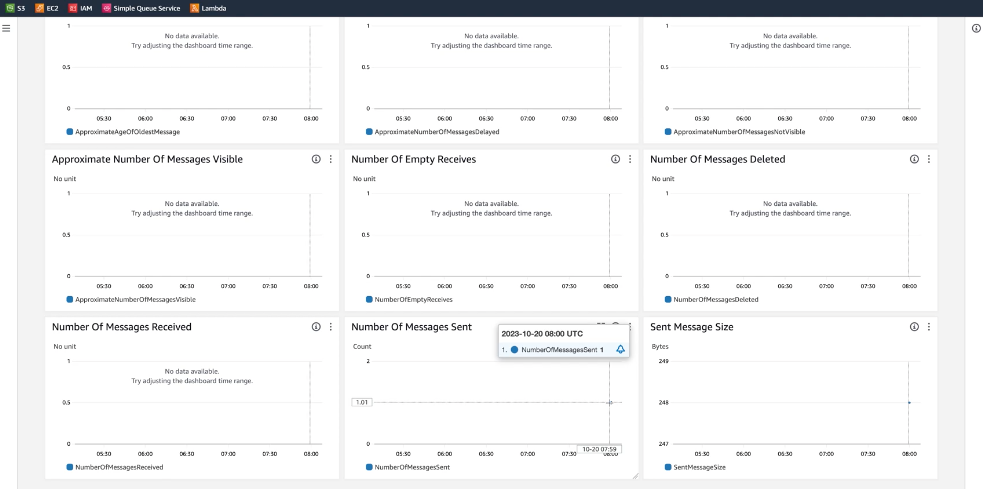
Figure 131. Ingest Feeds - data
If you are using an SNS Topic you need to create a SNS topic subscription that points to the SQS bucket you created previously with an access policy that allow SourceArn on your S3 bucket.
The next step is to create an IAM role, go to Identity and Access Management (IAM), which allows you to read data. Select Roles.
Create a role and add a Custom trust policy using this snippet, where you must:
Replace
LOGSCALE_AWS_IDENTITY_ARNwith the IAM Identity you copied from the LogScale Ingest field pop-up. See LogScale Ingest Feeds Steps Phase 1.Replace
LOGSCALE_EXTERNAL_IDwith the External ID you copied from the LogScale Ingest field pop-up. See LogScale Ingest Feeds Steps Phase 1.
json{ "Version": "2012-10-17", "Statement": [ { "Sid": "AllowLogScaleAccess", "Effect": "Allow", "Principal": { "AWS": "LOGSCALE_AWS_IDENTITY_ARN" }, "Action": "sts:AssumeRole", "Condition": { "StringEquals": { "sts:ExternalId": "LOGSCALE_EXTERNAL_ID" } } } ] }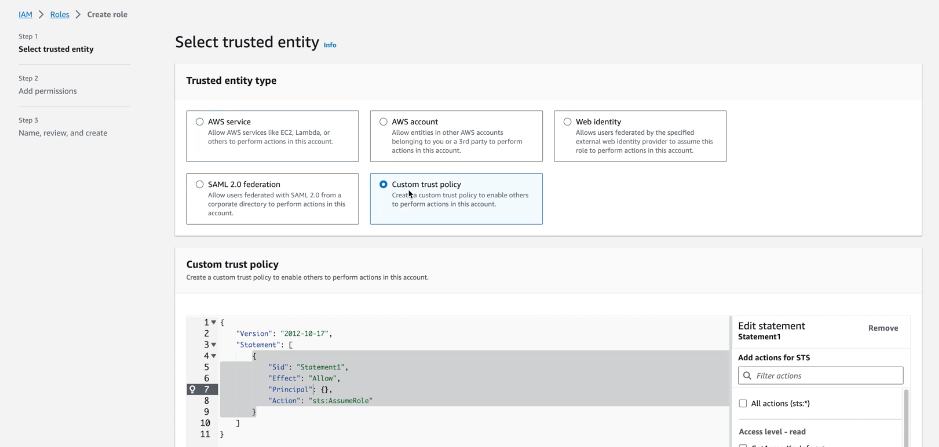
Figure 132. Ingest Feeds - Custom trust policy
Click .
Click again, you do not add permissions as we will add an inline policy later.
Find and select the role, click the drop down and select

Figure 133. Ingest Feeds - Role
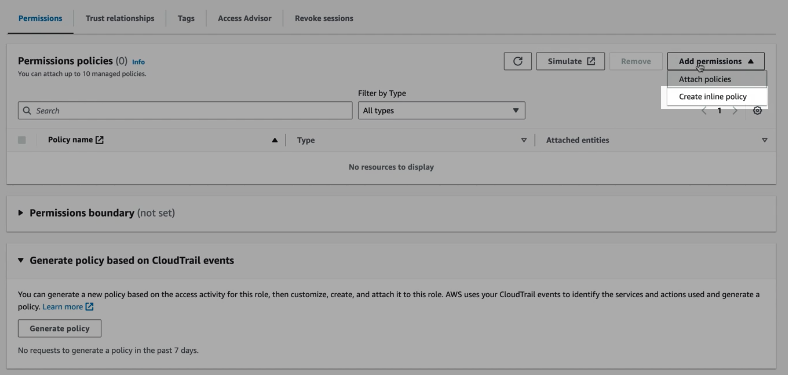
Figure 134. Ingest Feeds - Inline Policy
Click the JSON tab and copy and paste the snippet below which allows your read data and;
Replace
S3_BUCKET_ARN-- with the ARN of your S3 bucket this must be followed by/*to access the objects in the bucket.Replace
SQS_QUEUE_ARNwith the ARN of your SQS queue
json{ "Version": "2012-10-17", "Statement": [ { "Sid": "ReceiveS3Notifications", "Action": [ "sqs:ReceiveMessage", "sqs:GetQueueAttributes", "sqs:DeleteMessage", "sqs:ChangeMessageVisibility" ], "Effect": "Allow", "Resource": "SQS_QUEUE_ARN" }, { "Sid": "ReadS3Objects", "Action": "s3:GetObject", "Effect": "Allow", "Resource": "S3_BUCKET_ARN/*" } ] }Click . Specify a name for the policy and click . Copy and save the ARN of the role and the URL of the SQS bucket.
LogScale Ingest Feeds Steps Phase 3
Go back to the ingest feed you started to create in part 1.
Figure 135. Ingest Feeds - Add Part 2
Copy and paste the ARN of the role you created in AWS.
Copy and paste the URL of your SQS queue from AWS. The AWS Region is normally auto-filled but if empty, select a region based on your AWS Console.
Optionally, click test to see if the configuration is valid. Click .