
Creating a Package
A package is a bundle of assets that can be installed in a LogScale repository. They allow you to make assets reusable across multiple teams, repositories and even share your work with the LogScale community.
To create a package in LogScale you first need to have a working set of LogScale components such as parsers, queries, dashboards or alerts that meet a particular need.To do this you need to have access to the relevant logs and to have tested that the package works as intended.
When preparing to create a package please keep a careful record of the versions and configurations that you used in testing as well as the relevant log files and how they were generated and/or collected.
You must complete the following configuration and steps in order to create a package.
Make sure you have Change Package permissions for the repository in which you're creating a package. Otherwise, you may encounter errors due to permissions. For testing the examples here, you might use your personal Sandbox repository since there you'll have the required permissions to manage packages. You can read more about permissions under Manage Roles.
Ingest Data using the method which best suits your requirements Data Ingest Guidelines
Create the LogScale assets to include in the package for example, parsers and dashboards Asset Guidelines.
In LogScale start the Exporting the Package process and add the key high level information about the package and select the assets to be included in the package.
Keep in mind the Developer Guidelines to insure that the package contains the critical pieces of information to enable it to be uploaded to LogScale and to work, but it does not need to contain all the information needed for inclusion in the Marketplace.
Use a text editor to edit the yaml/md files in the package and to enhance the package with the information necessary for inclusion in the Marketplace according to the Submission Guidelines. To help with version control and collaboration it may be useful to use GitHub or something similar.
Exporting the Package
Once you have your assets ready, you can export them as a package using
the Create a package link within
the Settings view.
For a more detailed guide to the different fields and contents, see Developer Guidelines.
The maximum allowed size of upload/lookup files in a package is
controlled by the MAX_FILEUPLOAD_SIZE configuration
parameter.
Tip
Package Contents and Sizing
Creating packages with very large data that change over time can affect efficiency as it would require a large amount of space to store old versions of that package.
It is therefore recommended that you create a package with all your parsers, dashboards, saved queries, and then point to lookup files which are not part of the package.
This will allow you to update the lookup file with new data, without having to create a new package version whenever the lookup files are updated.
To create a package:
Click on the Create a Package link under the
Settingstab in your viewThe
Create packagepage provides background information on exporting assets to a package. To create a package, click the button.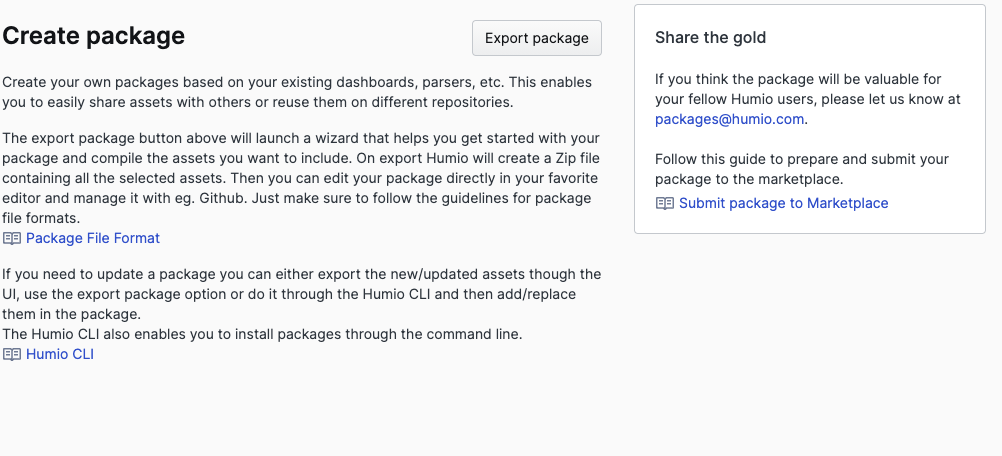
Figure 68. Create a Package
The fields within the Package Metadata section of the form marked with a
*(asterisk) are required and must be filled in: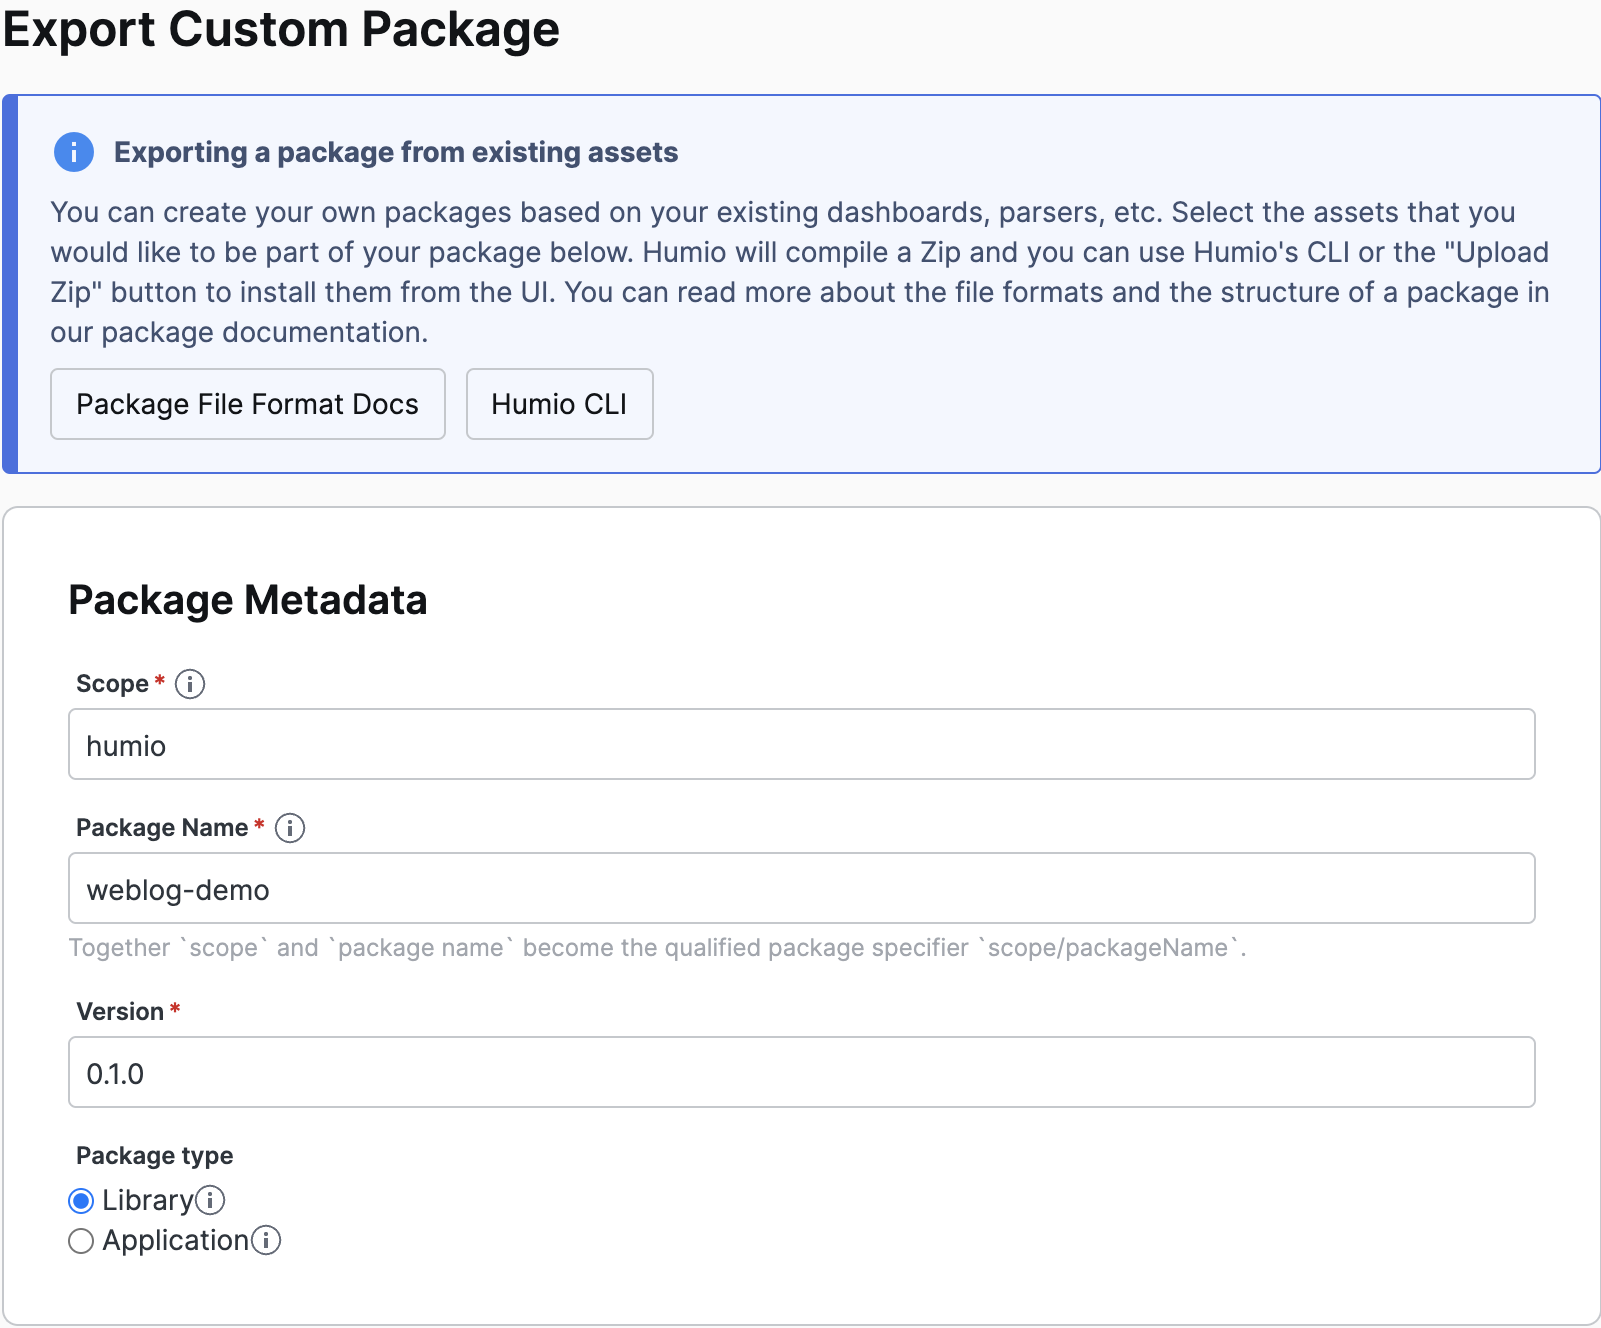
Figure 69. Export Package Metadata
Scope is the scope or namespace for the package, for example you might use the product or domain name, for example humio or github. Names must start with an upper or lower case letter, then use alphanumeric characters, dashes or underscores, and be between 3 and 107 characters in length. See Scope for more information.
Package Name is the specific package name, for example you might use a log name or functionality group, such as weblog or metrics. Names must start with an upper or lower case letter, then use alphanumeric characters, dashes or underscores, and be between 3 and 107 characters in length. See Name for more information.
Brief Description is the outline description given in lists, the marketplace listings, and during installation. See Brief Description for more information.
Icon is the location of an icon or image to be used when viewing the package; it will be shown in summaries and lists and can be a helpful tool for identification. See Icon for more information.
Version is the version number of this package. This should be used as with any version number to enable you to distinguish between versions and functionality as your package develops. Each version is distinct, and there can be multiple versions of a package available. See Version for more information.
Package type is either Library or Application using the radio buttons. See Package Type for more information.
Click the to continue to the next page.
The Package contents page enables you to select the package contents according to the different asset types that you can want to include in the export packed.
To include a component, click the checkbox next to each item that you want to include in the package. Items in bold, or with the package icon next to them indicate that the asset is already part of another package. Selecting a package asset by default includes all related assets within that package.
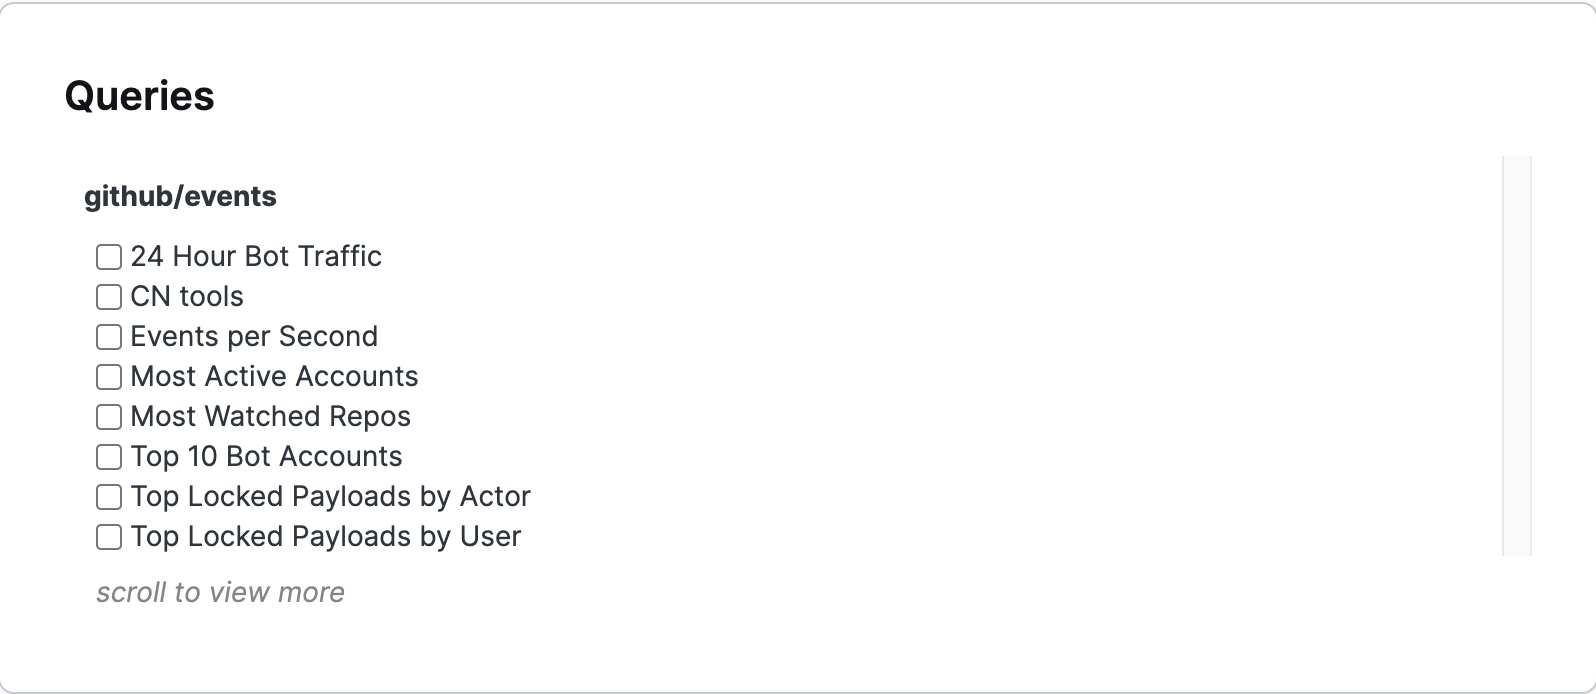
Figure 70. Create Assets
Once you have finished defining the contents of the package, click the button. You will be presented with a Save File dialog where you can select the location to download the Zip file of the generated package.
A package is essentially a Zip file containing several YAML files, with each file describing the dashboards , alerts, and other components, as well as some metadata files.
Once you have exported your package, you should unzip the file and add
it to source control, so that the
manifest.yaml file is at the
root of the code repository. See
manifest.yaml for more
details on manifest.yaml. That way you can manage changes over time and
collaborate with others. Alternatively, you can upload your package to a
shared location like Amazon S3 and have others install from there.
Maintaining a Package
You should maintain your package within a source control mechanism, such as git or hg. That allows you to collaborate on changes to dashboards , parsers, etc.
You can either edit YAML files by hand, or make changes in LogScale's UI and "Export as Template" on the individual asset. There is no need to go through the "Export Package" flow again.
If you want to make changes to the YAML manually, read the Package File Formats documentation page.
Note
LogScale does not allow overwriting existing versions of a package. So
remember to bump your package version number when you update the
content of your package. You do this either in the
manifest.yaml file or be going
through the export wizard again. See
manifest.yaml for more
details on manifest.yaml.
Submitting a Package to the LogScale Marketplace
The LogScale Marketplace holds a number of packages that are tailored for different use cases. If you want to contribute to the marketplace your package needs to include specific metadata among other things. The Developer Guidelines documentation provides information on what to include in the package as well as how to submit a package to the marketplace.
If you want to publish a package and make it available to everyone - we
would love to hear from you or your company. You can contact
packages@humio.com for more details.
It can be a list of parsers or full set of Dashboards for a specific technology, or anything really.