
Connect: Passthru, Pipeline, or Pack
The documentation explains how to establish data connections in QuickConnect using three options: Passthru for direct Source-to-Destination routing, Pipeline for implementing data processing functions, and Pack for sharing configurations between Worker Groups. It details how to configure these connections through both the QuickConnect interface and Data Routes UI, including setting up Pipelines, managing data flows, and implementing filtering rules to control how data moves between Sources and Destinations.
In QuickConnect, as soon as you drag and drop a Source -> Destination connection, a pop up dialog will prompt you to select a connection type: Passthru, Pipeline, or Pack. (In Data Routes, you'll make the same choices elsewhere.)
 |
What are these options?
A Passthru establishes a simple direct connection between a Source -> Destination pair.
A Pipeline hosts a stack of Functions to process your data, in the order you arrange them.
A Pack is a microcosm of a whole CrowdStream configuration, designed to share configs between Worker Groups or deployments. A Pack can encapsulate its own Pipelines, Routes, Knowledge libraries, and sample data (but not data Sources or Destinations). A Pack can snap in wherever you can use a Pipeline.
So let's unpack Pipelines, where you'll define most of your event processing.
Pipeline Options
When you first create a new Pipeline, it's empty, making it equivalent to Passthru. CrowdStream provides a set of out of the box Pipelines for specific purposes. As you can see below, one of these is a passthru Pipeline. This similarly contains no Functions — making it the Data Routes UI's equivalent of QuickConnect's Passthru button.
For these reasons, it's easy to start with an empty Pipeline, and then add Functions as you need them.
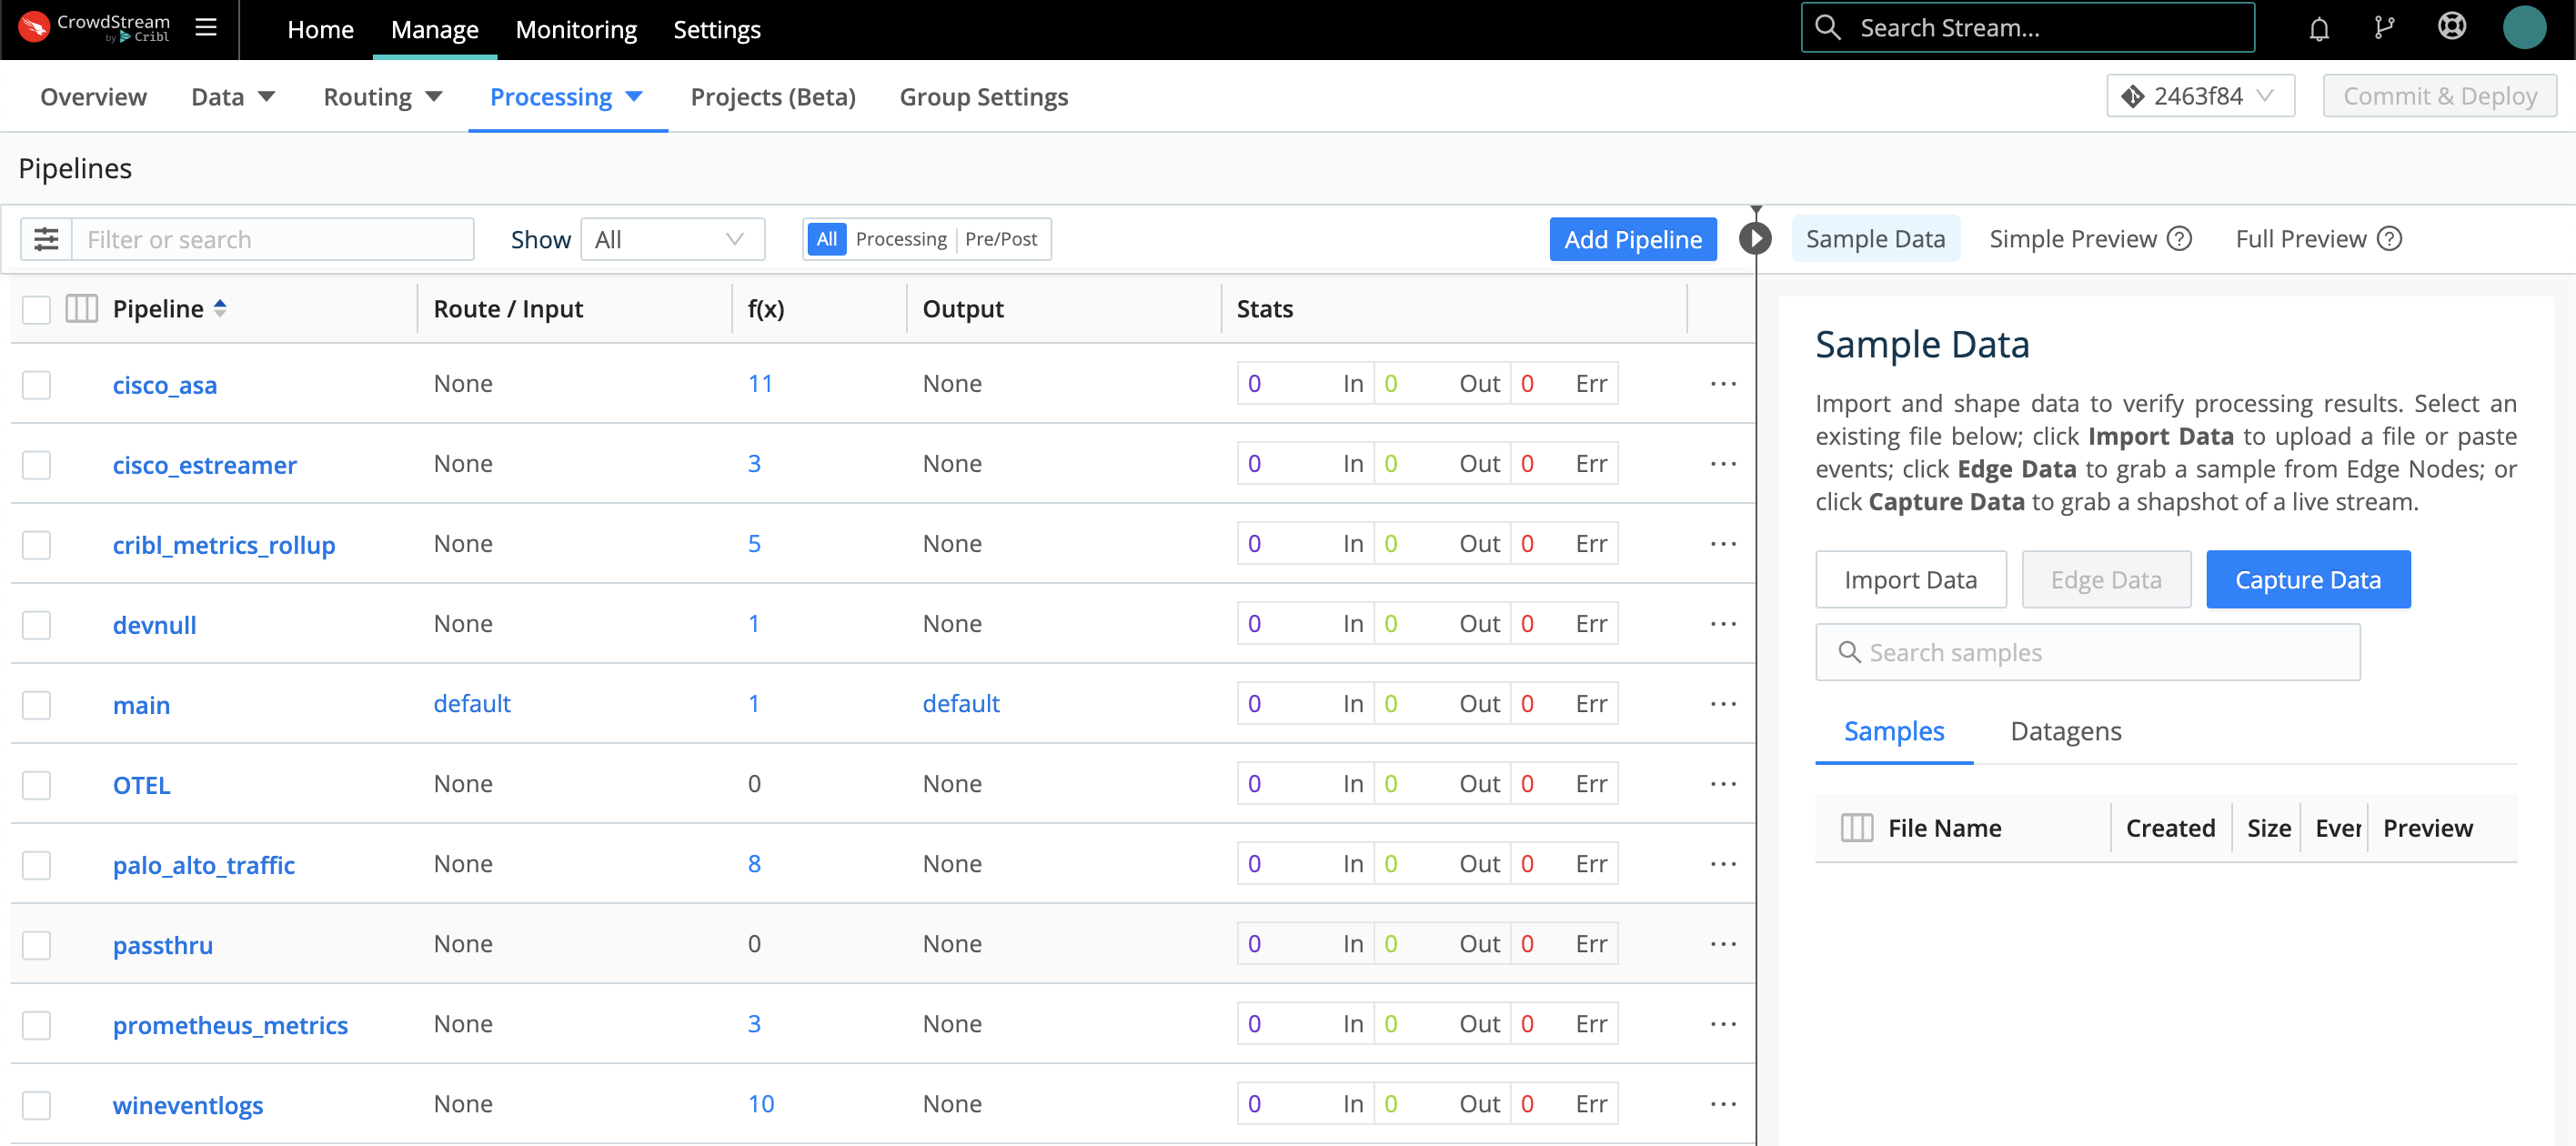 |
A Pipeline, as you populate it, is a stack of processing Functions and optional comments. Use the accordions on the left to expand or collapse each Function. Use the sliders on the left to enable/disable each Function — preserving structure as you develop and debug.
Use the right Sample Data pane to preview how the Pipeline's current state transforms a set of events. (Controls here enable you to capture live data, save it to sample or Datagen files, and reload those files.)
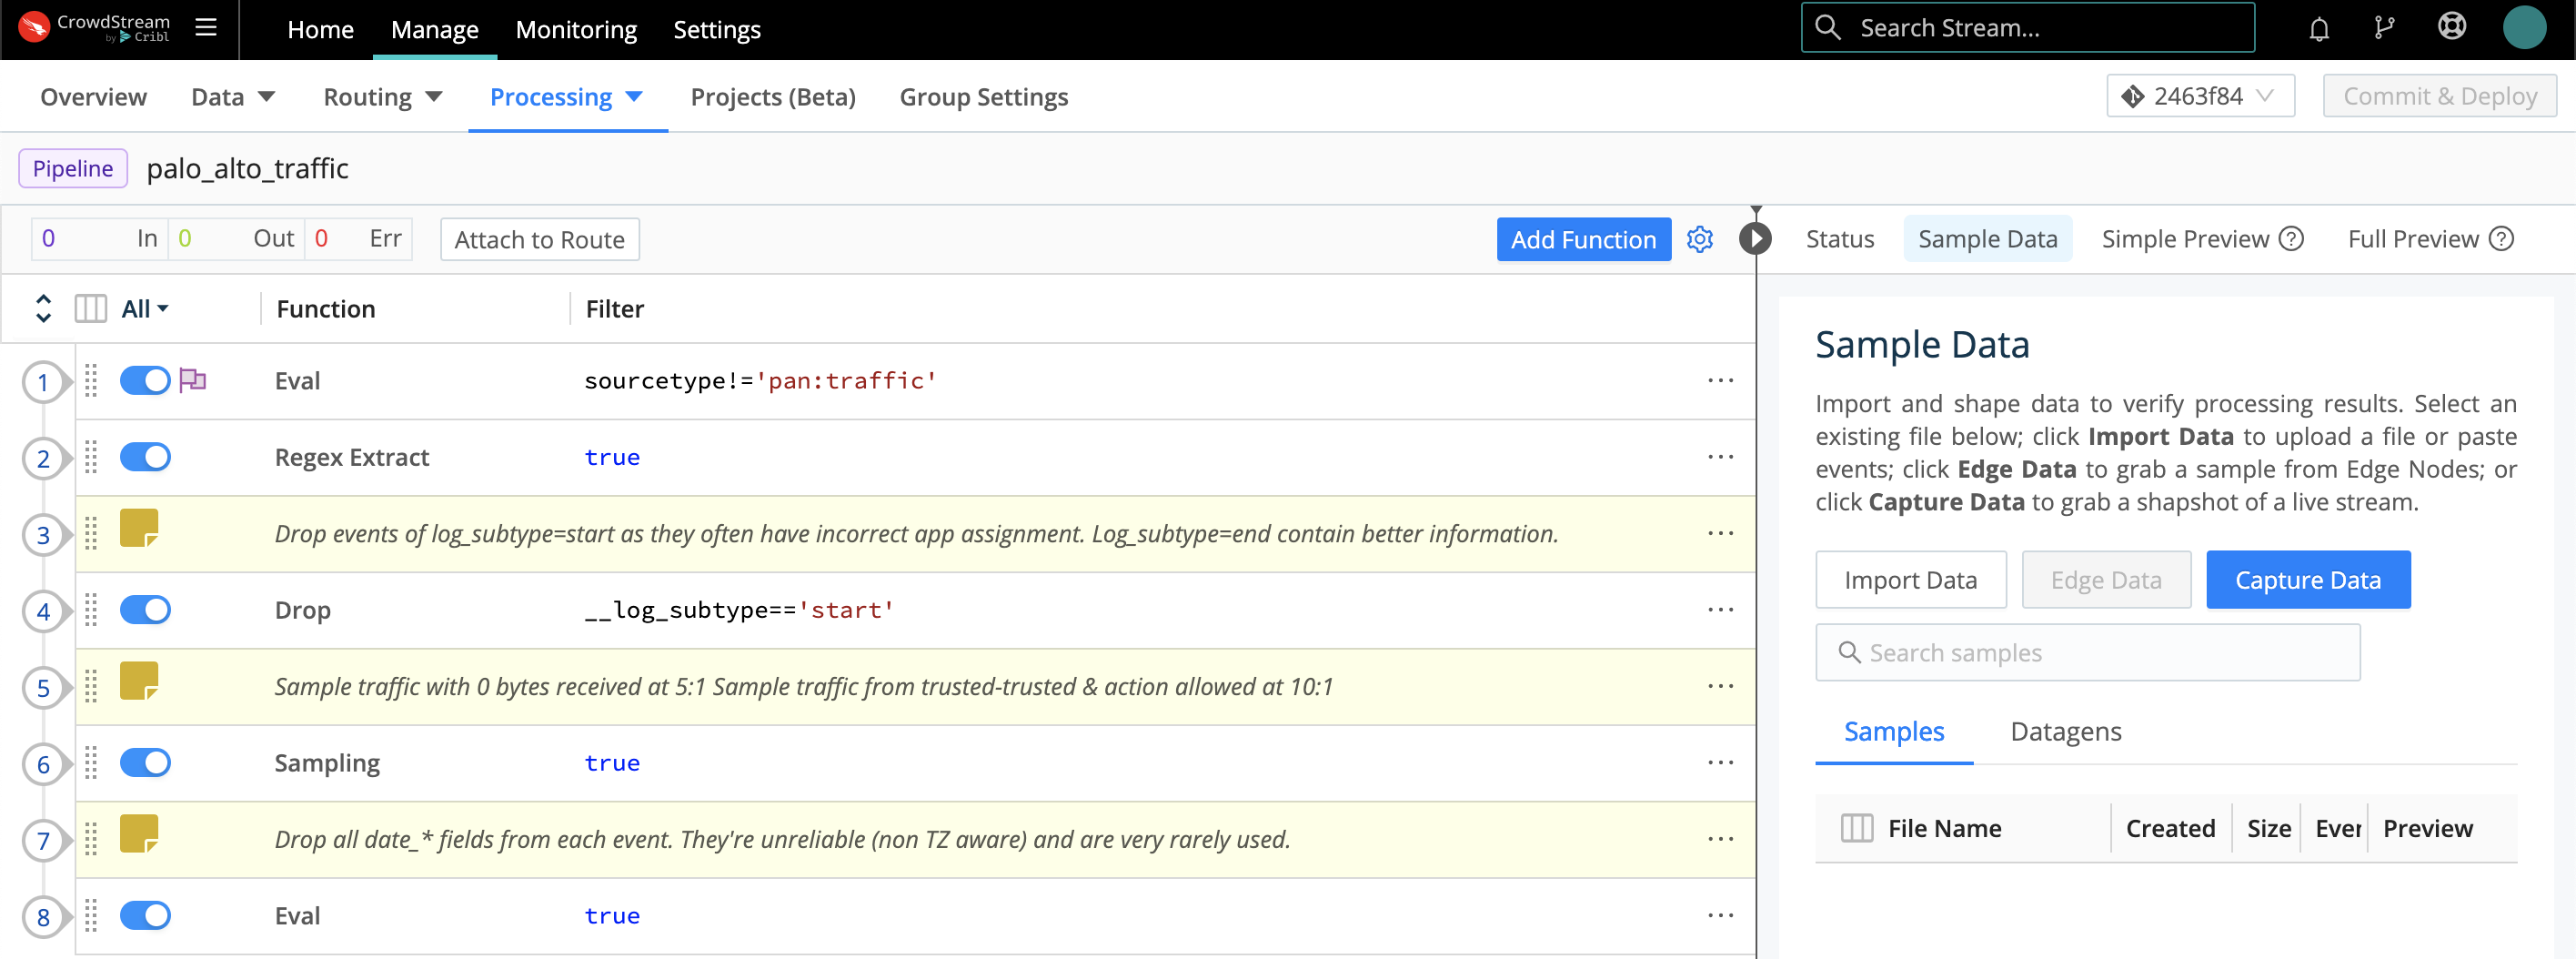 |
Although you'll configure most data shaping in processing Pipelines between Sources and Destinations, you can also attach a pre processing Pipeline to any Source instance, and a post processing Pipeline to any Destination instance. Use these options when you need to “condition” the specific data type handled by a particular inbound or outbound integration.
Connect via QuickConnect
To select a connection type in QuickConnect, click the appropriate button in the pop up dialog shown above. To accept the default Passthru option, just click Save. Your Source and Destination will now be connected.
If you select Pipeline, you'll see an Add Pipeline to Connection modal. Here, you can click to select an existing Pipeline, or click Add Pipeline to define a new one. Then click Save here to establish the connection.
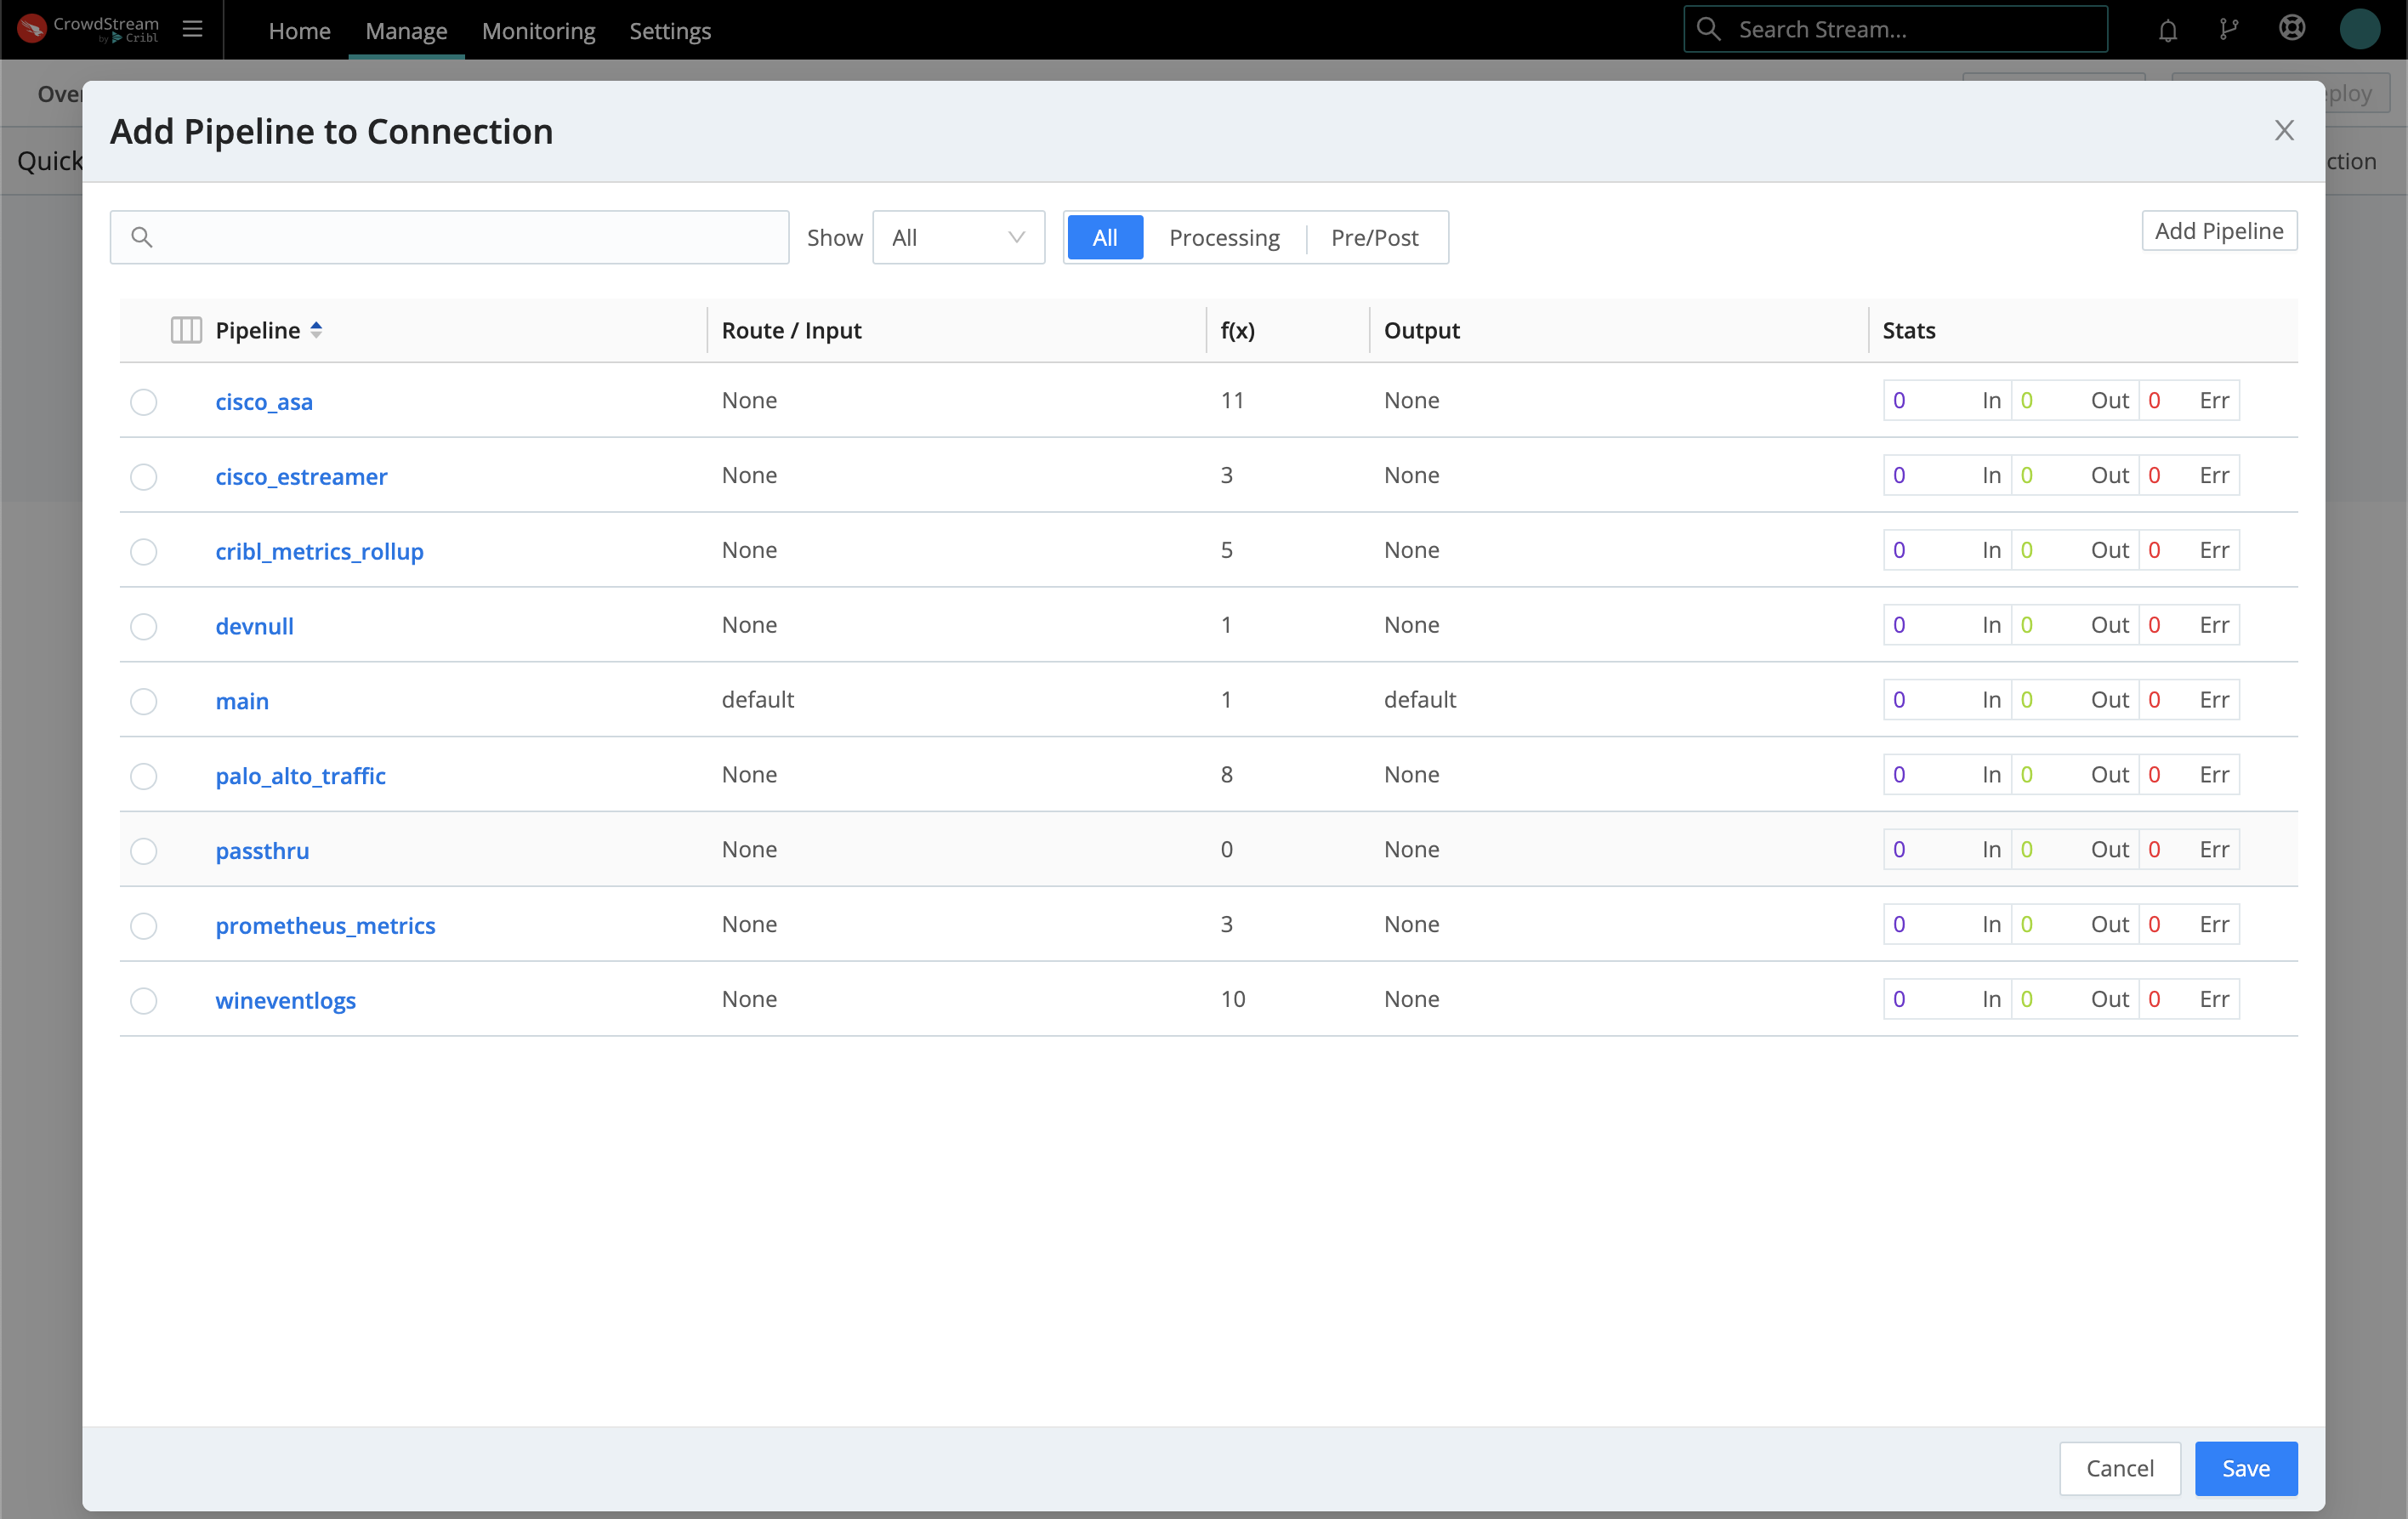 |
Selecting Pack opens an Add Pack to Connection modal that works exactly the same way.
Whichever option you choose here, your connection between this Source and Destination is now complete.
To get data flowing, jump ahead to commit and deploy your new configuration.
Connect via Data Routes
The Data Routes UI enables you to finely configure multiple, interdependent connections between Sources and Destinations. Events clone and cascade across a Routing table, based on the filtering rules and sequence you define.
In exchange for this flexibility, you sacrifice QuickConnect's one stop, snap together UI metaphor. After configuring your Sources and Destinations — which you've already done above — you need to connect them by separately setting up at least one Pipeline and one Route.
Pipelines Access
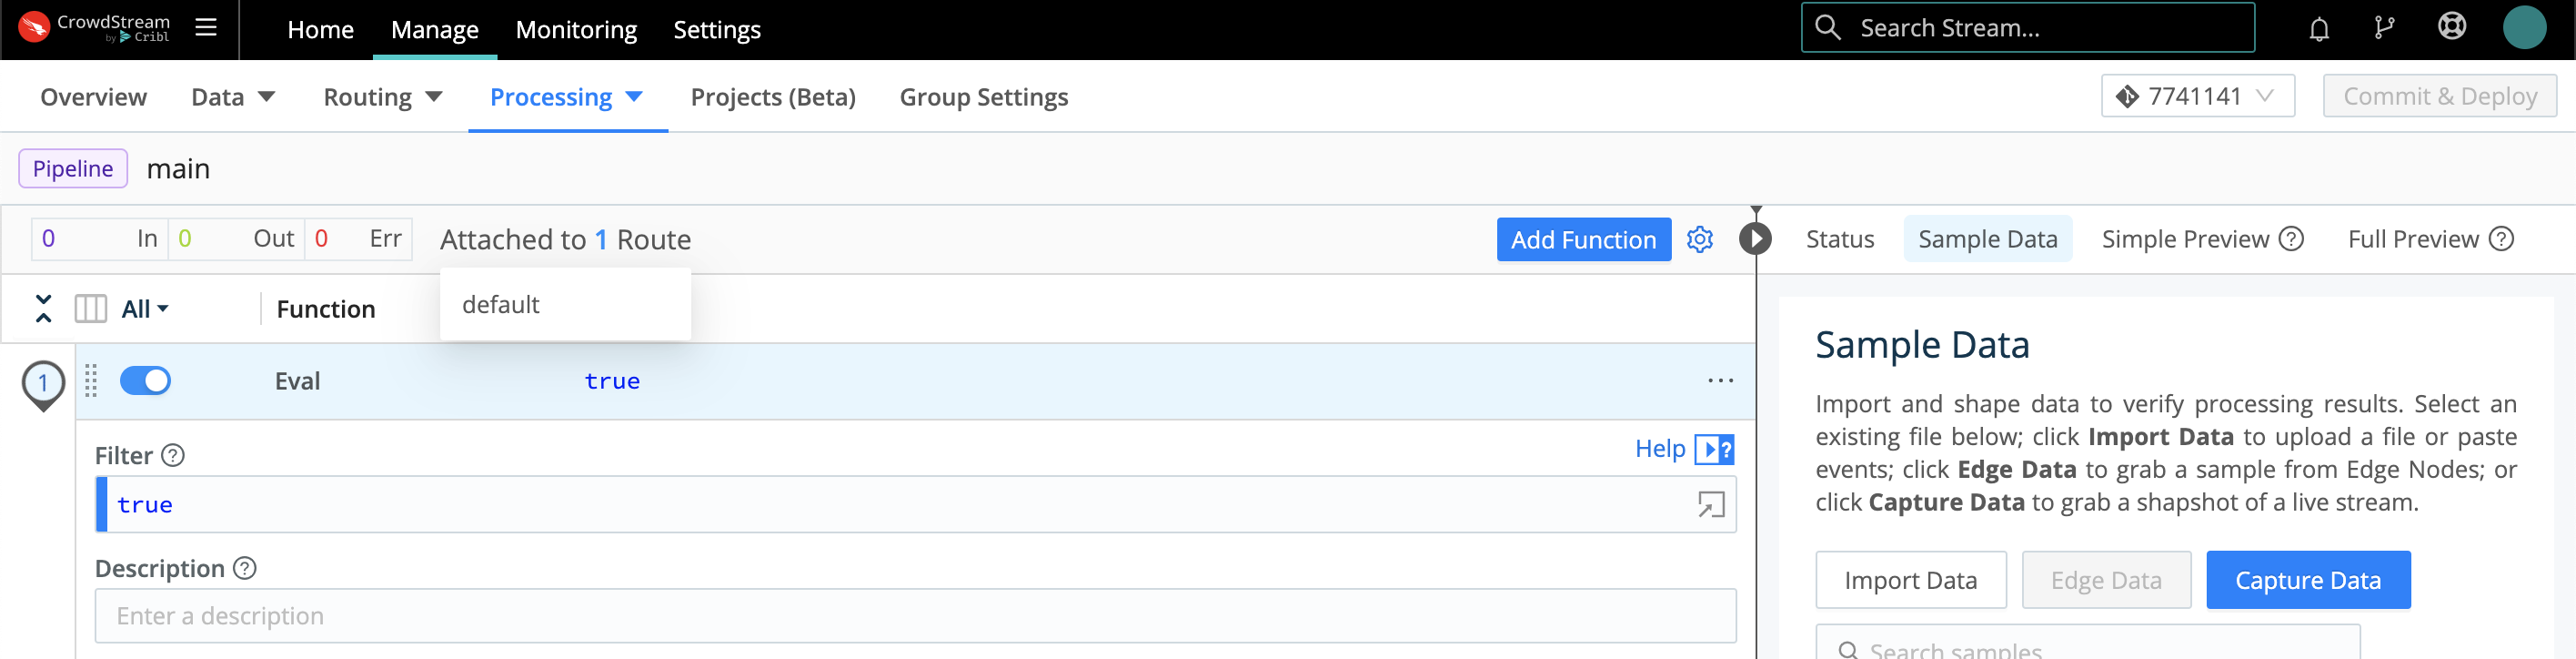
From a Group's Manage tab, select Processing > Pipelines. In addition to the minimal passthru Pipeline identified above, other simple building blocks here include main (which initially contains only a simple Eval Function) and devnull (which contains a single Function that just drops events).
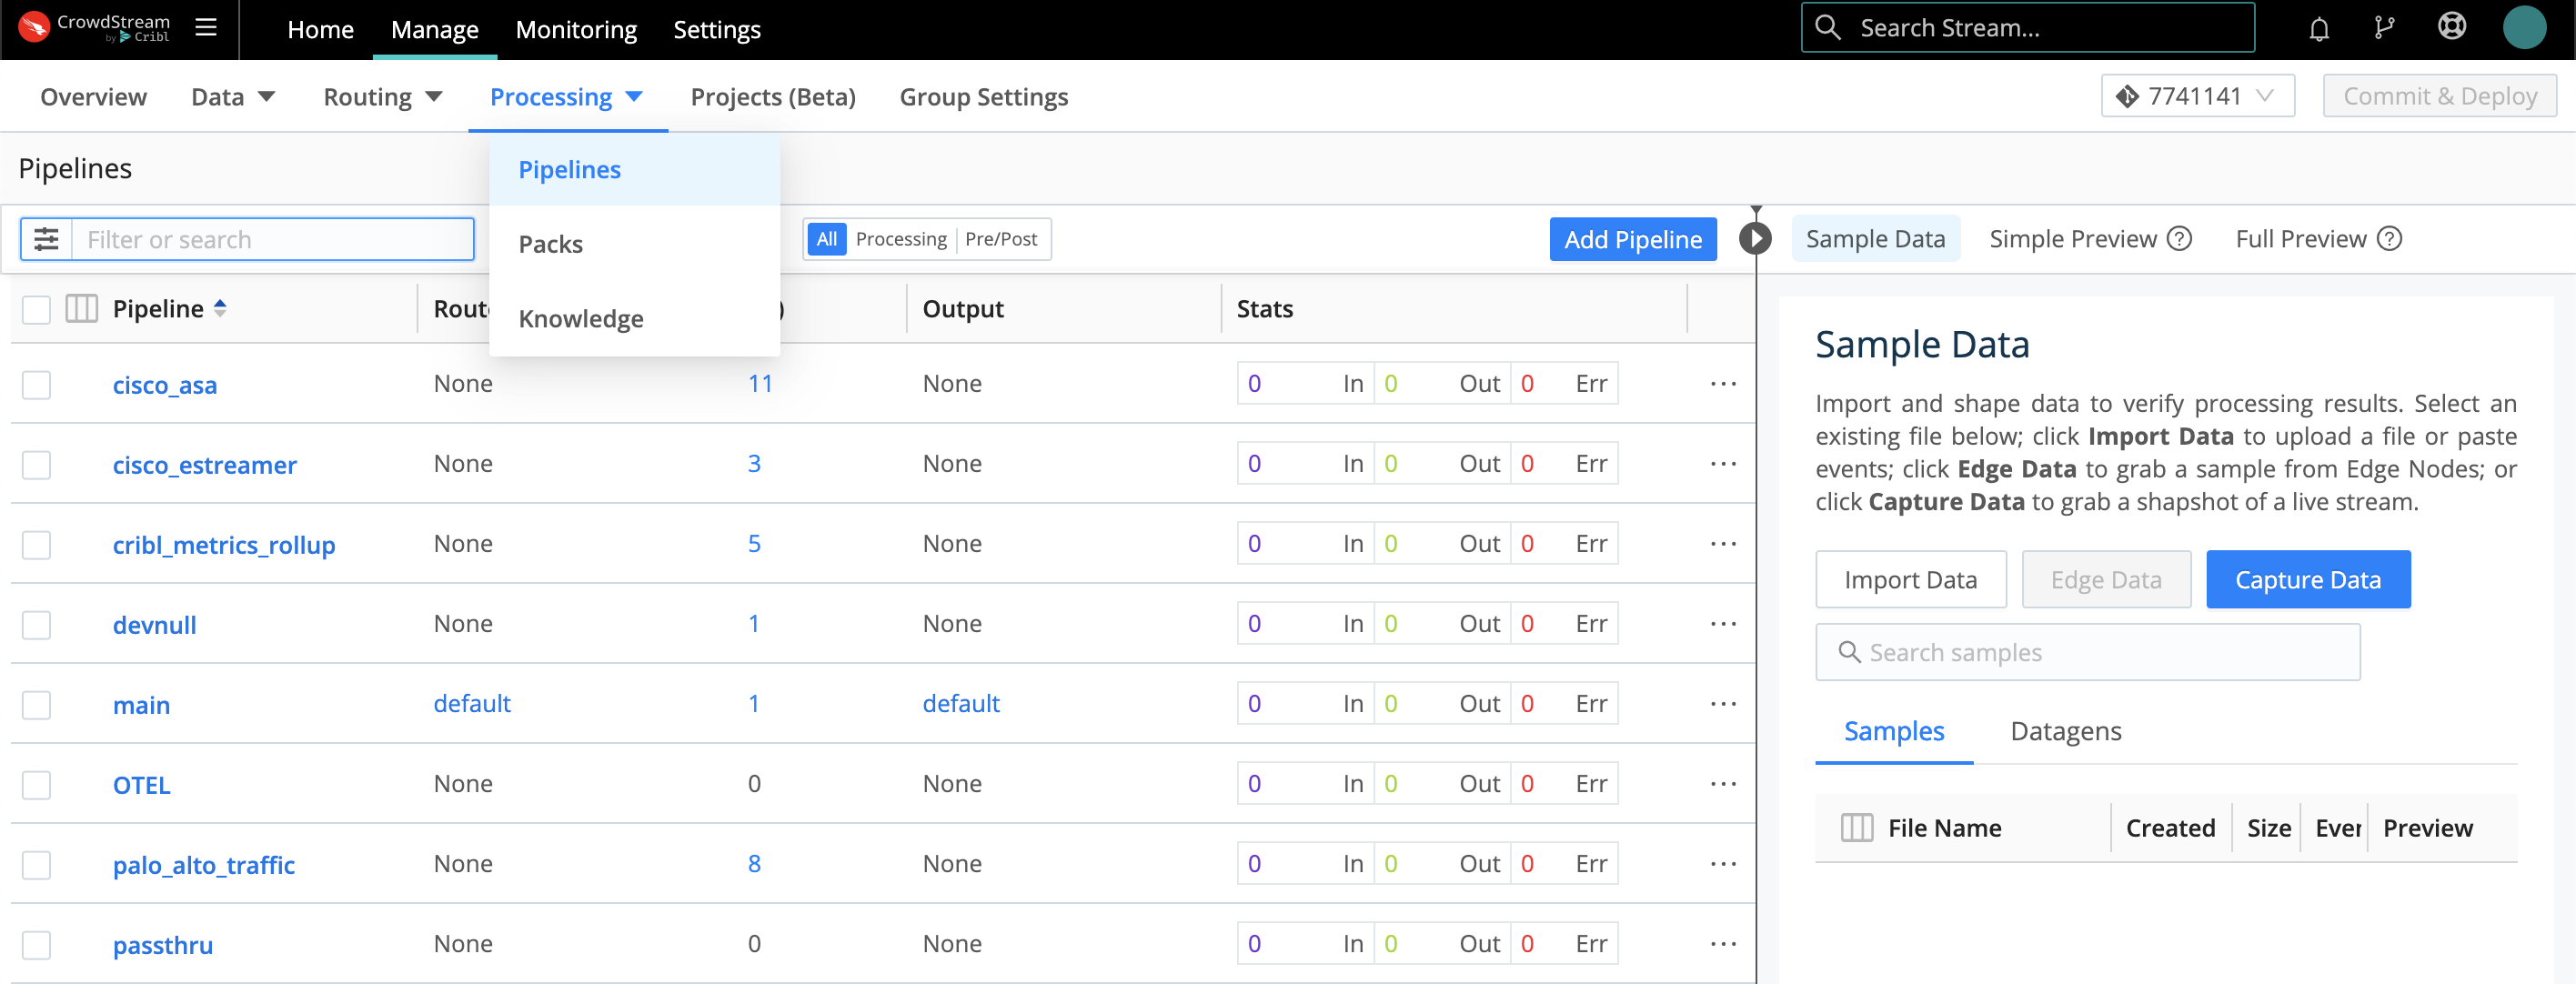 |
Out of the box Pipelines are already connected to Routes. When you click into a Pipeline, you can hover to display the connected Route, as shown here. But as our final connection step, let's next look at how to connect up everything (Source, Pipeline, Destination) in a Route.
 |
Configure a Route
In the Data Routes UI, a Route is where you complete a data flow connection. Each Route connects exactly one Pipeline with exactly one Destination.
This combination can consume data from one, multiple, or all the Sources you've configured on the Data Routes side. (QuickConnect Sources are separate, but you can open those Sources' configs to move them to the Data Routes UI.) This is governed by the filtering we'll see below.
To open the Routing table, from a Group's Manage tab, select Routing > Data Routes.
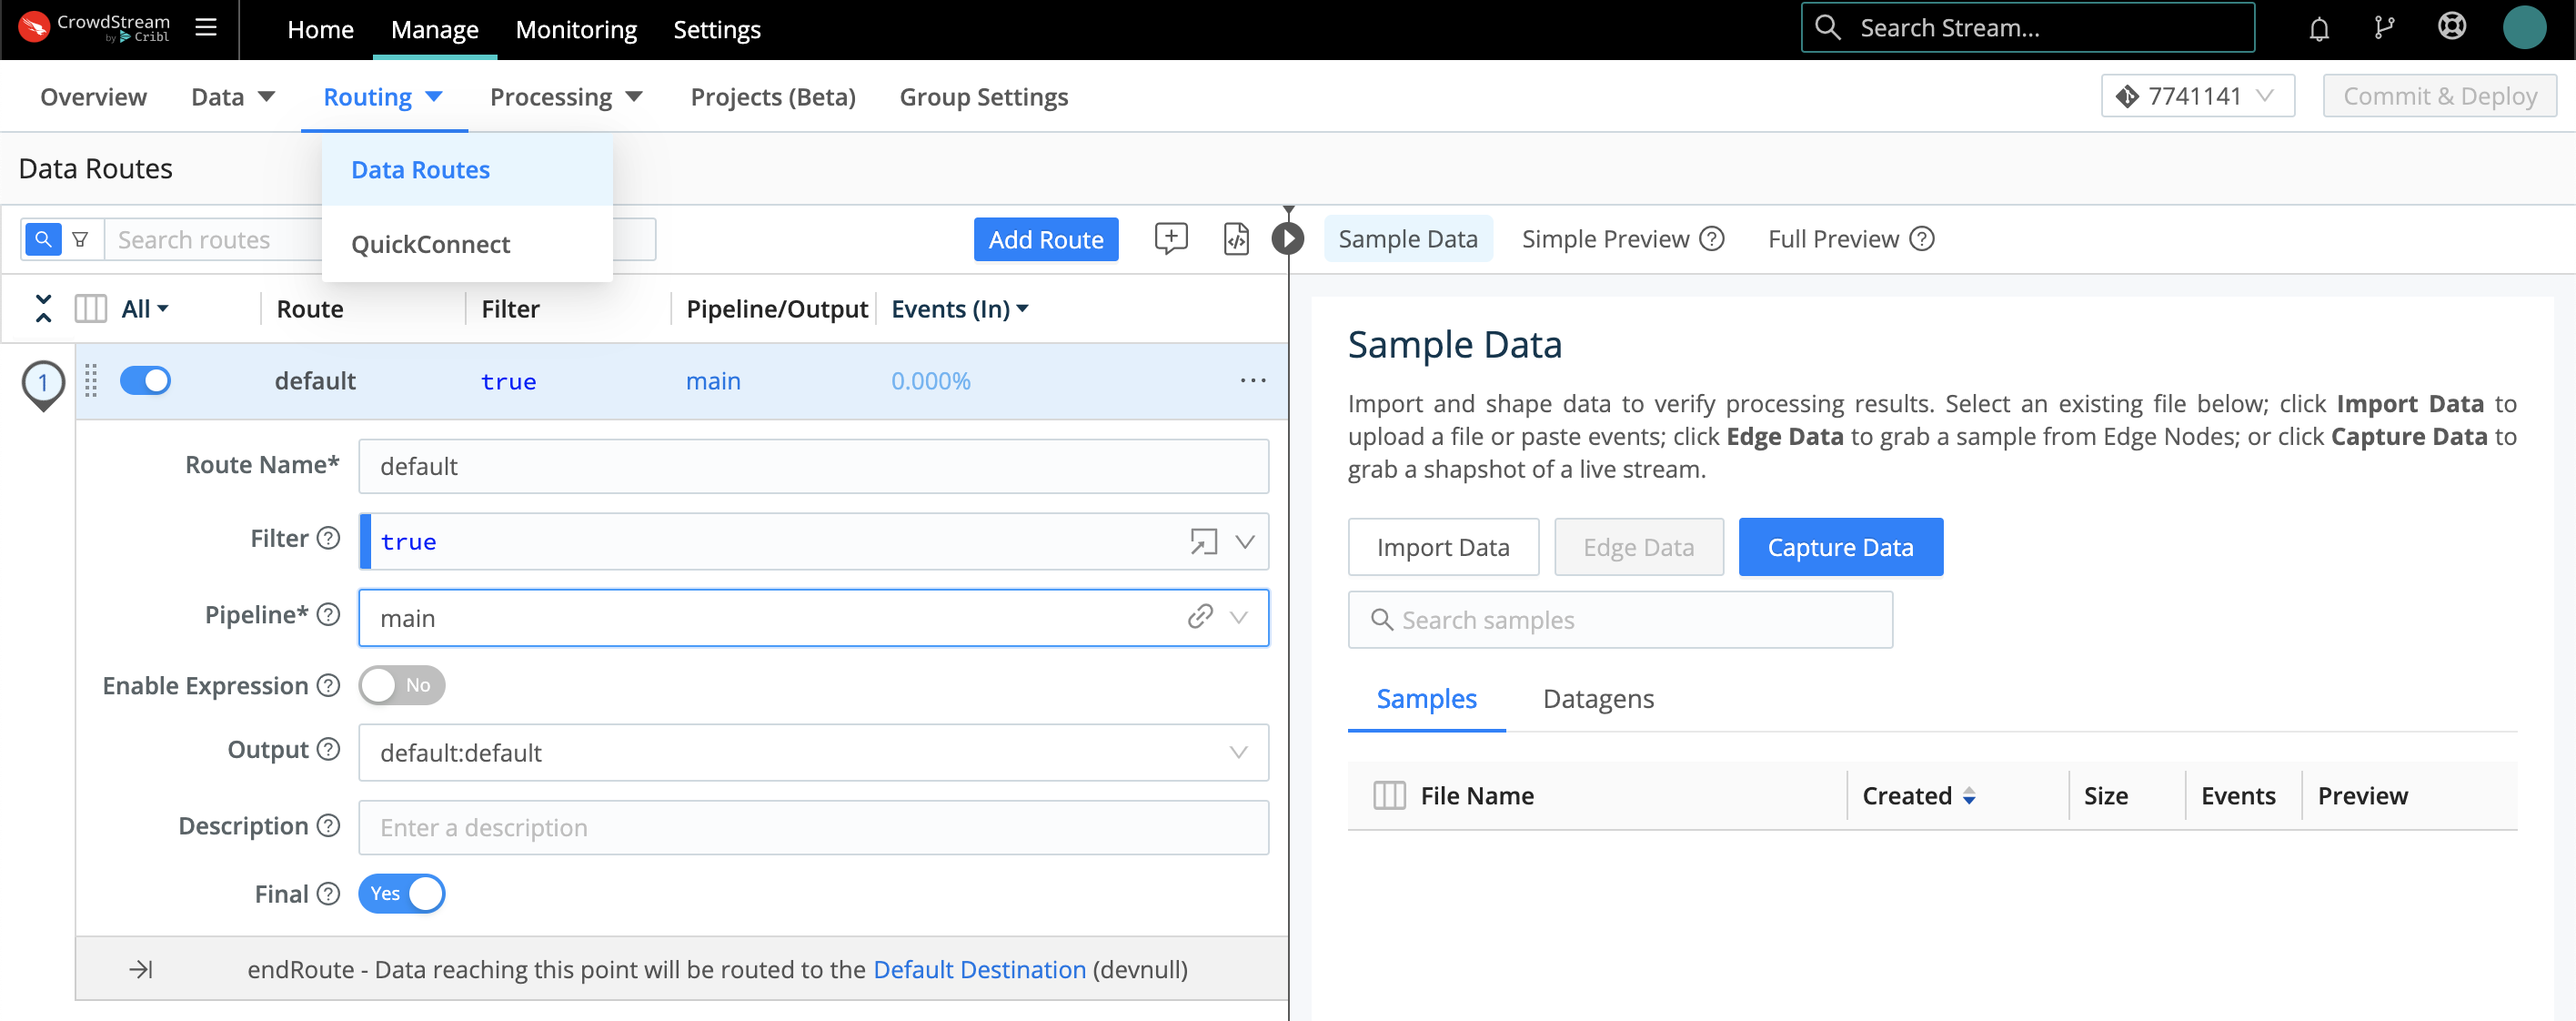 |
As you can see, CrowdStream ships with one starter Route named default. It's configured as follows:
The Filter expression is set to true. This simple, default expression makes data from all active Sources available to this Route. (See finer filtering options below.)
The Pipeline drop down is where you set the 1:1 Pipeline:Route connection. This starter Route's Pipeline defaults to main, but you can select any one other configured Pipeline.
The Output drop down defines the single Destination for this Pipeline:Route connection. If this isn't already set to your LogScale Destination, you'll most likely want to select that here. (Note that each option displayed on this list corresponds to the unique, arbitrary Output ID set on one instance of a Destination type. So some names might initially be unfamiliar.)
 |
To get data flowing, jump ahead to commit and deploy your new configuration.
Filter a Route's Input Data
When you want a Route to ingest data from only one Source, or a subset of Sources, you expand its Filter expression beyond the default true catch all.
Filter is itself a drop down. Open it to select among typeahead suggestions for several common inbound data types.
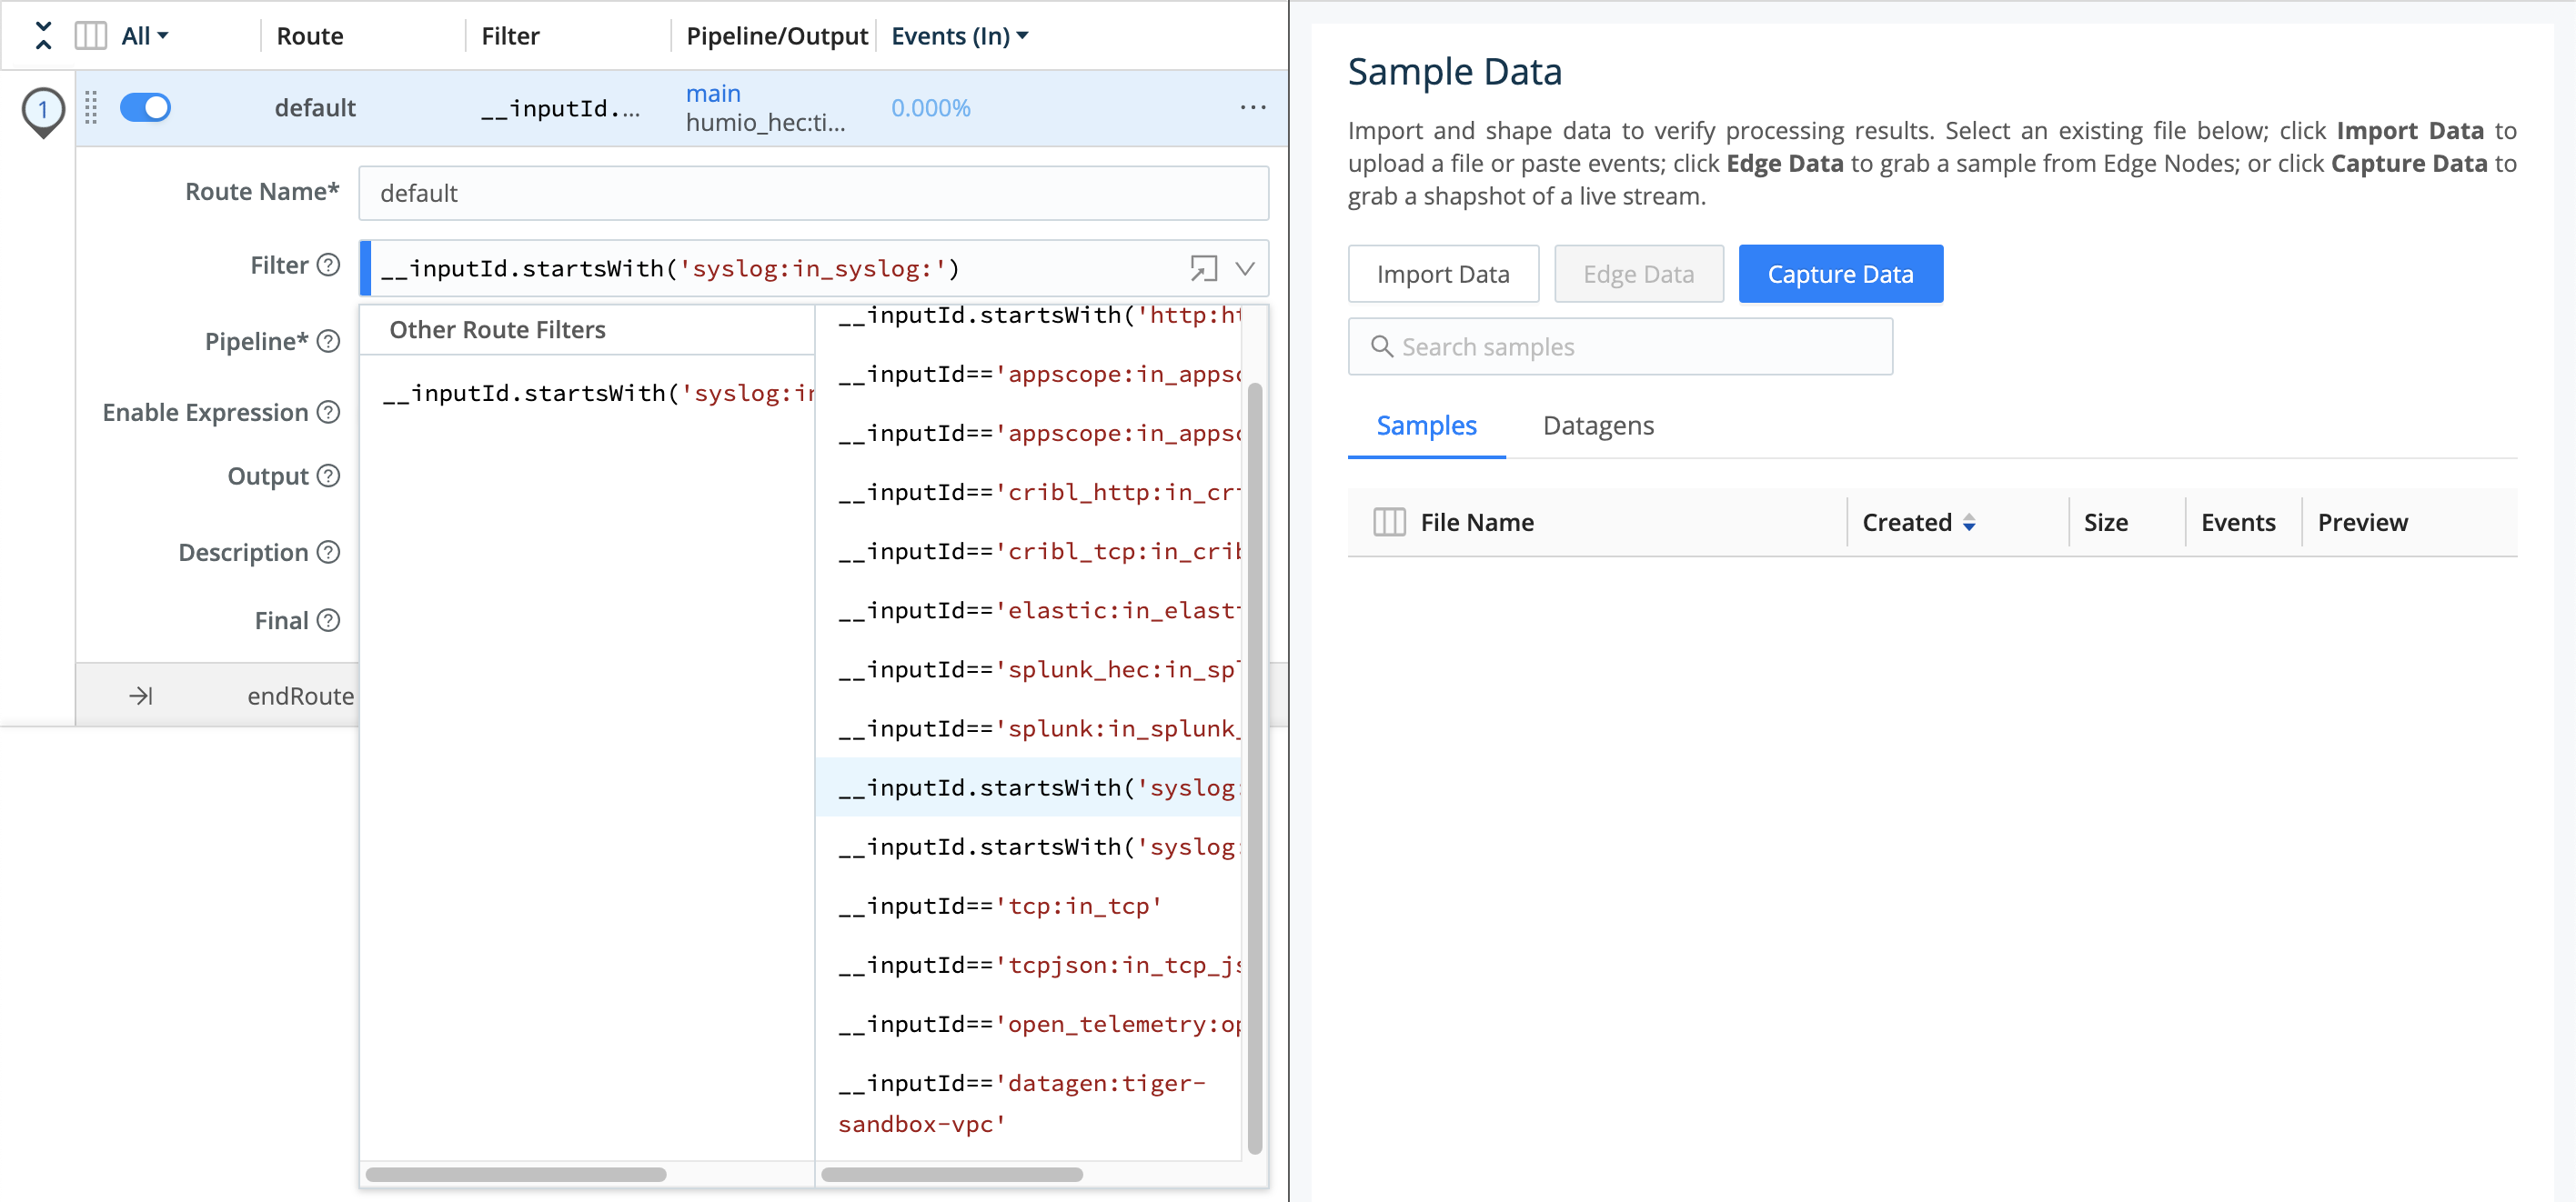 |
You can select one of these expressions and then modify it, using the
same __inputId syntax. In the example expression
below, note that the identifier after the : is
— as with the Output
options we saw above — the arbitrary name of one Syslog Source
instance:
__inputId.startsWith('syslog:in_syslog:')
For More Information see Cribl Expression Syntax > Filters