Manage Roles

Security Requirements and Controls

Manage and customize user roles in LogScale, including creating new roles, setting permission levels, and modifying existing predefined roles like Reader, Admin, Member and Deleter. Users with Organization Owner status or appropriate permissions can access the Roles page to configure role-based access controls, assign granular permissions, and view aggregate permissions across multiple roles to maintain security best practices.

All roles available and the permissions granted via the roles are displayed in the User Interface in the Roles page.

Depending on the system level permission you've chosen, you can assign different permissions for any new role you create. For example, you can create an Organization management role type and name it, say, "Operations", to which grant permissions such as the capability to view all internal notifications, or to manage other users.

While LogScale comes with a predefined set of roles — Admin, Member and Deleter — they may be customized to your specific needs. Keep in mind that it's generally a good idea to grant as few permissions as possible and to add more as needed.

Note

You need to be an Organization Owner on Cloud or a root user on self-hosted installations to have access to the Roles page and assign roles to users. Or you need to have the Change user access permission:
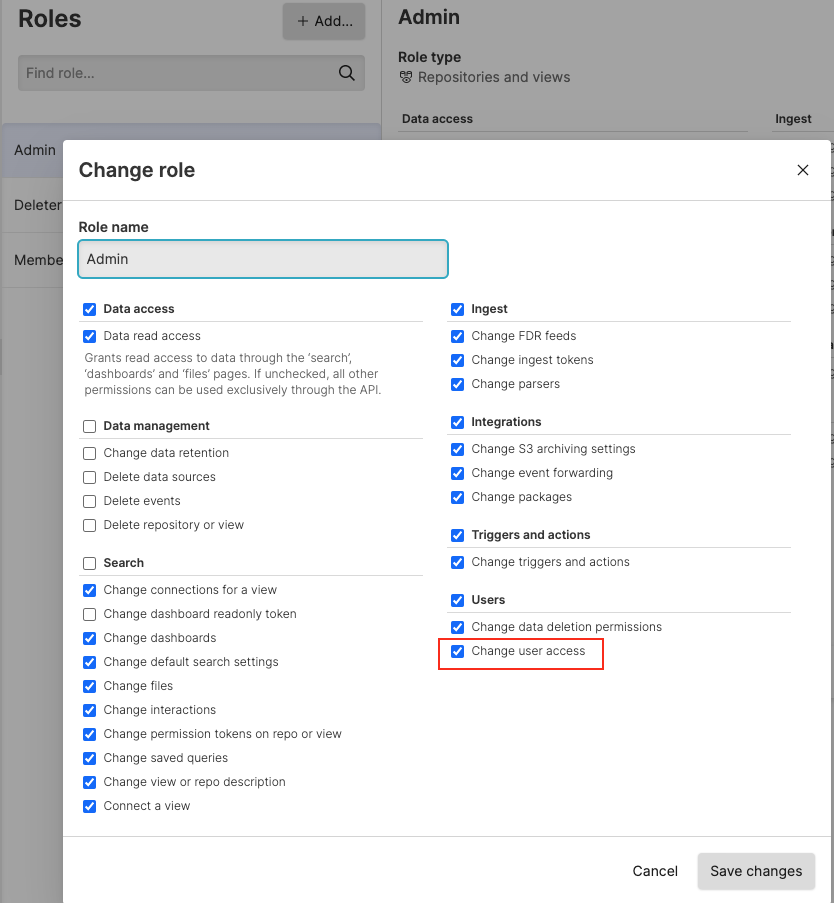
Screenshot of the LogScale permission configuration interface highlighting the 'Change user access' permission checkbox. This critical permission grants users the ability to access the Roles page and assign roles to other users without requiring Organization Owner status on Cloud or root user privileges on self-hosted installations. The permission appears within a settings panel where role-based access controls are configured, demonstrating how administrative responsibilities can be delegated to non-owner users through specific permission assignments.

Figure 68. Change User Access


See the full list of available permissions along with descriptions of their usage at Repository & View Permissions.

To add new roles or customizing existing roles:

  1. Click on the user menu icon in the upper right corner and select Organization SettingsRoles on the left.

    Screenshot of the LogScale Organization Settings Roles page showing a tabular list of all available system and custom roles. The interface displays predefined roles (Reader, Admin, Member, Deleter) and any custom roles, with information about the permissions associated with each role. The page includes a '+ Add' button for creating new roles and options to edit or delete existing roles. This administrative interface is the central hub for role-based access control management and is only accessible to Organization Owners or users with specific permission management privileges.

    Figure 69. Roles


  2. Click + Add, enter a name for your new role such as "Operations" and select a Role type e.g. Organization management.
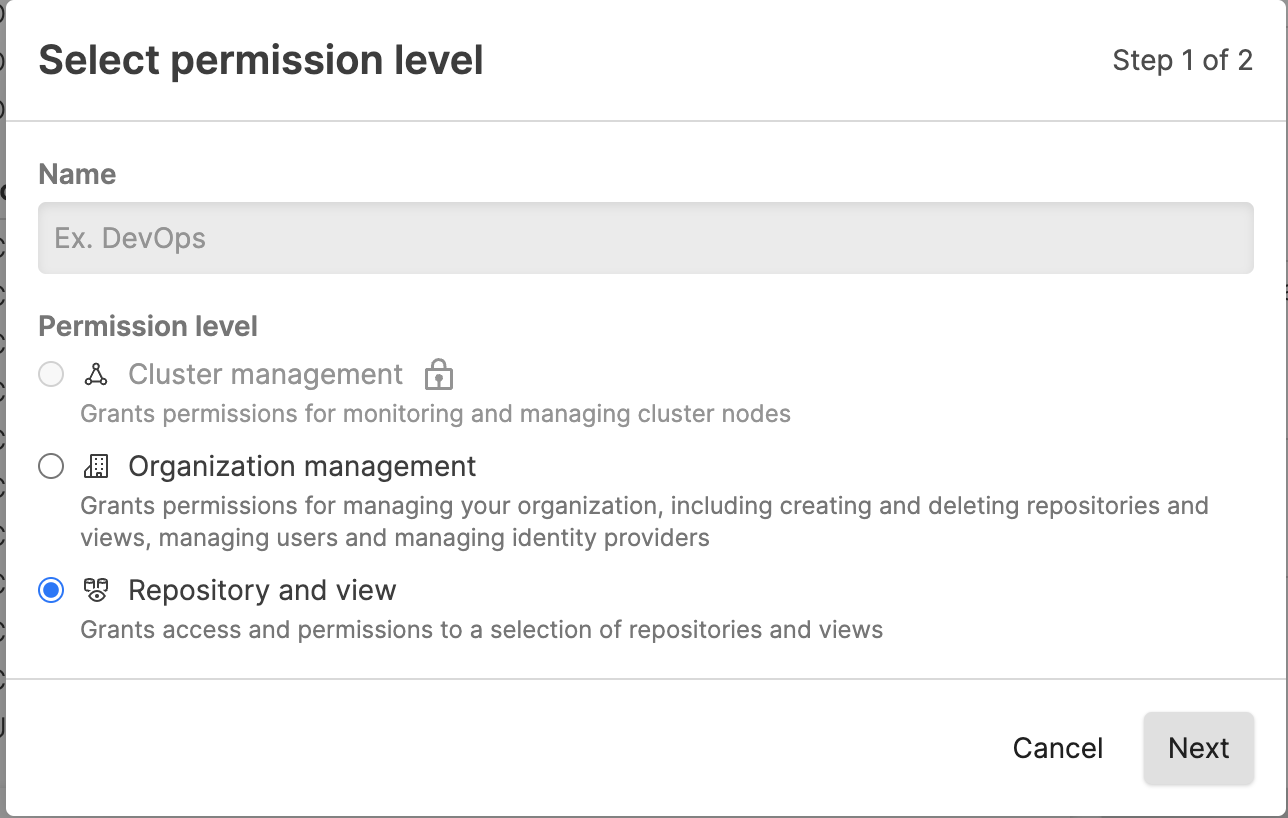
    Screenshot of the LogScale 'Add Role' dialog showing the initial step in creating a custom role. The interface displays a form with an input field for entering the role name (such as 'Operations') and a dropdown menu for selecting the permission level category (such as 'Organization management'). This is the first screen in the role creation workflow, where administrators define the basic parameters of the role before proceeding to select specific permissions in the next step.

    Figure 70. Adding Roles


  3. Set the permissions for the new role. For example, if you wish to create a strictly read-only role, select the Data access checkbox and nothing else, then click Create role:
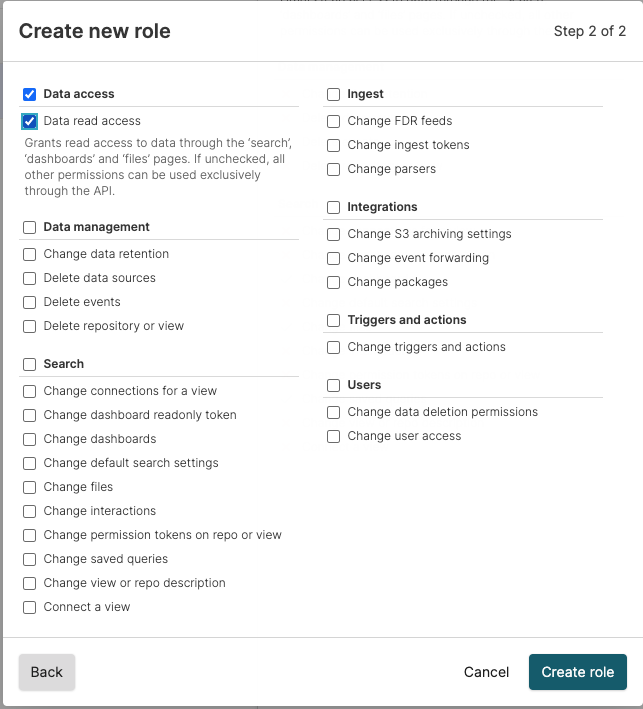
    Screenshot of the LogScale permission configuration interface where specific permissions are assigned to a newly created role. The screen displays a comprehensive list of permission checkboxes organized by functional categories, allowing administrators to precisely select which capabilities the role will have. The example shown relates to creating a read-only role by selecting only the 'Data access' checkbox and leaving all other options unchecked. The interface includes a 'Create role' button at the bottom to finalize the role creation.

    Figure 71. Assigning Permissions to Roles


    The new role can now be assigned to groups via the Groups page of the User Interface, where you are prompted to configure the permission levels for a group — see Figure 61, “New Group Created”.

  4. To customize an existing role and change its permissions, or to remove it, select the role and click Edit role or Delete role:
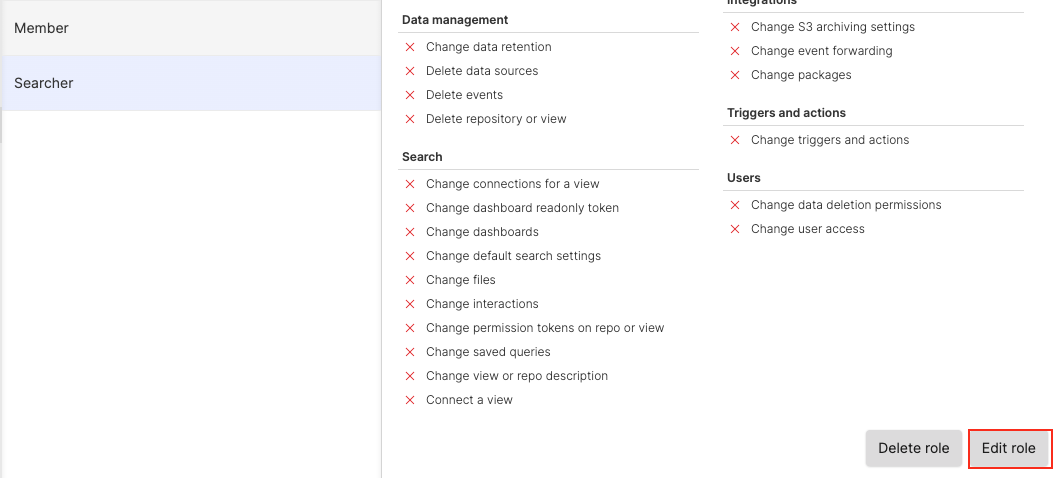
    Screenshot of the LogScale role management interface showing a selected existing role with two action buttons: 'Edit role' for modifying the role's permission settings and 'Delete role' for removing it from the system. This interface appears after selecting a role from the main Roles page and serves as the starting point for administrators to maintain existing roles by either updating their permission assignments or removing roles that are no longer needed. The screen likely displays information about the selected role, including its name and current permission settings.

    Figure 72. Customizing or Removing Roles


Aggregate Permissions

When you've defined more than one role under a Repository and View, Organization or Cluster, you can get a combined view of the available permissions for all roles — all permissions in a specific repository, for example. This gives you an overview if you want to know exactly which permissions you have.

  1. Click on the user menu icon in the upper right corner and select Organization SettingsUsers on the left.

  2. Select one of the users that have multiple roles assigned and click on your repository.

  3. Click the Show aggregate permissions button: the list of aggregated permissions will be displayed on the right.
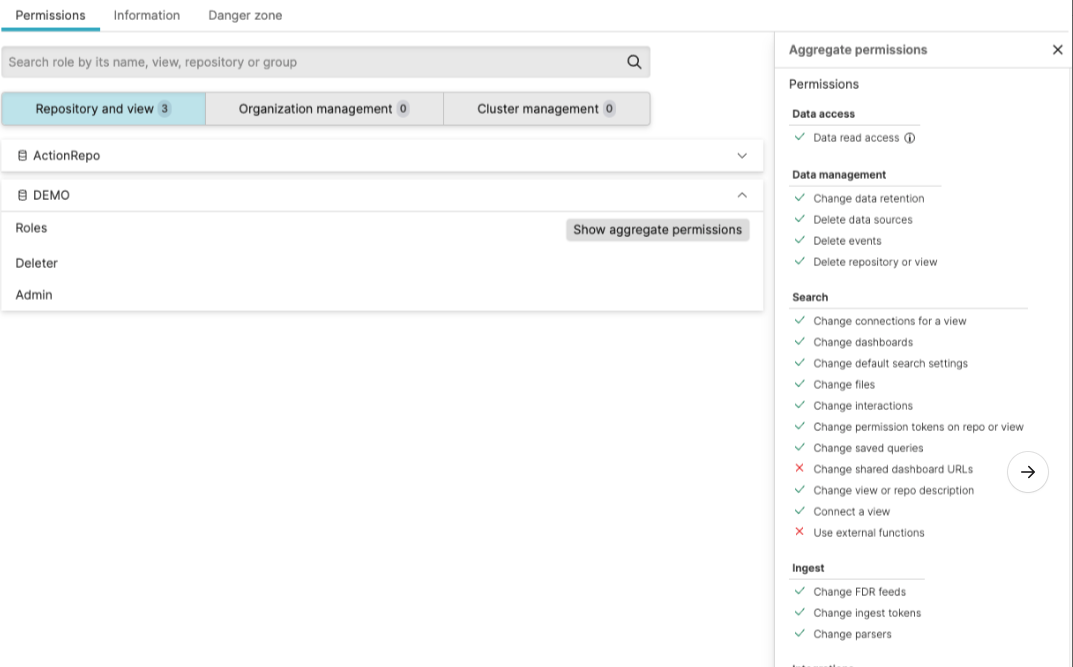
    Screenshot of the LogScale aggregate permissions view showing a consolidated list of all permissions a user has for a specific repository through multiple assigned roles. This interface appears after selecting a user with multiple roles and clicking the 'Show aggregate permissions' button. The screen displays a comprehensive permission matrix that combines all access rights granted through different roles, allowing administrators to quickly assess the user's effective permissions across the system. This view is particularly valuable for security auditing and ensuring the principle of least privilege is maintained even when users have multiple role assignments.

    Figure 73. Aggregate permissions


You can always select a single role instead to get only the permissions for that role.