

Okta
Security Requirements and Controls
Change identity providerspermission
LogScale allows for the integration of many applications. If you want to integrate Okta into LogScale, you can do so by creating an application (i.e., an app) in Okta. To do this, you'll have to use Okta's system, in particular the SAML (Security Assertion Markup Language) section. This is used to authenticate and authorize the app.
Important
For Cloud customers, please gather the information on Authentication & Identity Providers, and contact Support, and they can work with you to setup your chosen IdP service.
Creating an App in Okta
From the main page of the Okta user interface:
Click on Admin. This will bring you to the Admin Dashboard. From there, go to applications by clicking the button labeled in the header.
Next, click on the button labeled, . Then click on the button labeled, . You'll see a box similar to the one in Figure 40, “Creating an App in Okta”. Incidentally, you can click on any image on this page to enlarge it. Now, choose Web as the platform to use and select SAML 2.0 for the sign-on method. Then click, .
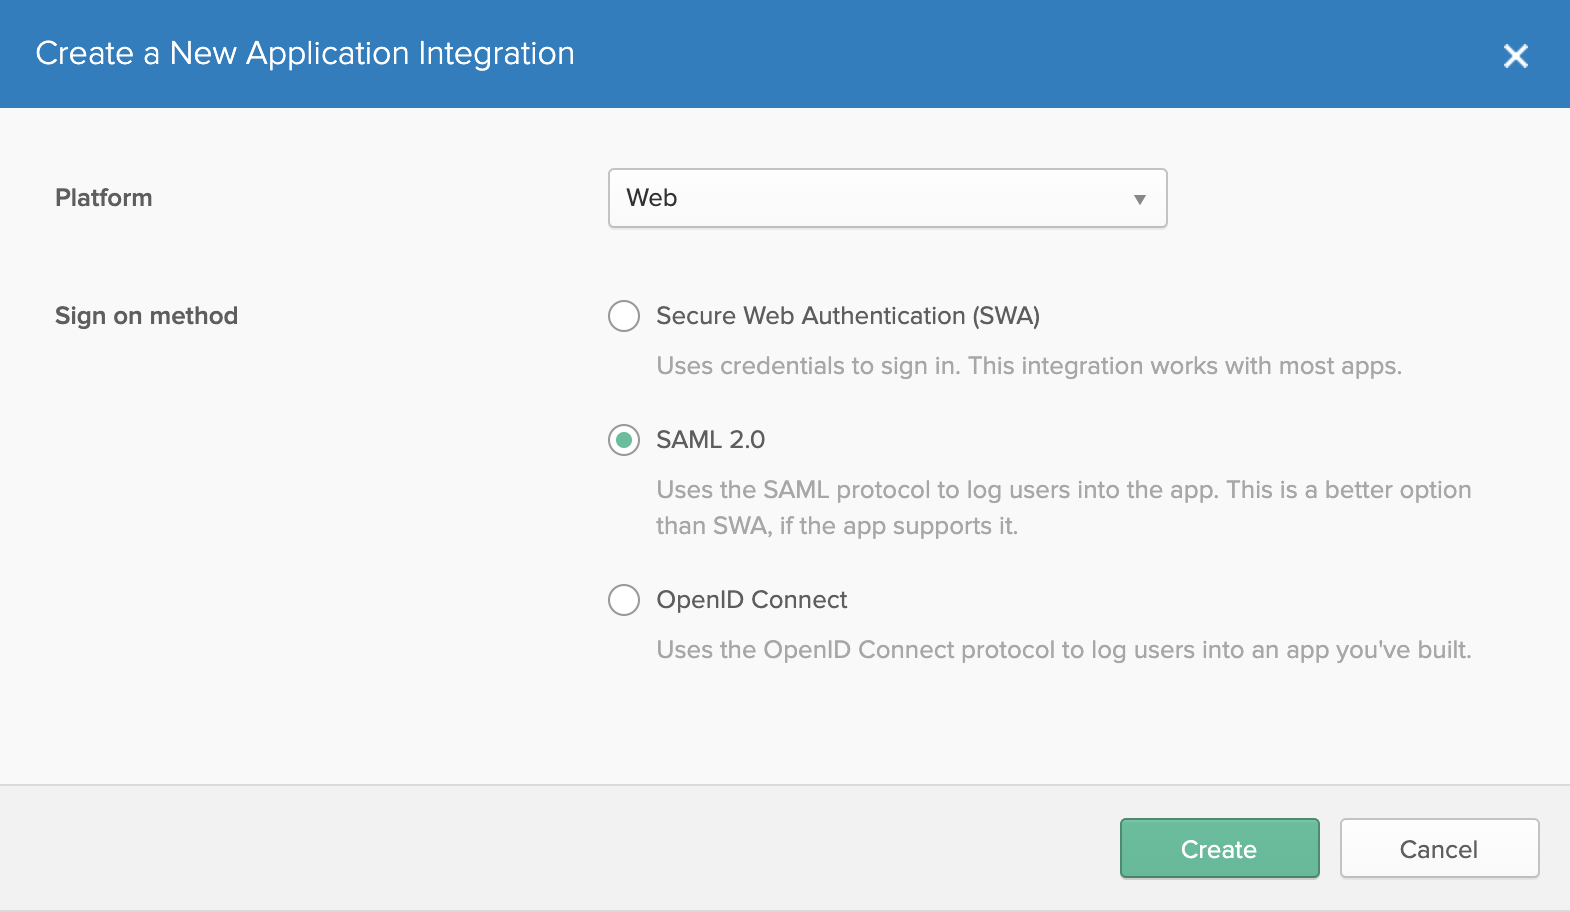
Figure 40. Creating an App in Okta
You'll now be asked to give your application a name. Name it
LogScale. You can also upload an image for the login button. You can use our logo for this purpose:
When you're finished, click to continue.
You should be on the SAML Settings configuration section. In the General area, you will need to set a few values to tell Okta how to connect to LogScale. The table below lists all of the fields you'll need to set, and the values to give them:
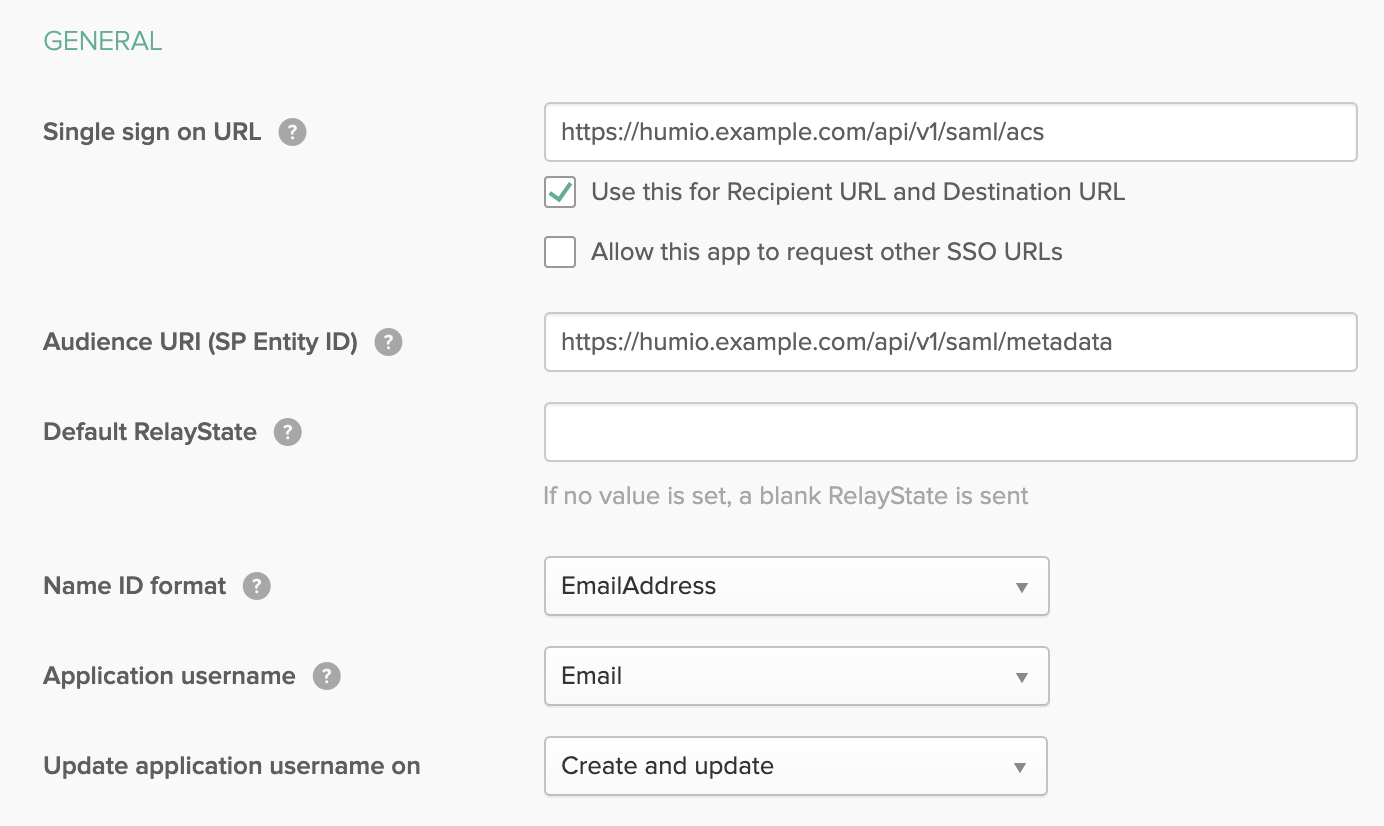
Figure 41. Create New App
Field Value Single Sign on URL http(s)://$YOUR_LOGSCALE_URL/api/v1/saml/acsAudience URI (SP Entity ID) http(s)://$YOUR_LOGSCALE_URL/api/v1/saml/metadataName ID Format EmailAddressApplication Username EmailTo understand better where these values are entered, you can see an example in the screenshot shown in Figure 41, “Create New App”.
Next, you'll have to add a single attribute in the Group Attribute Statements area of the SAML settings configuration. Set its Name to a value of
group, with the Name format set toBasic. Set the Filter toMatches regexwith the value as.*When you're finished doing all of that, click .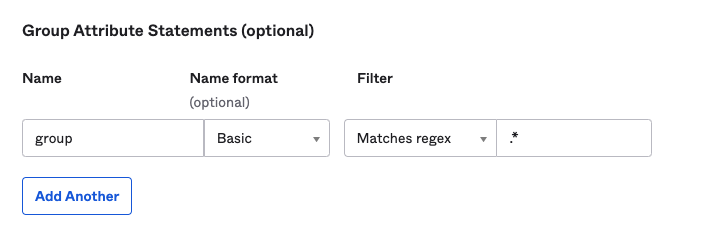
Figure 42. Group Attribute Statements
For the Feedback step, choose I'm an Okta customer adding an internal app — assuming you are one. Check the box where it says, This is an internal app that we have created. When you've done this, click the button labeled, .
On the next page, you should see a detailed view of the application you just created. On that page, click . This will provide you with three key pieces of information you'll need to configure LogScale to work with Okta:
the Identity Provider Single Sign-On URL
the Identity Provider Issuer
the X.509 Certificate
You can see all of this in Figure 43, “Configuring LogScale”. Leave that page open for reference for when you're configuring LogScale in a moment.
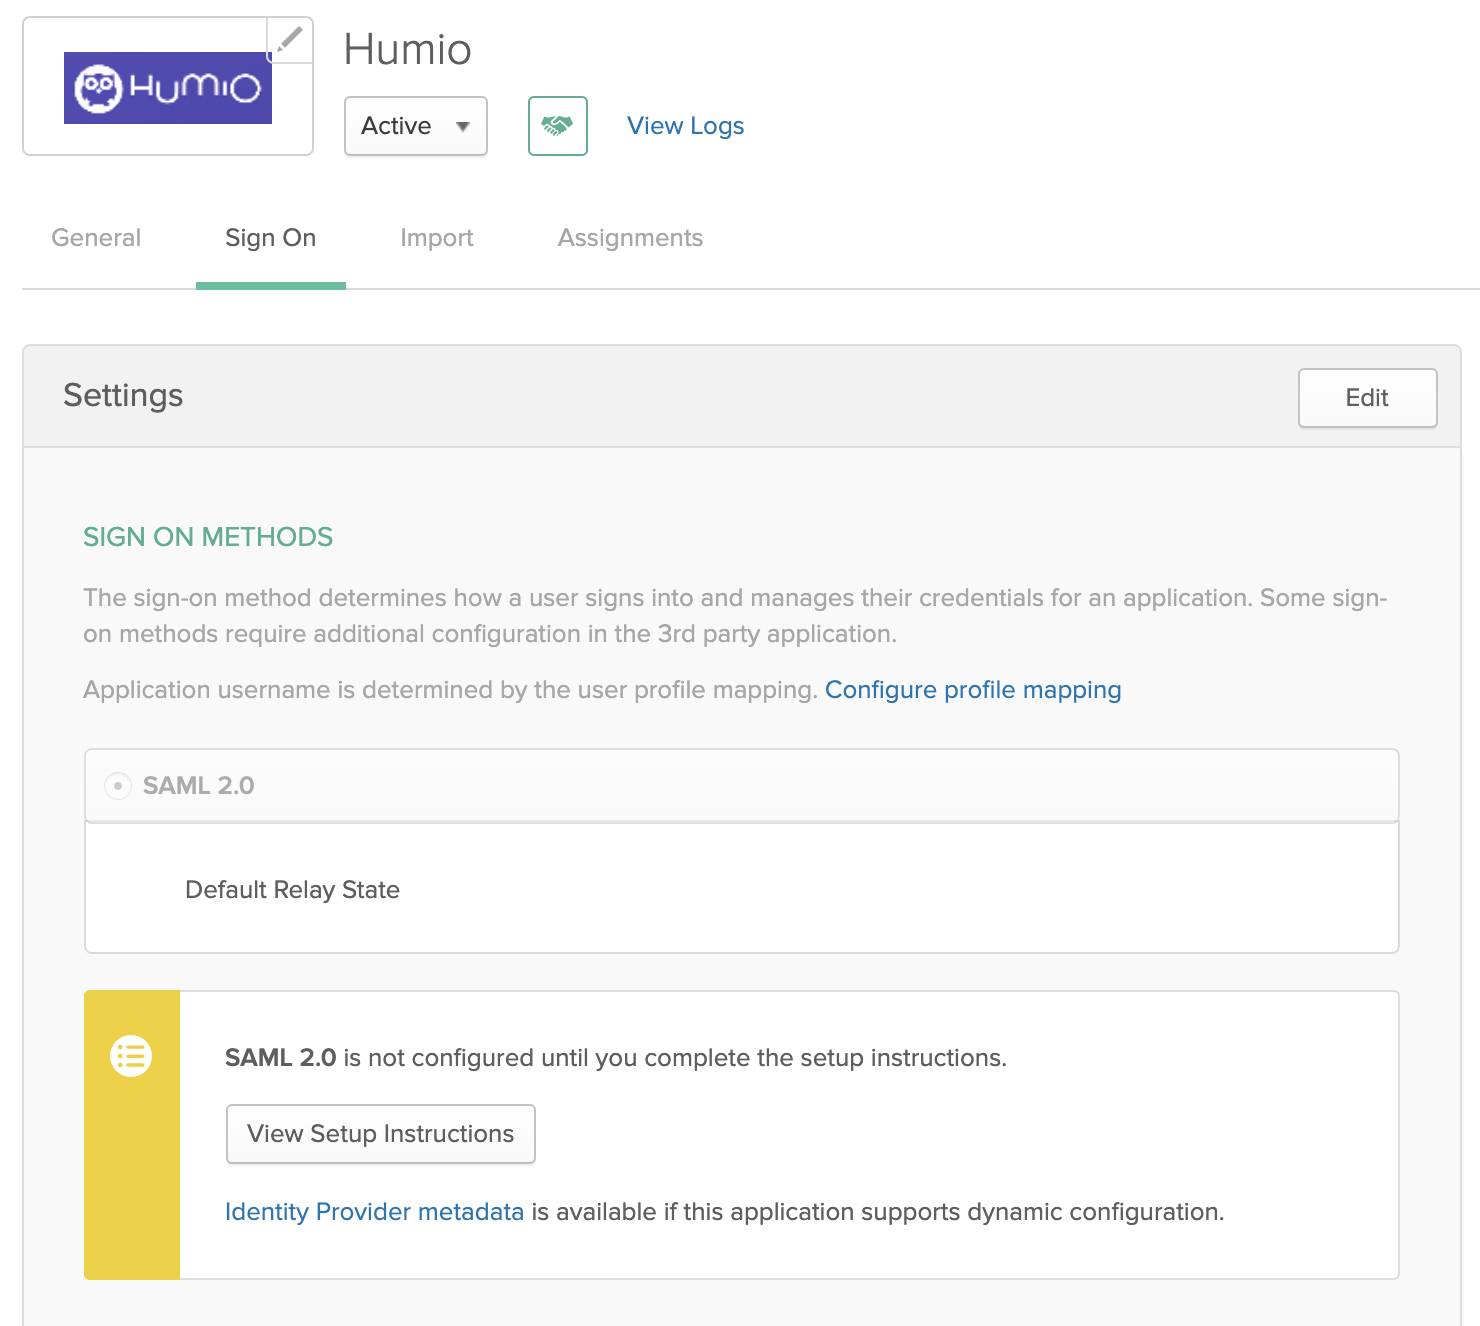
Figure 43. Configuring LogScale
At this point, Okta is configured to work with LogScale. However, there is a little more to do, but mostly on your LogScale system.
Configuring LogScale for Okta
After you've done what needs to be done to prepare Okta for integrating with LogScale, you'll need to configure LogScale. What you'll do will depend on whether you're using LogScale Cloud or are self-hosting LogScale on your own server.
To use SAML with LogScale Cloud, go to the Authentication & Identity Providers documentation page.
When you've finish preparing LogScale, go to the Sign On tab in Okta. In the Settings section, click on . This will provide you an input box labeled, Default Relay State. Paste the Integration URL for LogScale into that field and save when done.
You'll need to give users in Okta permissions to use the app. Assign the application to any users or groups you want to have access to LogScale. See Okta's instructions on how to do this. Otherwise, if everything went according to the instructions on this page, you're now ready to use Okta with LogScale.
Customizing Email Invite Address
The email addres that Okta sends to the user as the login email to use for authentication with LogScale can be modified. This is useful if emails change, domains change, or if there are multiple email domains and want to use a single domain as the identifying email address.
To achieve this, the email address must be transformed as part of the mapping process within your Okta configuration:
Go to the the Okta configuration and choose Profile Editor → LogScale App → Mappings → Okta to LogScale.
Edit the mapping using the Okta expressions mechanisms. In the example below, the domain name is being stripped from the email address (after the
@) and then reconstructed to the new email address:String.substringBefore(source.email, "@")+"-"+$appuser"+"@"+String.substringAfter(source.email, "@")
For more information on expressions, see Modify attributes with expressions and Okta Expression Language overview guide Okta documentation pages.