

CyberArk Privileged Access Manager Self-Hosted
CyberArk is as established leader in privileged access management. CyberArk offers an Identity Security Platform to secure identities — human and machine — end-to-end. Having fast search across this data set and being able to pivot and correlate with other data sources in LogScale gives cyber defense teams an advantage in detecting attacks and completing investigations faster.
The LogScale — CyberArk integration and package described here supports both Vault and Privileged Threat Analytics (PTA) logs from CyberArk.
Configure Ingestion to LogScale
To ingest logs into LogScale CyberArk must be configured to apply a specific log export format so that it sends cef syslog to a customer syslog receiver. From the syslog receiver the CyberArk logs can be written to a local destination and then shipped to LogScale with a log shipper. The LogScale marketplace package assumes that the log shipper wraps syslog in JSON and uses the LogScale HEC ingest API.
If PTA is enabled in CyberArk this method of log collection will cover both Vault and PTA logs.
The flow of logs between CyberArk, customer syslog server and LogScale is show below.
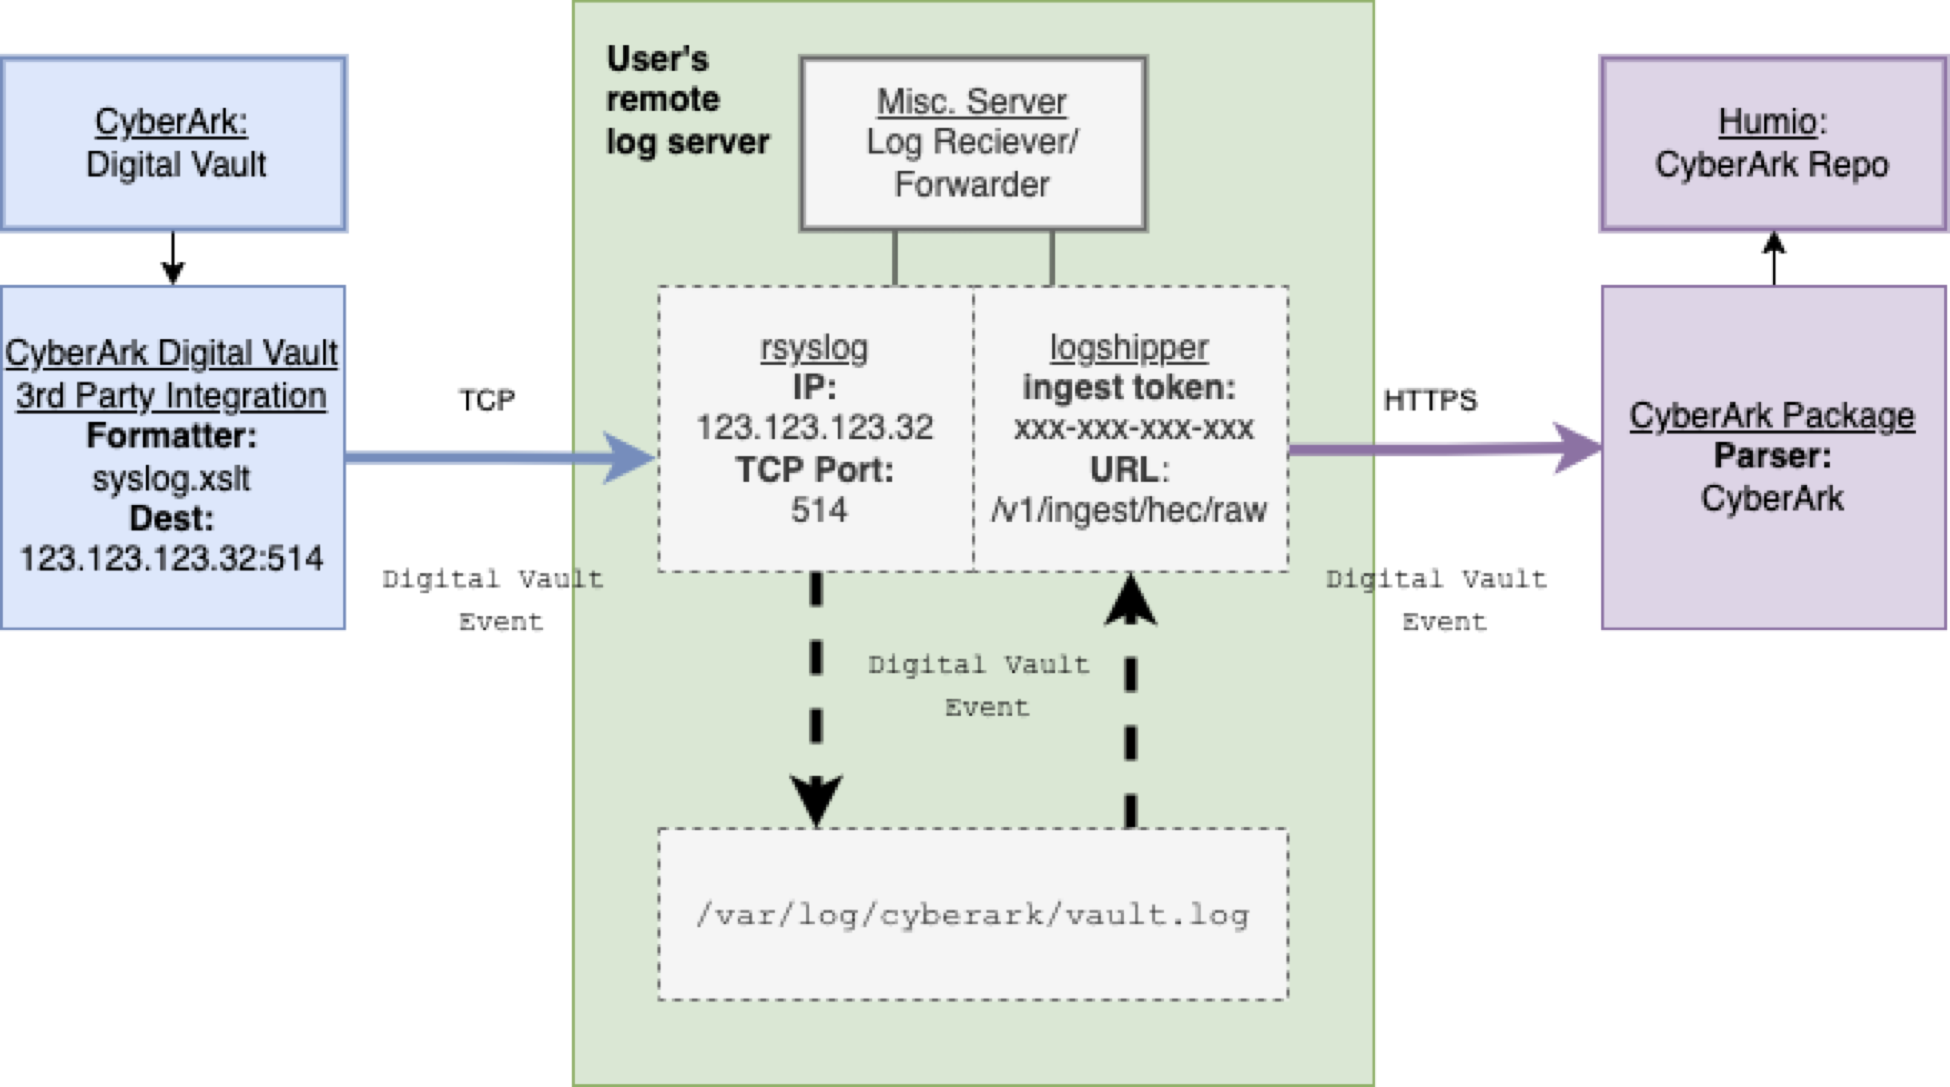 |
Figure 34. Data Flow Between syslog and LogScale
Preparations in LogScale
You'll need to create a new repository in LogScale to hold the CyberArk data. If you're not sure how to do this, see the Create a Repository documentation page.
Once you've created a repository, from that target repository in the LogScale Interface, select the Settings tab and then Packages on the left. From there, choose Marketplace and install the LogScale Package for CyberArk (i.e. cyberark/vault)
When you select the CyberArk package, it will describe what the package provides and other related information. Of most interest is that it will install the required CyberArk parser. And it will install an overview dashboard that you can edit later to suit your needs.
When it's finished installing, from the CyberArk repository, go to the Settings tab. In the Ingest section, click API Tokens on the left. In the right panel, click + Create Token to create a new token. Be sure to assign it the CyberArk parser. You can see the results of doing this in Figure 35, “CyberArk Ingest Tokens”.
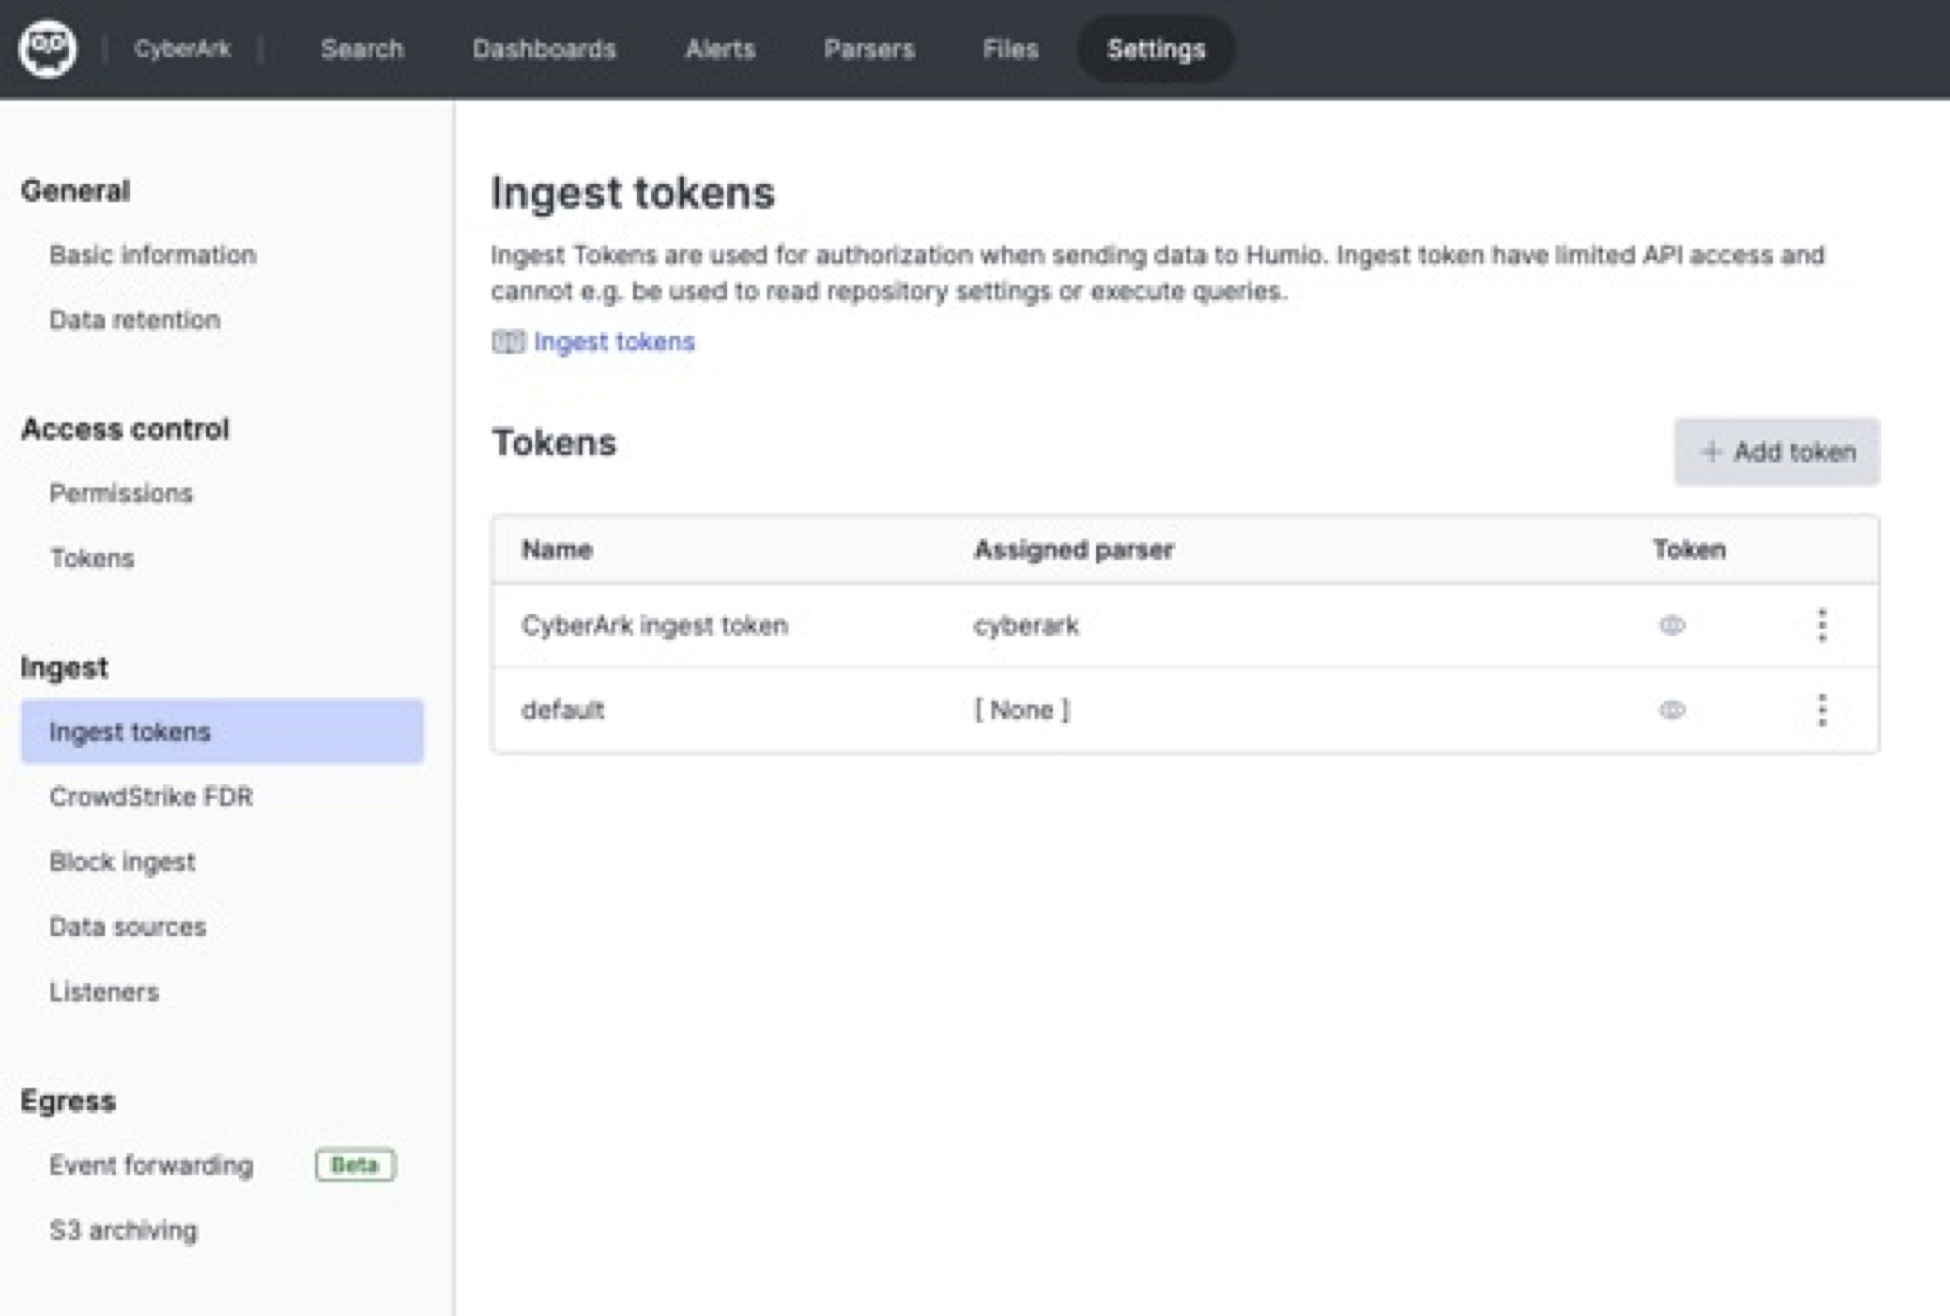 |
Figure 35. CyberArk Ingest Tokens
Before leaving this page, click the copy icon for the CyberArk token to copy it to your clipboard, or save it temporarily elsewhere.
Now that you have a repository set up in LogScale to receive data from CyberArk, you're ready to configure CyberArk.
Configure CyberArk
Configure CyberArk Vault to log to an external IP and format the logs with the default formatter,
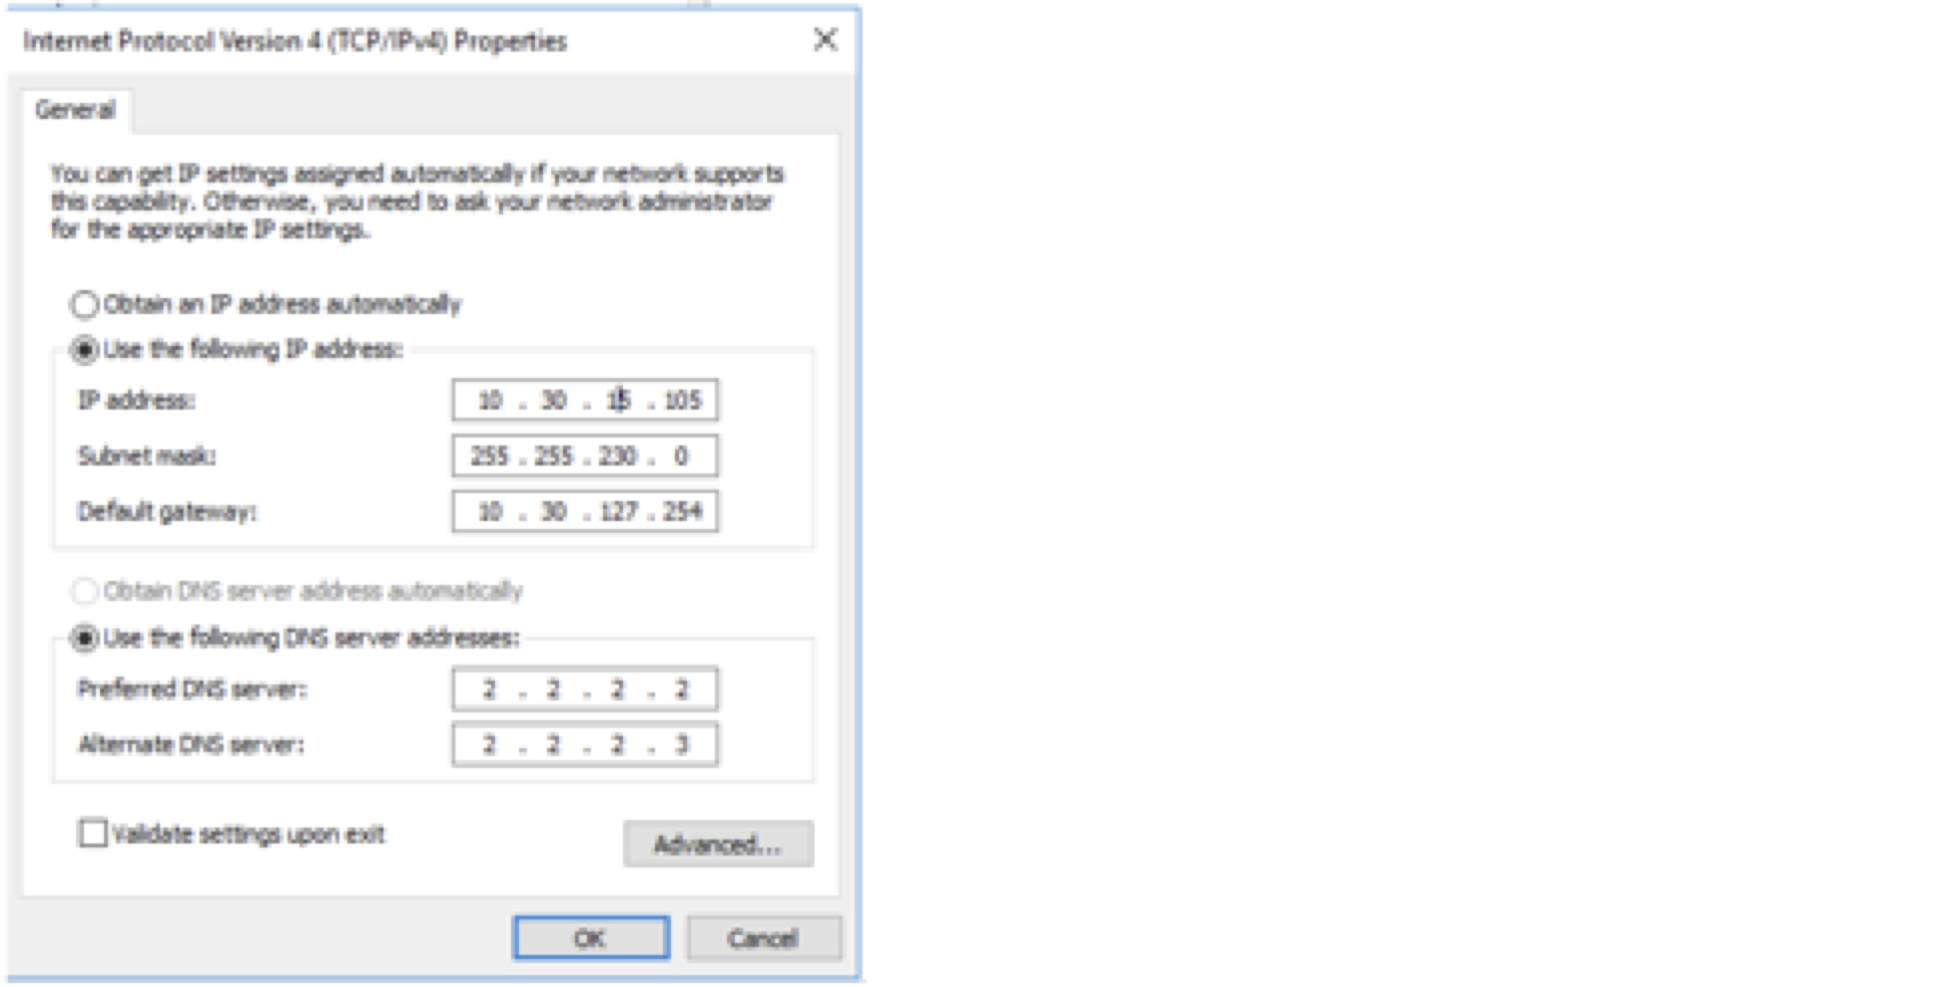
Syslog\Arcsight.sample.xsl.Configure the DNS Server on the Vault Server.
Select Internet Protocol Version 4 (TCP/IPv4), and then select properties. Use your syslog server's IP address as the destination in the first box (10.30.15.105 in the example below).
Next, open the
DBParm.inifile and configure the parameters relevant for syslog. Most importantly, confirm that your configuration file refers toSyslog\Arcsight.sample.xslfor syslog formatting your log output. The configuration file should be written as follows (with your own server and port):Example config:
iniSyslogServerIP=192.168.1.1 SyslogServerPort=514 SyslogServerProtocol=TLS SyslogTranslatorFile=Syslog\Arcsight.sample.xsl SyslogMessageCodeFilter=7,8,295 SyslogTrustedCAPath="syslogCA.pem" UseLegacySyslogFormat=noFor more detailed instructions please refer to the CyberArk documentation.
Configure a log receiver and log shipper of your choice
With the configurations described above, CyberArk will forward Vault and PTA will forward its logs to your remote log server.
Configure a log receiver, such as rsyslog, to accept remote logs via TCP on port 514 and write these logs to a destination like
/var/log/cyberark/vault.log.Next, configure a log forwarder, like Falcon LogScale Collector to forward logs to your LogScale instance.
Use an Authorization HTTP header with the ingest token associated with the CyberArk parser provided with the package.
Alternatively, you can use your own log shipper of choice but to be compatible with the LogScale marketplace package it should wrap cef syslog in JSON body and send to the LogScale HEC raw ingest API.
You should now be seeing CyberArk Vault data arriving in LogScale and can see the dashboards start to populate as data arrives and can search the data in LogScale.