
ServiceNow Alerts
Enabling the Integration
You must:
Sign up for ServiceNow
Visit https://developer.servicenow.com/dev.do and follow the online registration.
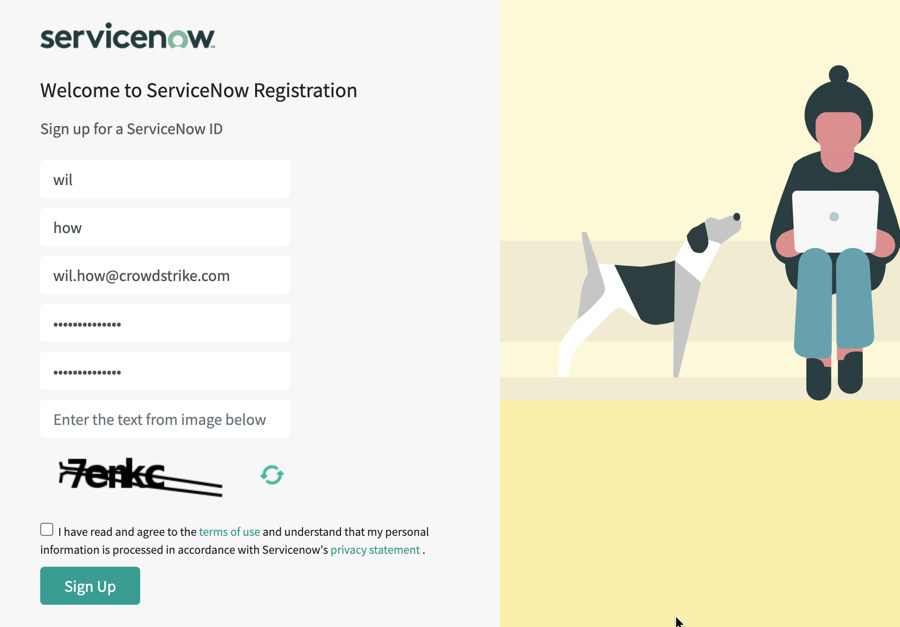
Figure 66. Servicenow
Once signed up, you'll need to continue from your email inbox. Click on the email to verify your account and you'll be directed to the developer account main page. Select the UX you want to complete the set up.
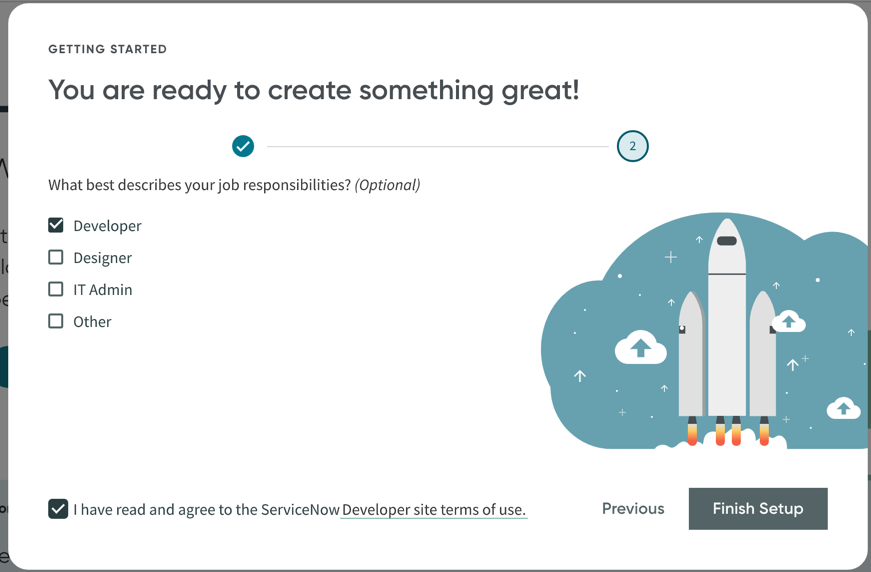
Figure 67. Servicenow
Create a Developer Instance
Once signed up, you should have access to create a new developer instance.
Click the button in the upper-right side of the page.
You will be given a username and password for this instance that is separate from your username/password that is used in the developer account.
This developer instance you be created automatically for you (just wait a few mins)
Once the instance is fully stood up (automatically), a pop-up will display details about your new instance (URL to use, as well as credentials)
 |
Figure 68. Servicenow
Ensure that your role is Admin. If it's not, you can change it in your profile:
Go to your profile and click on .
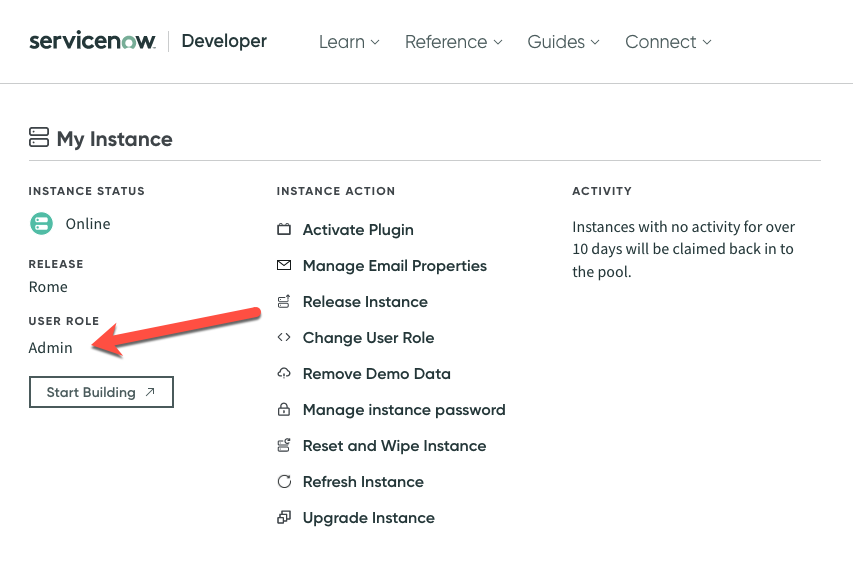
Figure 69. Servicenow
Update your role to Admin.

Figure 70. Servicenow
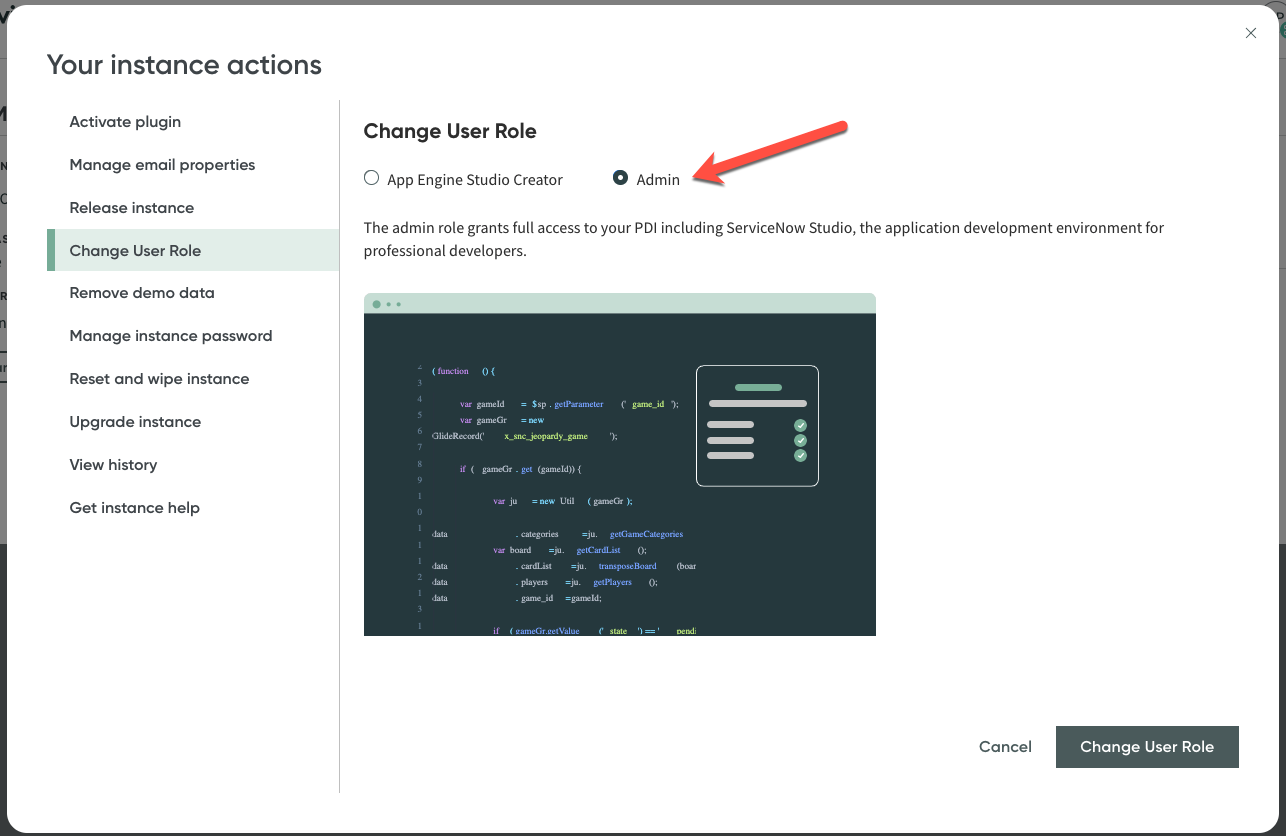
Figure 71. Servicenow
Create a Web Service
On the main page, click the button
Log on to ServiceNow and the main
App Engine
                    Studio
page is displayed.
On the top left, click the menu, and search for
web services.
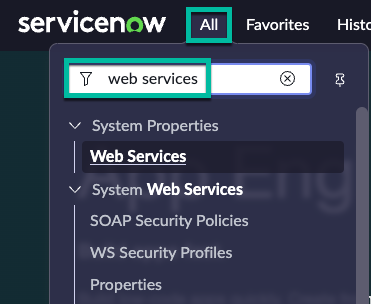
Figure 72. Servicenow
Click under →. It may take a little while for the new web service to be created (a timer dialog will display in a banner note).
Proceed to create a new Web Service. Each row is a new field created for this web service. These fields will be the variables where we'll send data to ServiceNow. You can also specify the length of each field. Once you're done, click on the button.
In the top section:
Label: Inbound LogScale Integration
Name: <automatically filled in based on what is typed in Label field>
For
Target tablefield, search for and select .
In the bottom section, double-click in the field and add the following labels (repeat for each value)
Summary *** also set the Length field at the end to "Medium (100)" ***
Full Description *** also set the Length field at the end to "Extra Large (4000)" ***
Incident Status
Request For
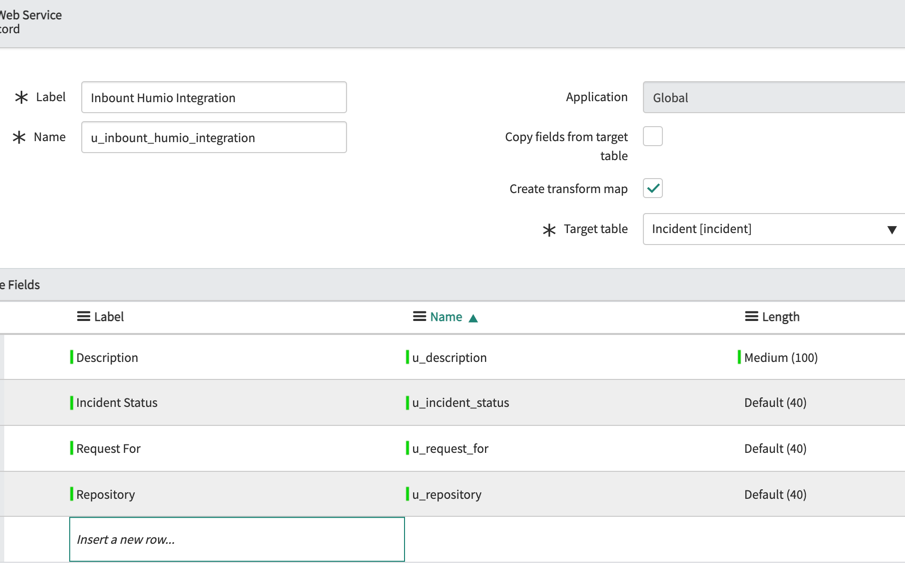
Figure 73. Servicenow
Once the Web Service is created, the next step is to start mapping these new fields to existing fields in ServiceNow's Incident table in the Table Transform Map form.
On the upper-left, set the name for the mapping
Name: (defaults to "Inbound LogScale Integration")
On the upper-right, set the target table:
Target table: Incident (defaults to Incident)
Click on at the bottom left of the screen to start mapping the fields.
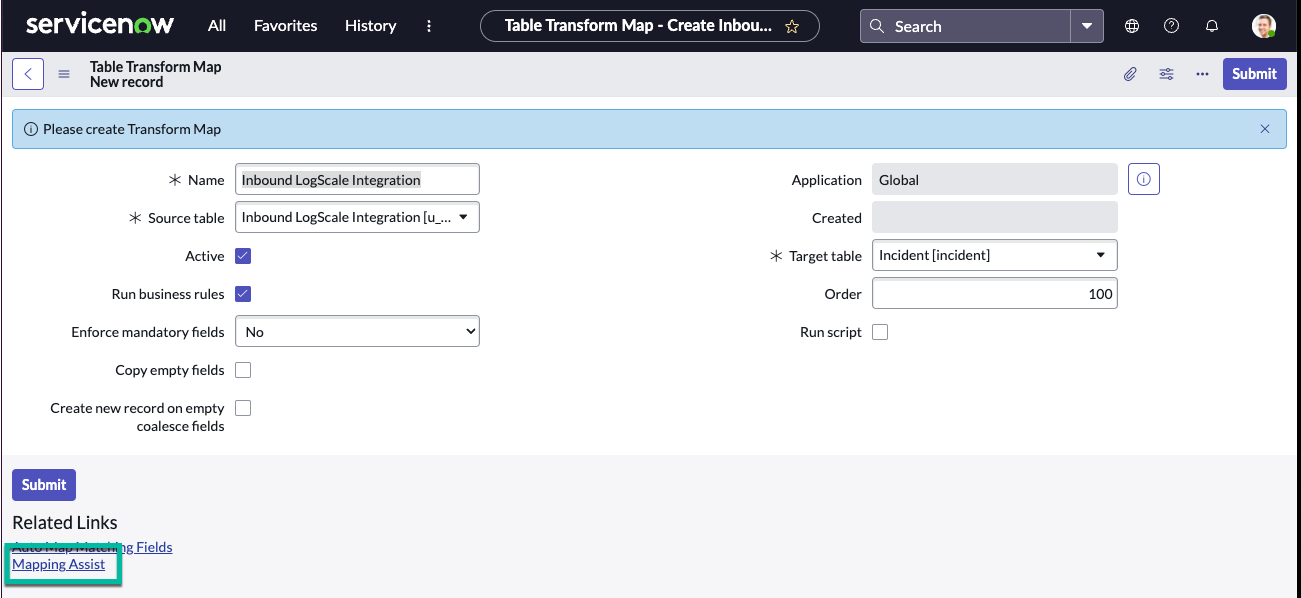
Figure 74. Servicenow
A wizard will pop-up and you can map the following fields that we had just created. This will map which fields in an incident form will be populated by LogScale data. For example:
Summary ↔ Short Description
Full Description ↔ Description
Request For ↔ Caller
Incident Status ↔ State
Repository ↔ Additional Comments
Click once you've completed the mapping.
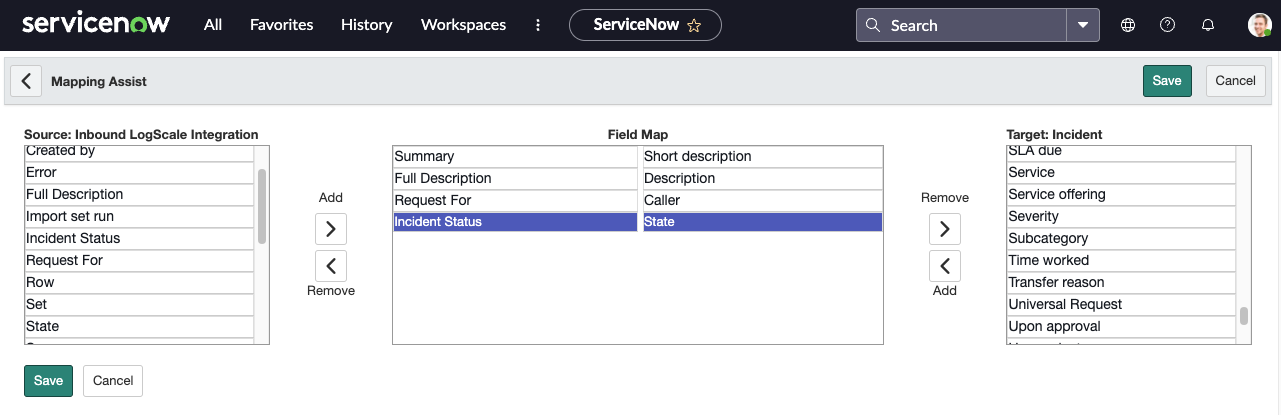
Figure 75. Servicenow
In the following page, click to complete the process.
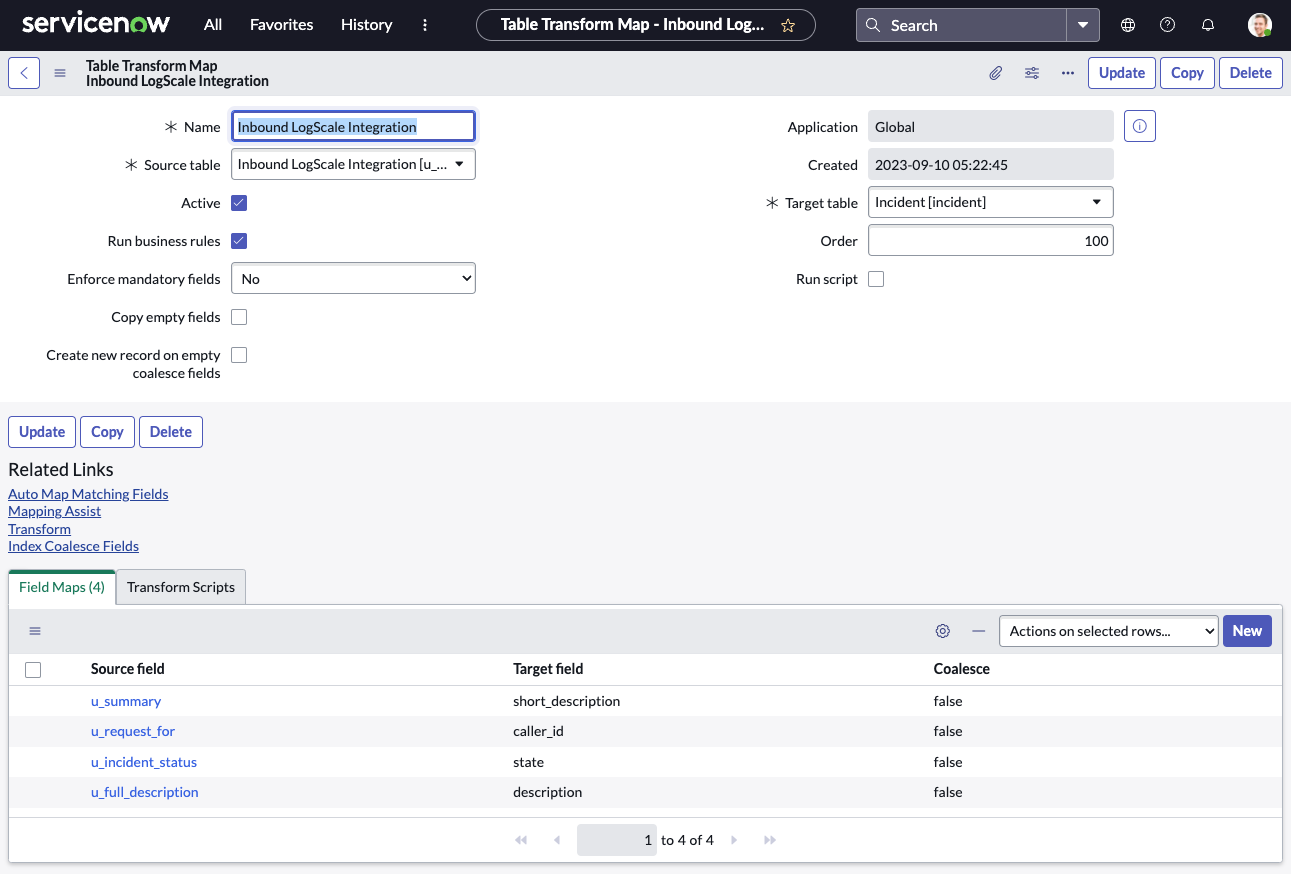
Figure 76. Servicenow
Test the Web Service
Start by going to the Filter Navigator and search for LogScale or the name of the Web Service that you had just created. Once the page loads, look for Explore REST API to test the newly created Web Service.
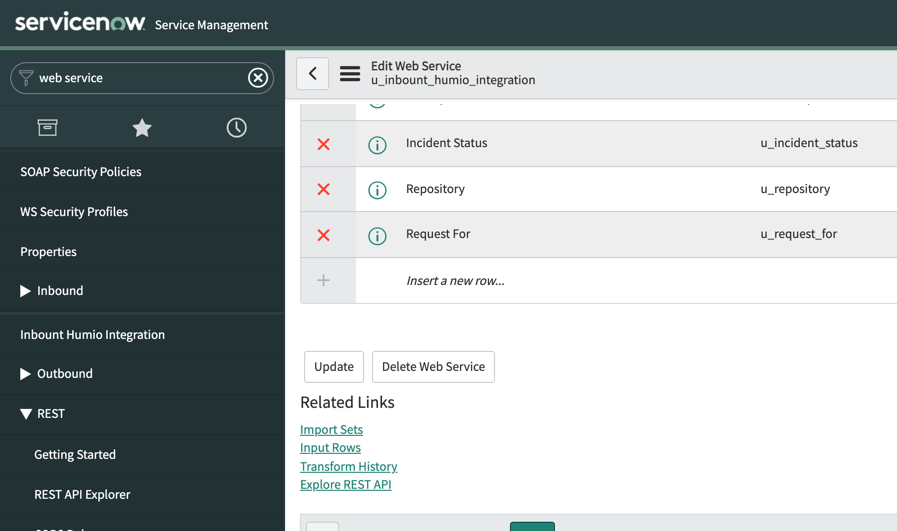
Figure 77. Servicenow
Click on , you may receive this page. Click on the button to continue.
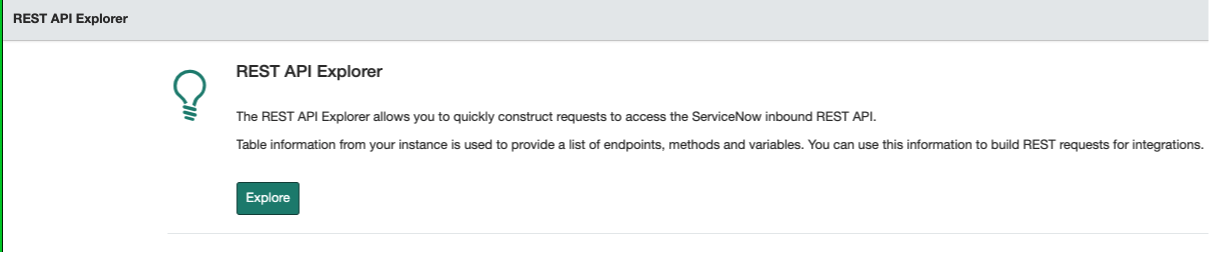
Figure 78. Servicenow
In the REST API Explorer, scroll down to look for the button in the
Request
              Body
area. Add the newly created fields into the body of the request to test your Web Service in ServiceNow. Since this is an internal test to see if the Web Service works, hard code all the values.Click on
Insert value in left column, then right, then click plus symbol
Repeat for each of the 4 rows
Summary ↔ Test LogScale Integration
Full Description ↔ This is a test of the LogScale alerting. No extra actions necessary.
Request for ↔ LogScale Admin
Incident Status ↔ new
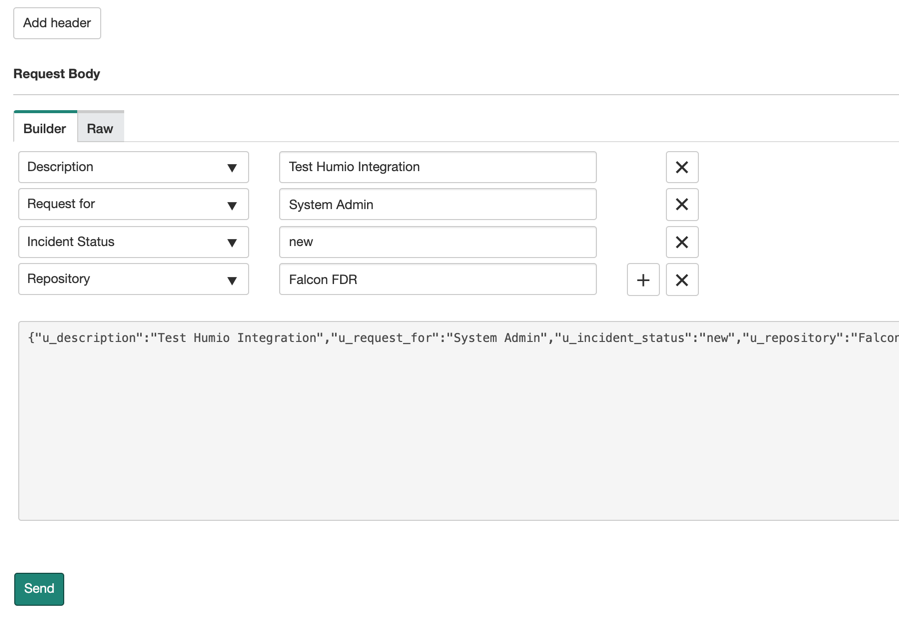
Figure 79. Servicenow
Once completed, click on the button. If prompted about Modifying data, click .
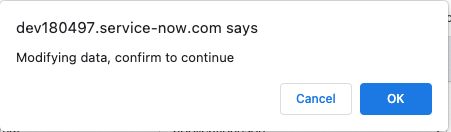
Figure 80. Servicenow
If successful, you should see a return body towards the bottom of the
REST API Explorerweb page. A status of 201 is a successful creation of the incident ticket.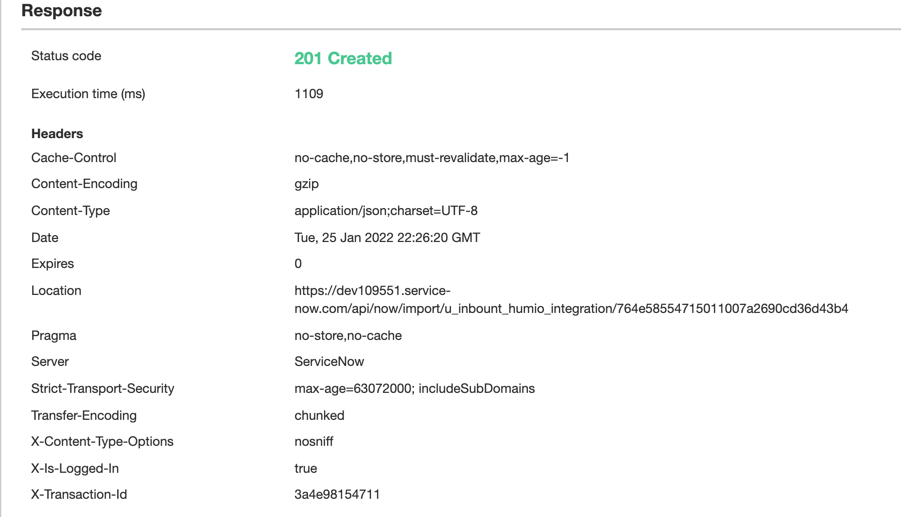
Figure 81. Servicenow
Go back to the main Service Now instance page. Click and search for Incidents.
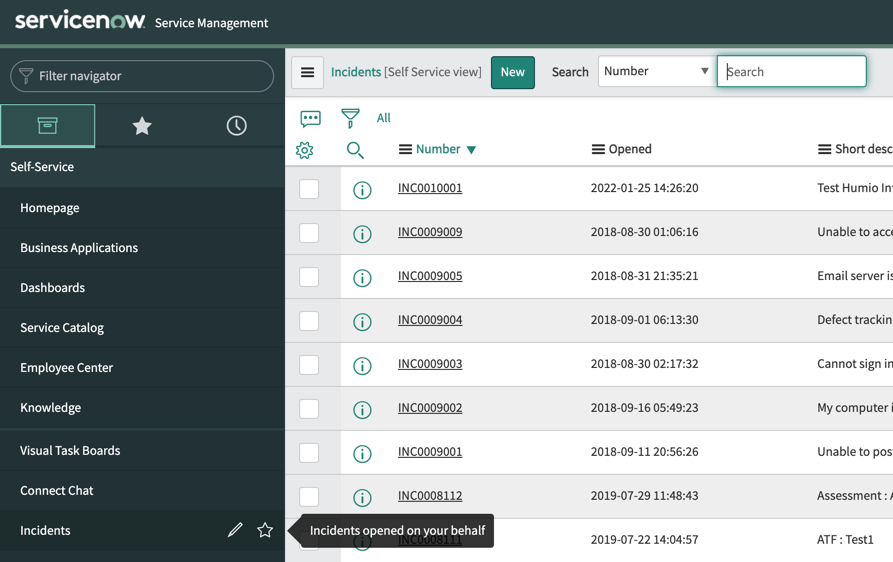
Figure 82. Servicenow
Click on Incidents
NOTE 1: Incidents filtered by default - to remove the filtering, click the option on the very left to show all incidents
NOTE 2: Within ServiceNow, you can pick from different views for how data on a page displayed
For Incidents, clicking on the value on the upper-left of the page lets you pick different views (diff pre-built displays of available columns)
Click > > view to see things like incident date/time in the display.
You should have a new incident available.
Click on the incident number to open the ticket
Field values set earlier in process display within the ticket. For example:
"* Short description" lists the summary
Full Description lists the full details
"* Caller" lists the "LogScale Admin"
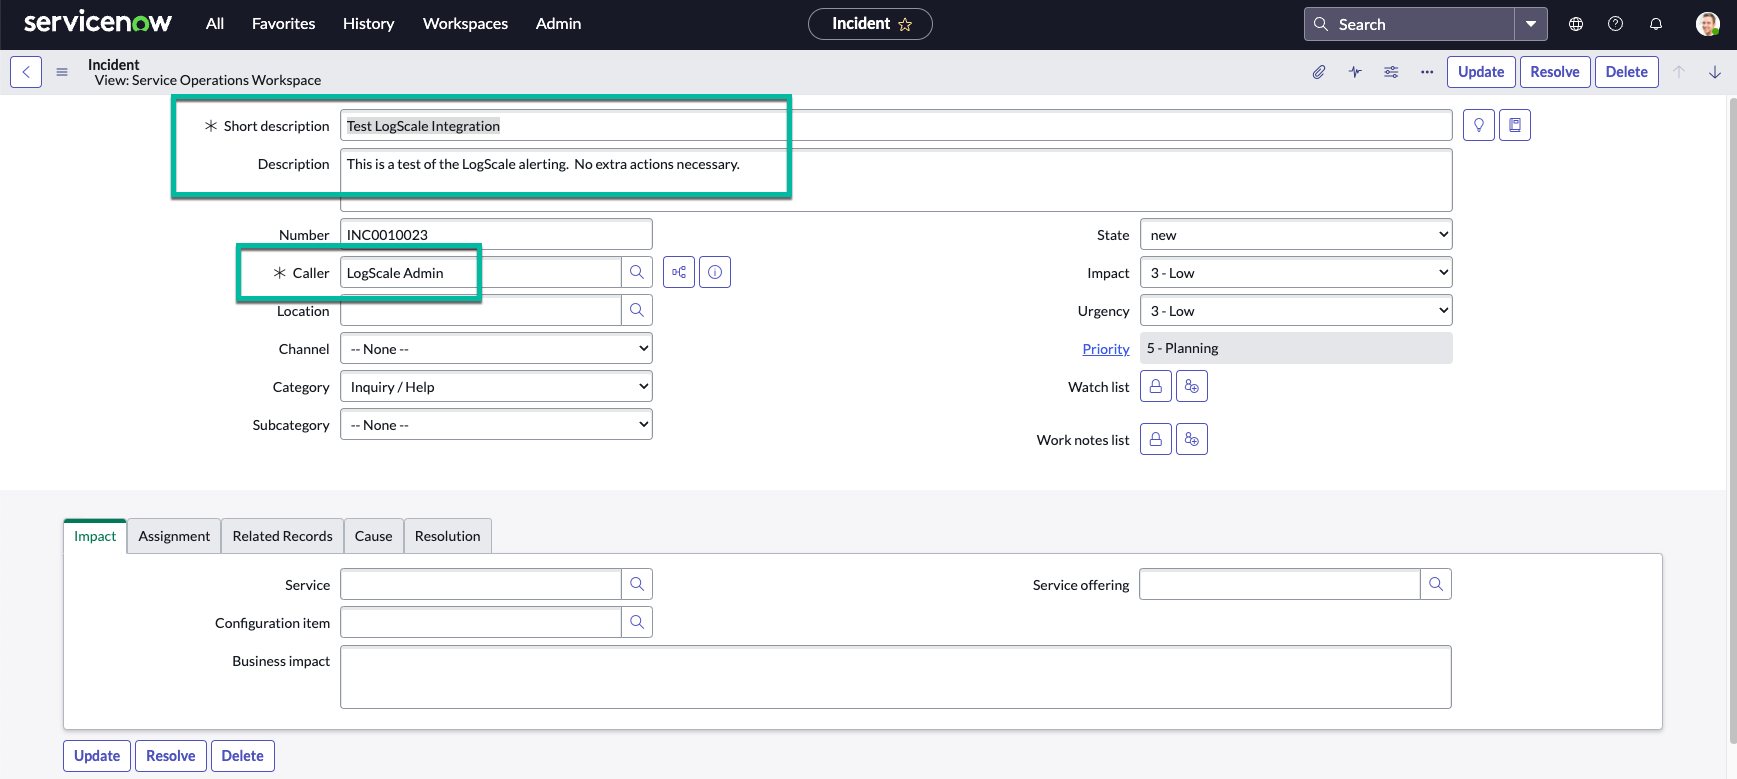
Figure 83. Servicenow
LogScale Integration
In LogScale, create a Http Web Hook Action.
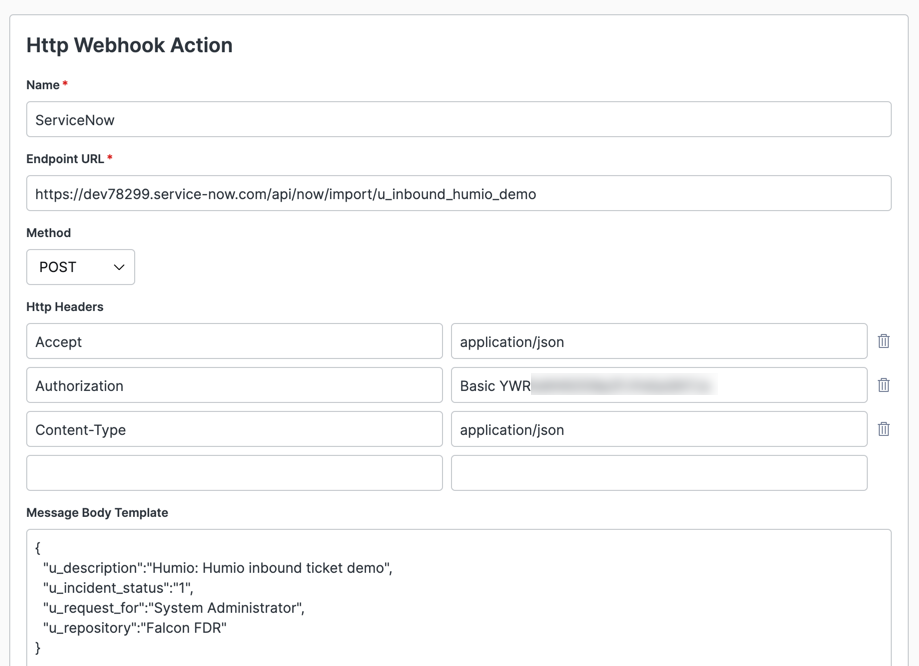
Figure 84. Servicenow
The Endpoint URL should be in your ServiceNow Rest API Explorer. It would be under the Request section.
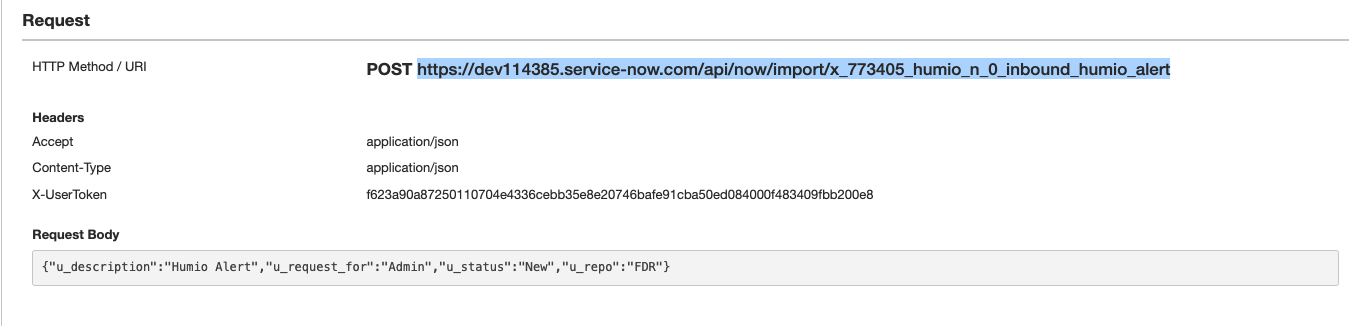
Figure 85. Servicenow
For your authentication, add it to the Http Header Authorization and you can encode your username/instance password using the default settings and pass it along as with Base64 here https://www.base64encode.org/.
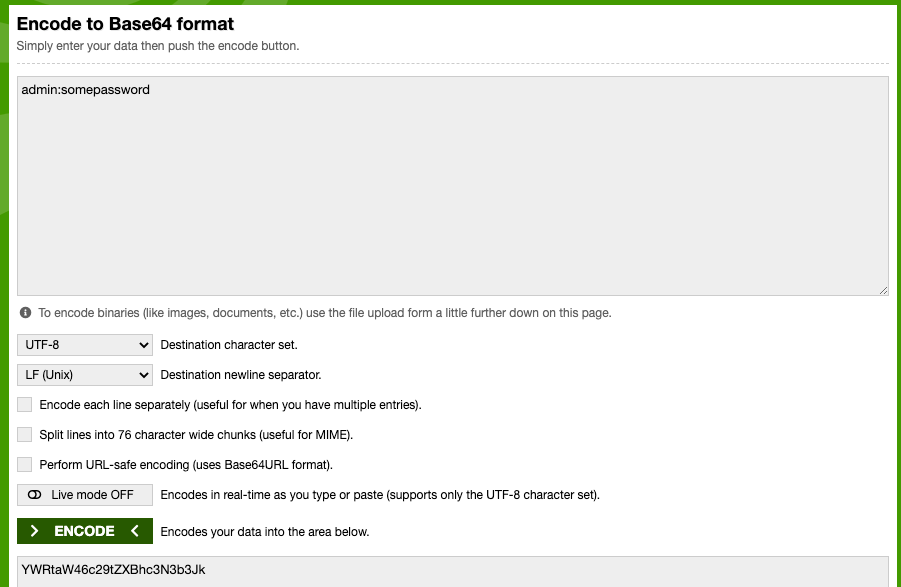
Figure 86. Servicenow
You can get your username and instance password from your profile and go to "Manage Instance Password"
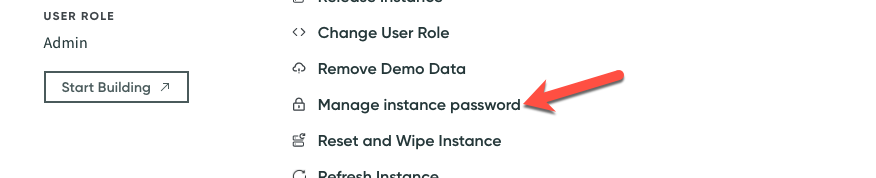
Figure 87. Servicenow
You will see your username and password here.
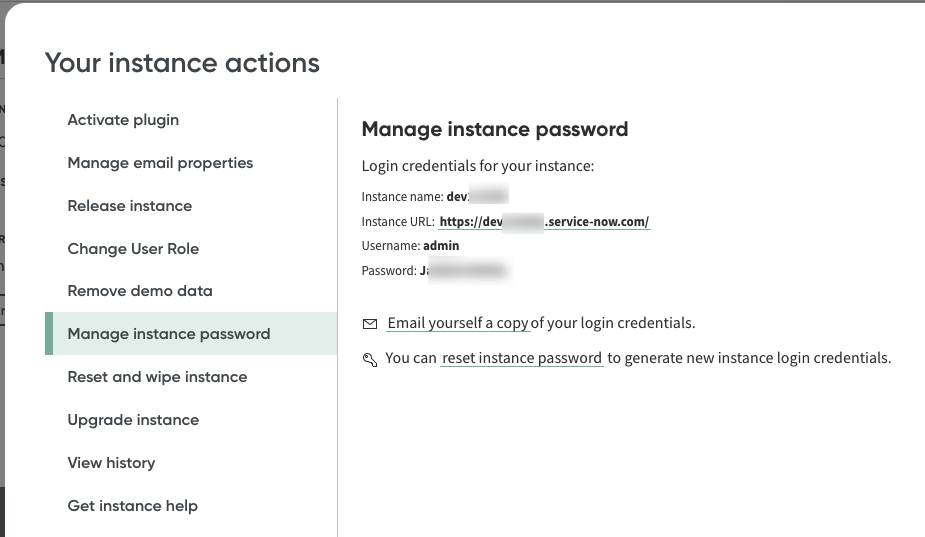
Figure 88. Servicenow