
Write a Parser
Once you have created your parser, you will be presented with an editor.
 |
Figure 47. Parser Editor
On the left side is the script, and on the right are the test cases you can run the script on. You can click on a test case after running tests to see the event it produced.
Writing a good parser starts by knowing what your logs look like. So it is best to gather some sample log events. Such samples may be taken from log files for example, or if you are already ingesting some data, you may be able to use the contents of the @rawstring fields.
As @rawstring can be changed during parsing, and different methods of sending logs may imply different data formats, you should verify that your samples are representative, as soon as you start sending real data.
Then, write your parser script. Note that the main difference between
writing a parser and writing a search query is that you cannot use
aggregate functions like groupBy().
Write Test Cases
Add samples as tests for your parser, where each test case represents an ingested event, with the contents of the test case being available in the @rawstring field during parsing.
Click and write test case logic in the textbox.
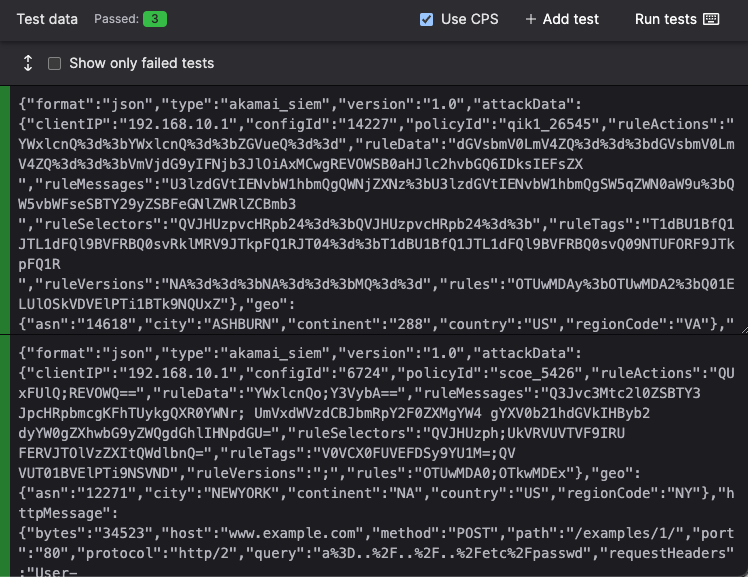
Figure 48. Test Case for a Parser
Once you have added some tests to your parser, click the button to see the output that your parser produced for each of them. See Figure 49, “Test Case Output after Parsing” for an example.
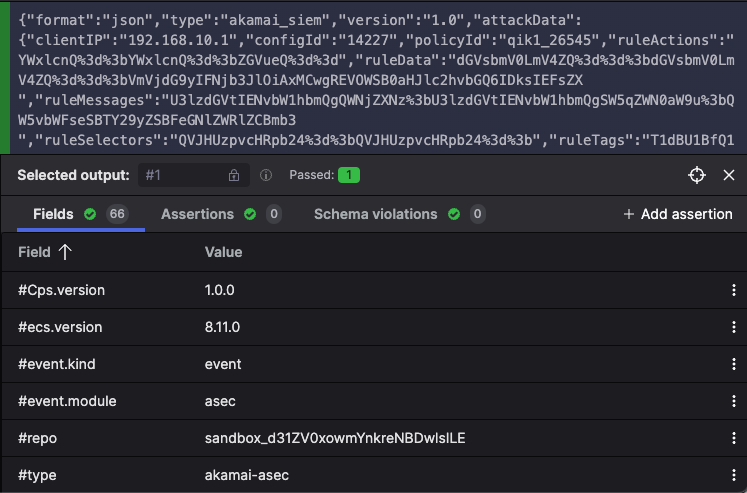
Figure 49. Test Case Output after Parsing
Errors, Validation Checks, and Warnings
When writing a parser, the test case output might show some validation messages, or return failed tests whenever errors or warnings occur. All these are output in different situations and produce a different behavior in the parser:
Errors. The parser fails to parse incoming data, and LogScale adds @error fields to the event. See Parser Errors for more details.
Validation checks. The parser does not fail: these are messages intended as guidelines on how you should write your parser. For example, arrays must be contiguous and have a
0thindex. Fields that are prefixed with#must be configured to be tagged (to avoid falsely tagged fields). See Parsers Validation Errors for more details.Optionally, you can also validate if your parser normalizes test data, as described in Normalize and Validate Against CPS Schema. Fixing parser validation errors is recommended before deploying your parser, but it does not prevent you from saving your parser script.
Warnings. The parser does not fail and continue parsing the event, but the test case shows a warning.
Assertions
In addition to seeing the concrete output the parser produced, you can also add Assertions on the output. This means that you can specify that you expect certain fields to contain certain values, and the tests will fail if that does not hold.
This is especially useful if you need to apply regular expressions, as they can be tricky to get right the first time, but also tricky to change over time without introducing errors. See Figure 50, “Assertions” for an example.
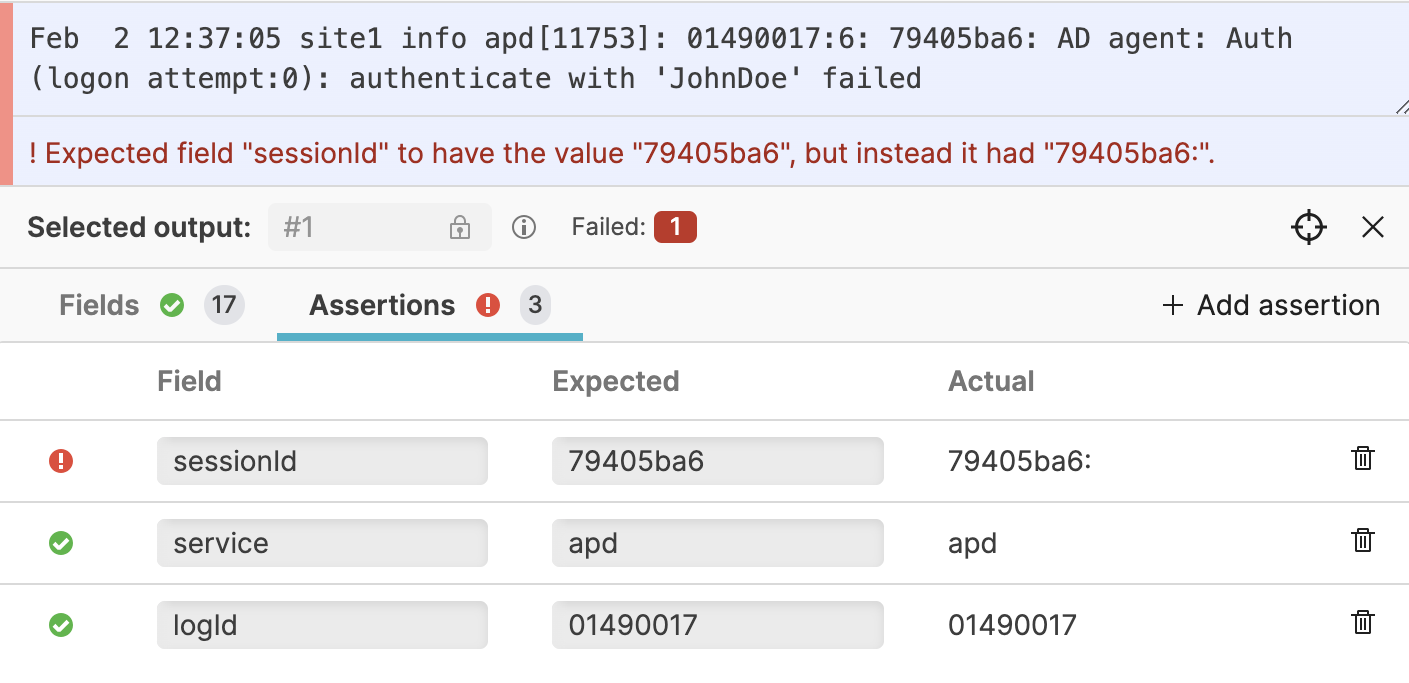 |
Figure 50. Assertions
Next Steps
Once you have your parser script created you can start using it by Ingest Tokens.
You can also learn about how parsers can help speed up queries by Parsing Event Tags.
For information on how to manage the parsers in a repository, see Manage Parsers.