Manage Triggers
Security Requirements and Controls
Update Triggerspermission
Several options to manage triggers are available from the
Triggers overview page:
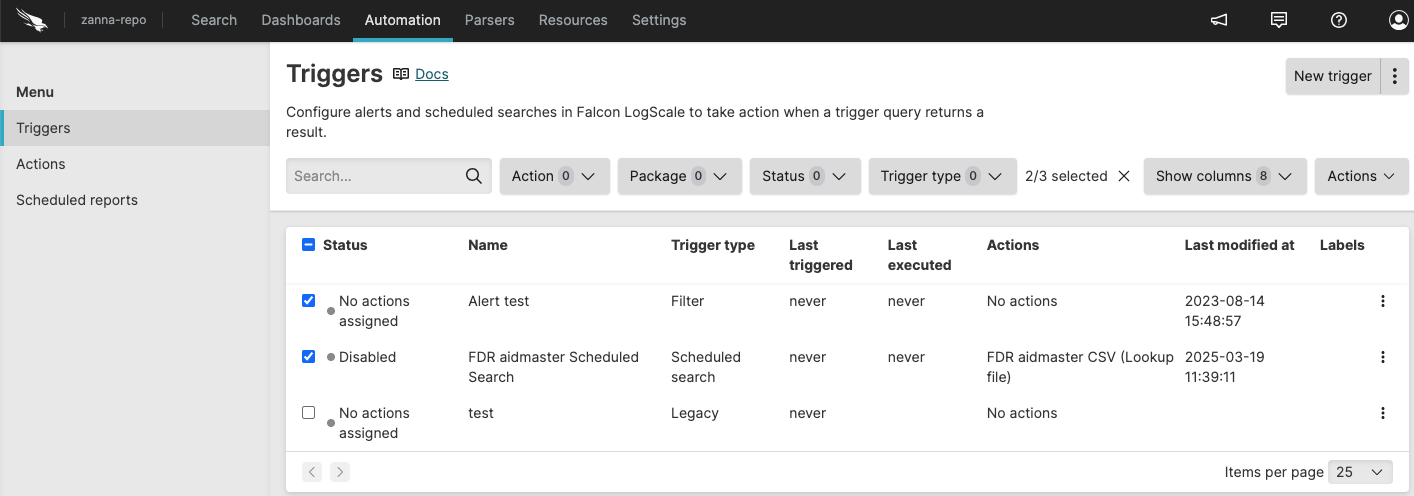 |
Figure 149. Triggers Overview
Options include:
allows you to customize the
Triggersoverview by showing or hiding columns in the table. The columns provide information such as the trigger name, type, status of the trigger, last executed, last triggered, the status of the action attached to the trigger, and so on. Available columns are:Column Description Actions Actions attached to the trigger. Backfill limit Only for scheduled searches. See Backfill limit. Delay run Only for scheduled searches. See Delay run. Labels Labels applied to the trigger. Last executed See Last executed and last triggered for more information. Last modified at Date and timestamp when trigger was last changed. Last modified by User who last changed the trigger. Last triggered See Last executed and last triggered for more information. Max wait time Only for scheduled searches. See Max wait time. Name Trigger name. Package Package associated with trigger. Query Trigger query. Query owned by Who owns the trigger query. If blank, the query is owned by the organization. Status Status of the trigger. The statuses that triggers can have are: Okay, Error, Warning, Disabled, Disabled actions, or No actions assigned. Throttle field Field name to throttle on when field-based throttling applies to the alert. For general information about throttling, see Throttling. For information about throttling for a specific alert type, see Triggers and select an alert type to learn more. Timestamp Timestamp type used by the trigger. For general information about timestamps, see Timestamps for triggers. For information about timestamps for a specific trigger type, see Triggers and select a trigger type to learn more. Trigger type Type of trigger. To search existing triggers, use the Search... field.
To filter the list of triggers, use the filter buttons for or .
To create a new trigger, click . For more information, see Create Triggers.
To edit a trigger, click on a trigger name in the list. For more information, see Edit Triggers.
To manage an individual trigger, click the menu icon ⋮ next to each entry:
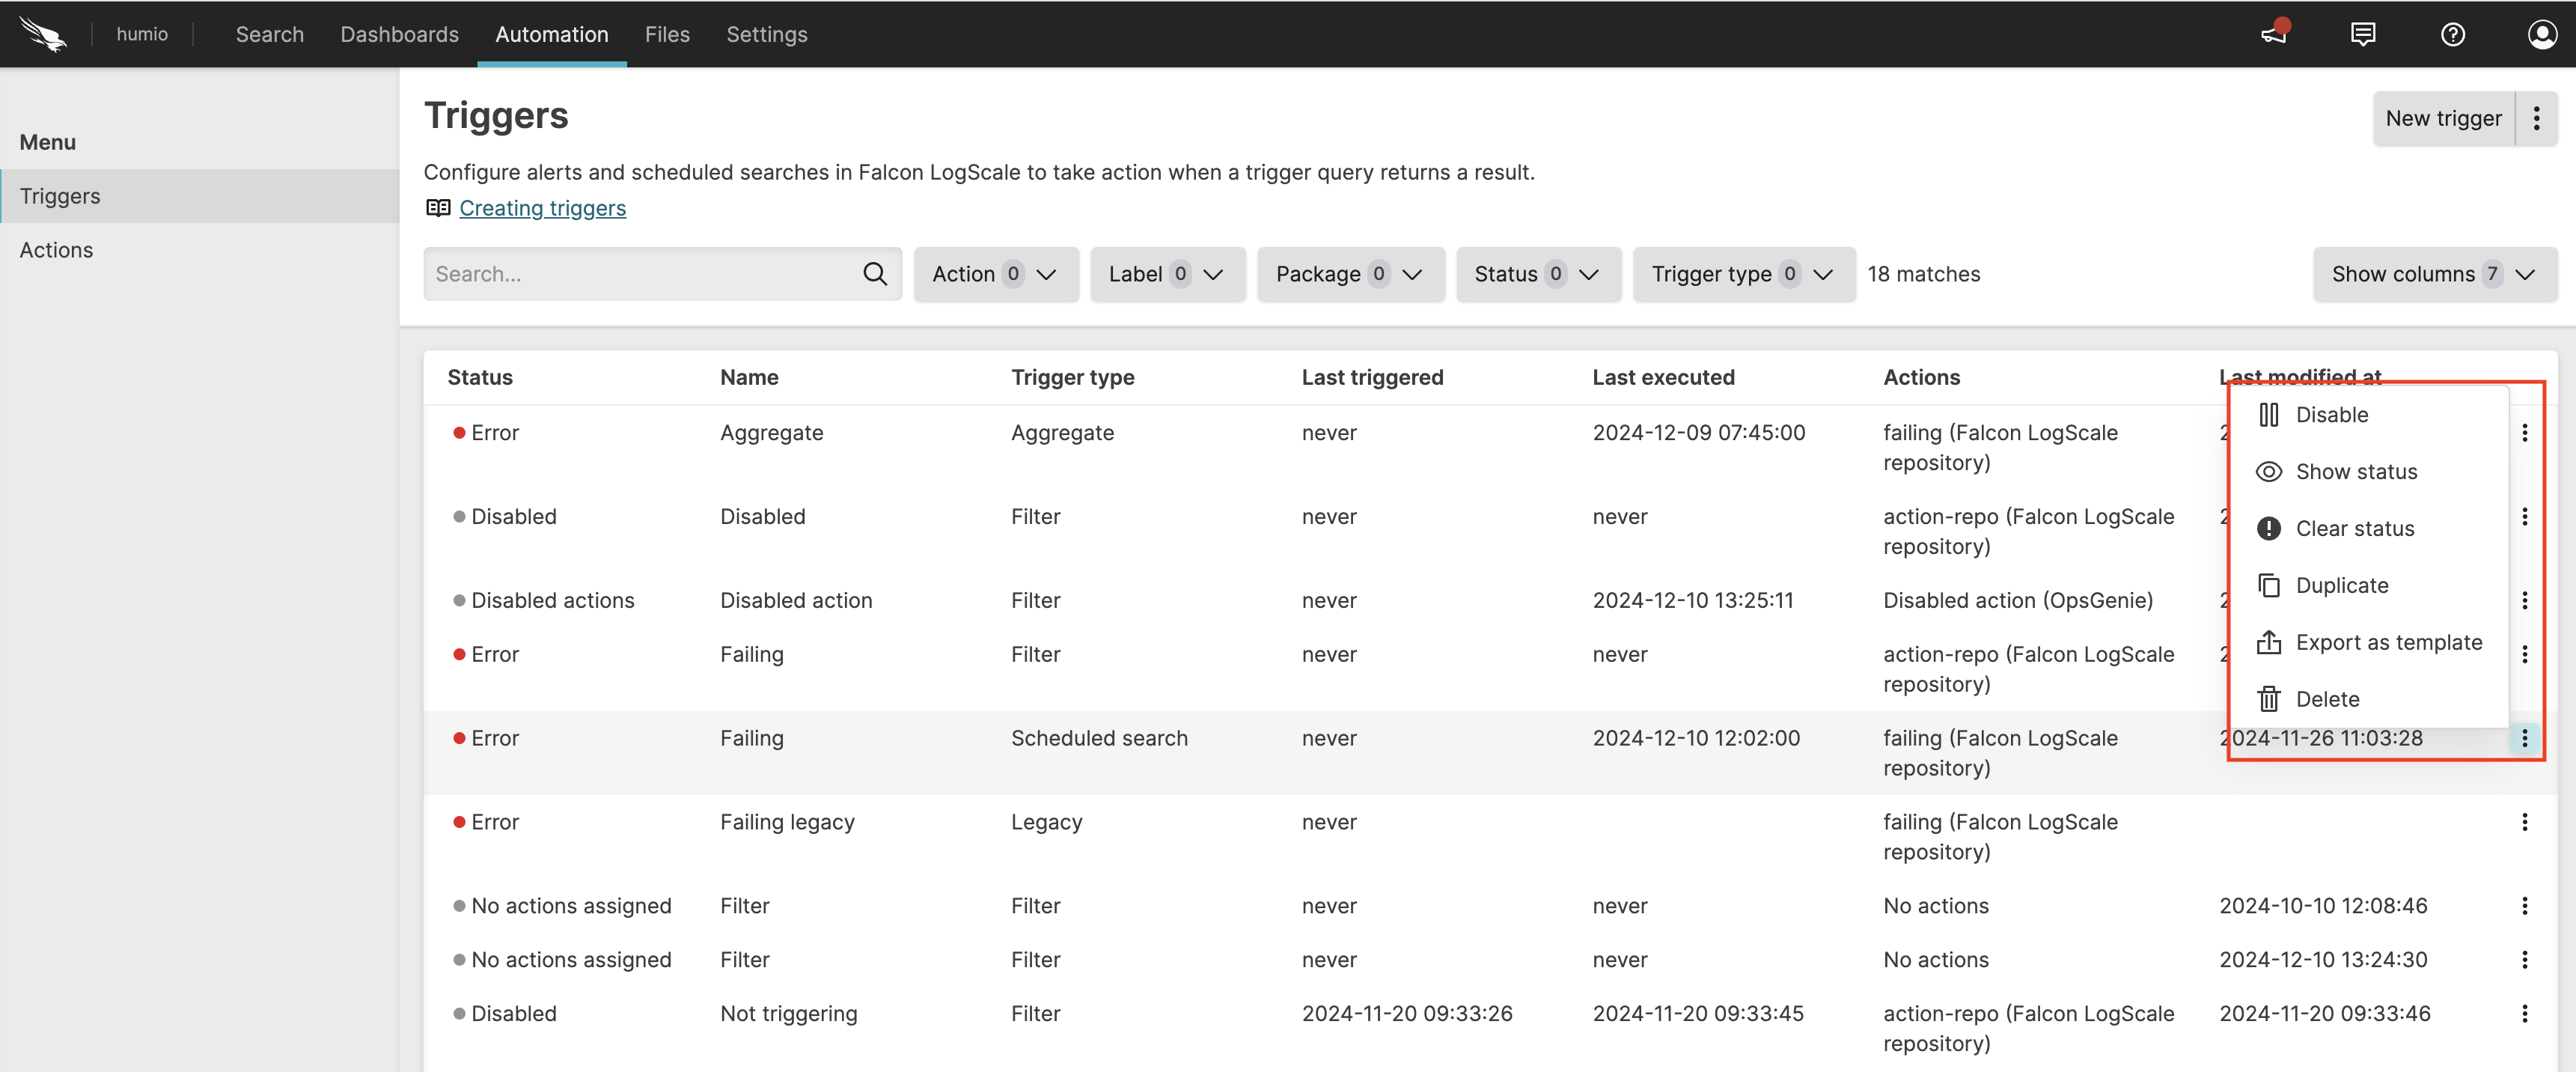
Figure 150. Manage triggers
/ the trigger. This action requires the Update Triggers permission. There may be times when you want to disable an alert. You might do this, for instance, if you received a notification of an alert and need time to resolve the problem. You might want to disable the alert until it is resolved, so that it will not bother you while you work on it. You can re-enable it when you finish.
is displayed when the trigger has a Warning, Error, or Disabled actions status — click this option to show the error and/or warning messages.
allows you to clear the status from either the context menu ⋮ or the side panel — if the problem reoccurs, the status appears again.
You can clear errors and warnings regardless of whether the trigger is enabled or disabled.
the trigger. This action requires the Create Triggers permission. Over time you will find that you have many triggers that are similar, but with slight deviations to their underlying queries. To make it easier to create a trigger that is similar to an existing one, you can duplicate it and then modify it.
for future reuse. This generates a
YAMLfile that your browser downloads. If needed, edit this file with a simple text editor before using it later. You might export all of your triggers and keep a version history of changes by storing them on GitHub or elsewhere as a back-up, and to install them to your repositories from there.allows you to give another user or group access to read, edit, or delete triggers.
the trigger. This action requires the
Delete Triggerspermission. The action cannot be undone and you cannot restore a trigger.
For more details on monitoring the alert execution and the list of alerts on this page, see Monitor, Diagnose, and Troubleshoot Triggers.
Last executed and last triggered
The Triggers overview keeps track of the
end search interval for when a trigger was run, as well as when it was
last run with results — thus being able to distinguish between
when a trigger was executed, and the last time it had results and
actually triggered an action. This information is displayed in two
columns in the Triggers overview.
For Aggregate alerts and Scheduled searches
Last executed indicates the end of the search interval for the last query result that was checked successfully — whether or not any results were returned.
This means that if any error occurs with the query or the associated actions, the time shown by this field will NOT be updated. For a comprehensive list of errors and solutions for each trigger type, see Scheduled Search Errors and Solutions, Aggregate Alert Errors and Solutions, Filter Alert Errors and Solutions, or Legacy Alert Errors and Solutions.
On the other hand, if the query result is empty, this field will be updated.
For Filter alerts
Last executed indicates the last time the query result was checked.
For Aggregate alerts, Legacy alerts, and Scheduled searches
Last triggered indicates the end of the search interval for the last query result that was checked successfully, and successfully triggered at least one associated action. It is not updated if the query result is empty.
For Filter alerts
Last triggered indicates the latest @ingesttimestamp on the triggering events.
Permissions for triggers
Security Requirements and Controls
Change user accesspermission
Sometimes you might want to collaborate with another user on a trigger, but that user does not have permission to triggers in the view. If you have permissions to do so, you can grant permissions to that user to edit and delete a particular trigger in a view. For more information about asset permissions, see Asset permissions.
If you do not have
Change user access
permission on the repository, you will see a list of users only (no
groups) that already have at least Read permissions on the repository.
You can select from these users and give them more permissions (up to
the same permissions you have).
To grant access to edit or delete a trigger to another user or group:
The creator of an asset and regular users can share the same permissions that they have to the asset with users who already have read access to the view. You cannot share access with users who do not have read access to the view. You cannot share access with groups at all.
Click ⋮ next to the trigger you want to share and select .
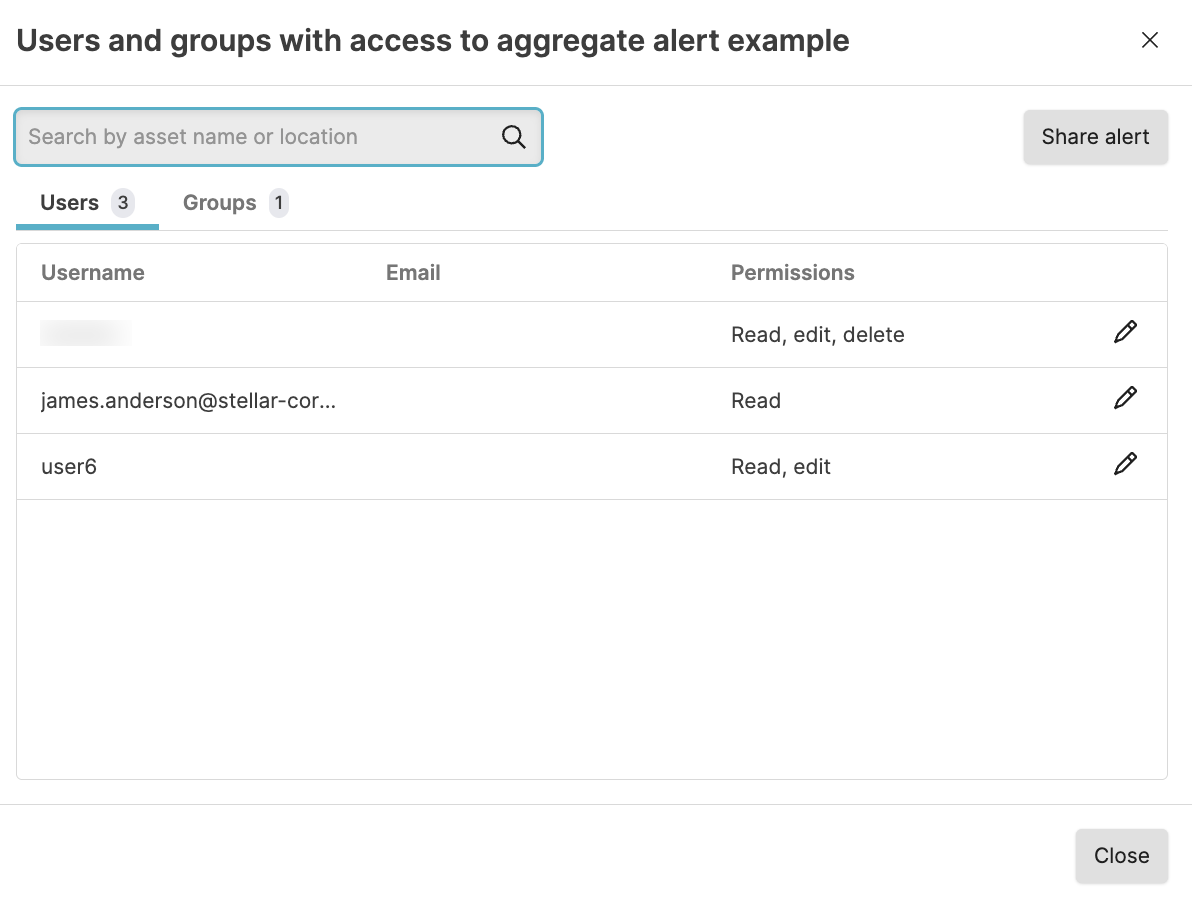
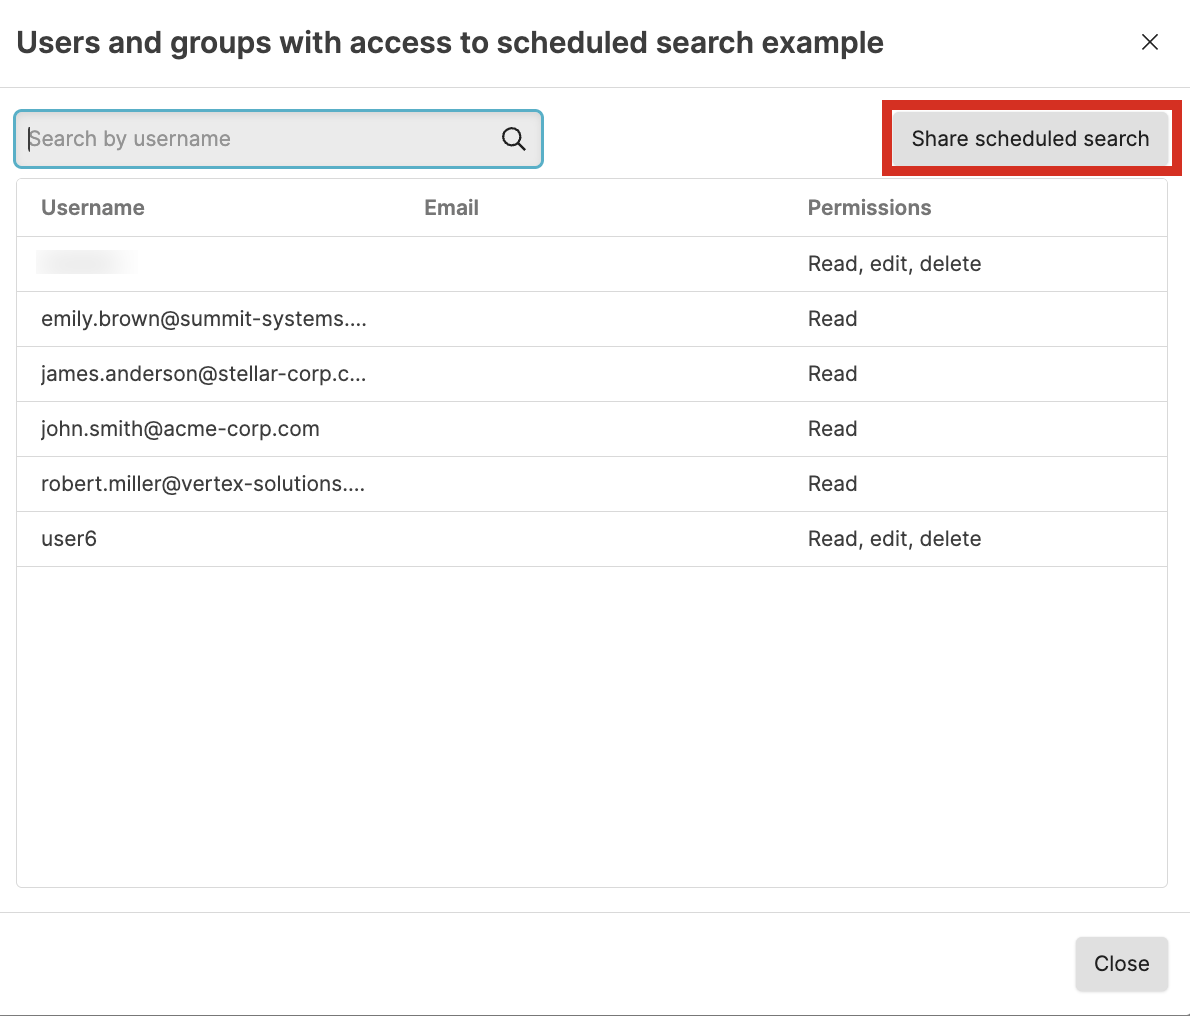
In the Users and groups with access window you see users who currently have access to the trigger and what access they have.
Click or .
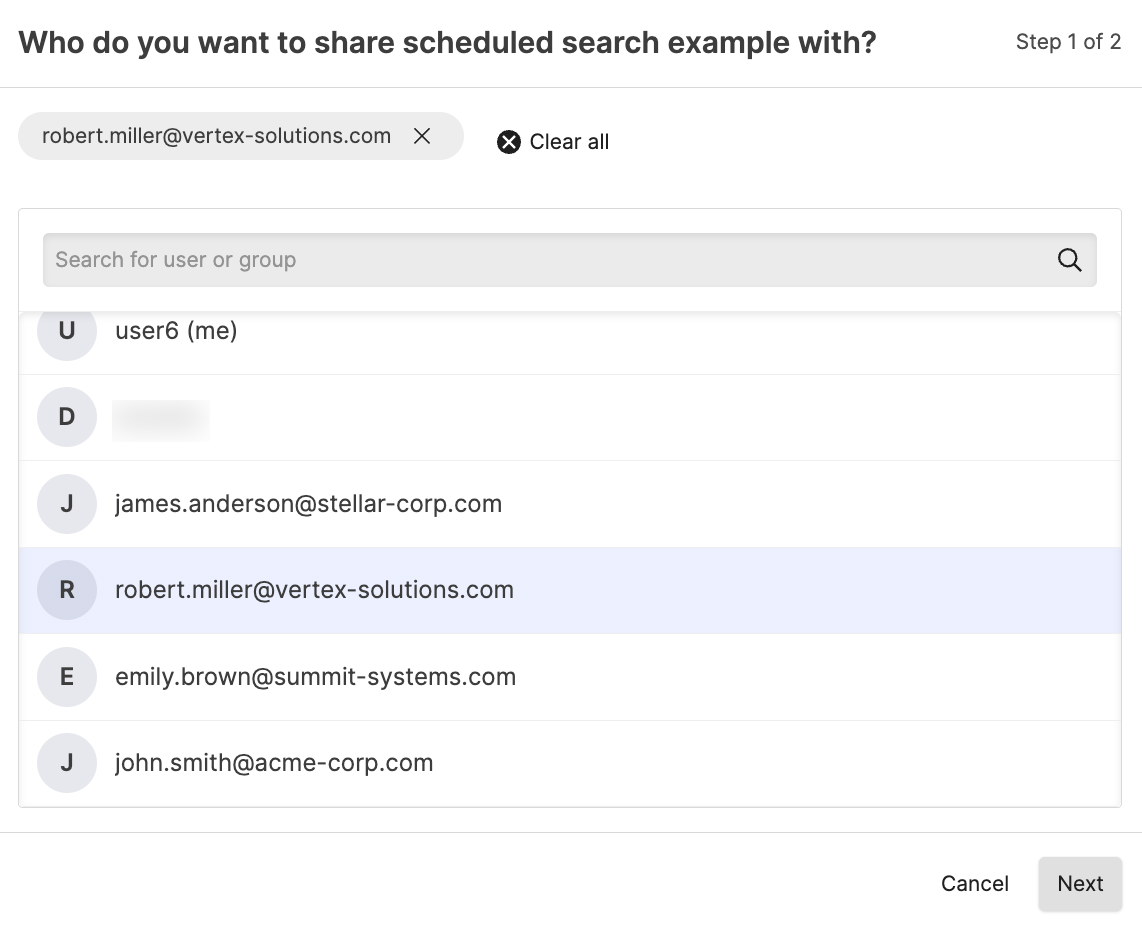
Click to select the user to get additional permissions. Note that you can only see users who already have read permission to the view. Click .
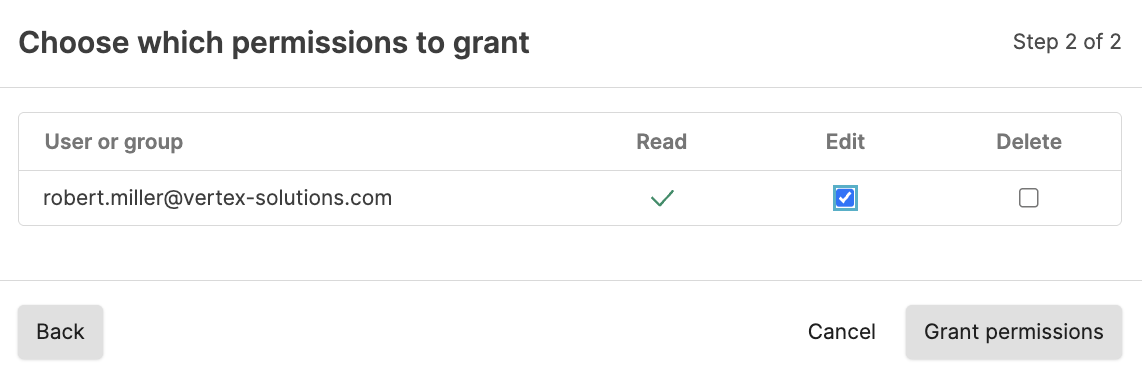
Select the appropriate permissions to assign the permissions. Click .
With
Change user accesspermission, you can grant permission to users, including read permission if the user does not have that, and permissions that you do not have yourself. You can also see groups and group members and what permissions they have in the Groups tab, but you cannot change the permissions for the group in the Groups tab. To be able to change the permissions directly from the group tab, you must haveChange organization permissionspermission.To grant additional permissions to a user that already has read access to the view:
Click ⋮ next to the trigger you want to share and select .
In the Users and groups with access window you see users who currently have access to the trigger and what access they have.
Click the button next to the user or group in the list.
Click to assign the permissions. Click .
Click .
If you have the
Change user accesspermission and you want to share permissions to the trigger with a user or group not in the list, or you want to give a group that is in the list additional permissions:
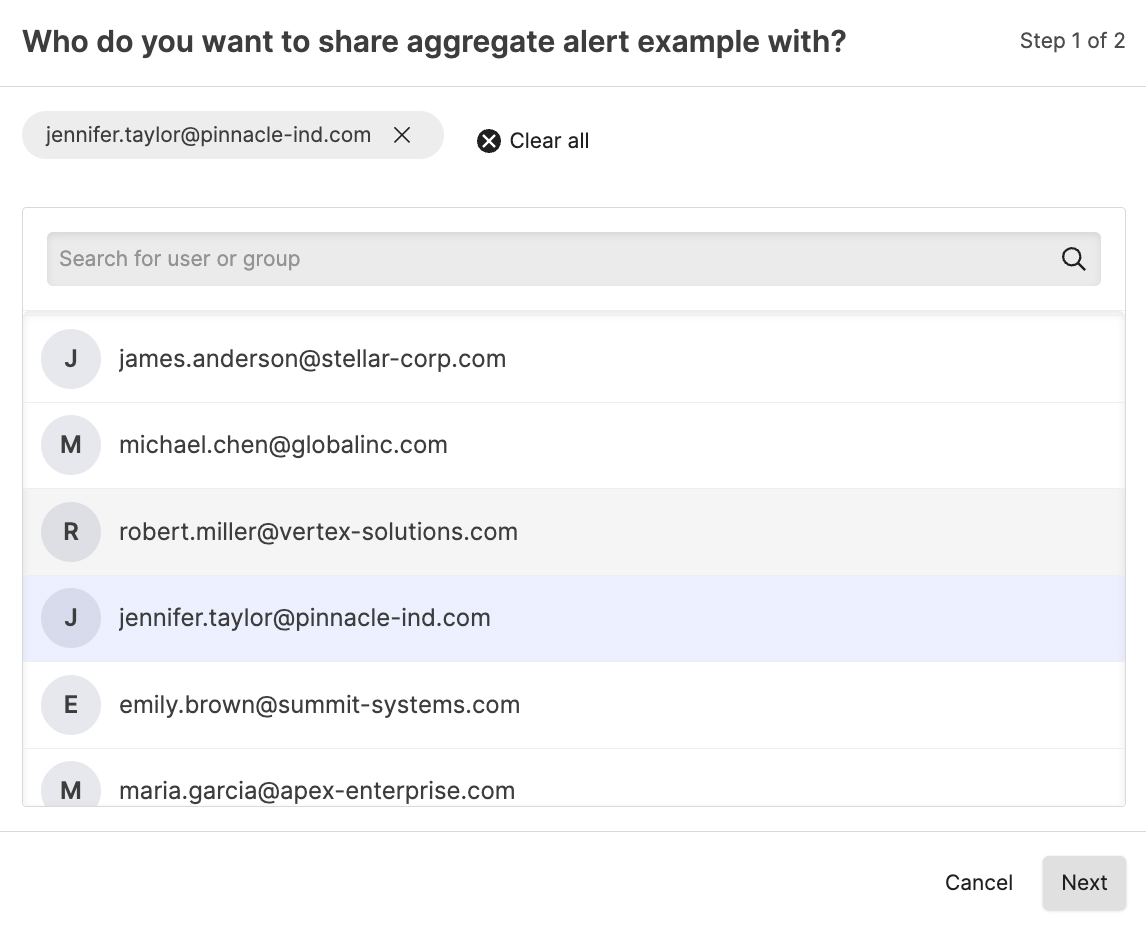
Click or .
Click to select the group or user who should get additional permissions. Click .
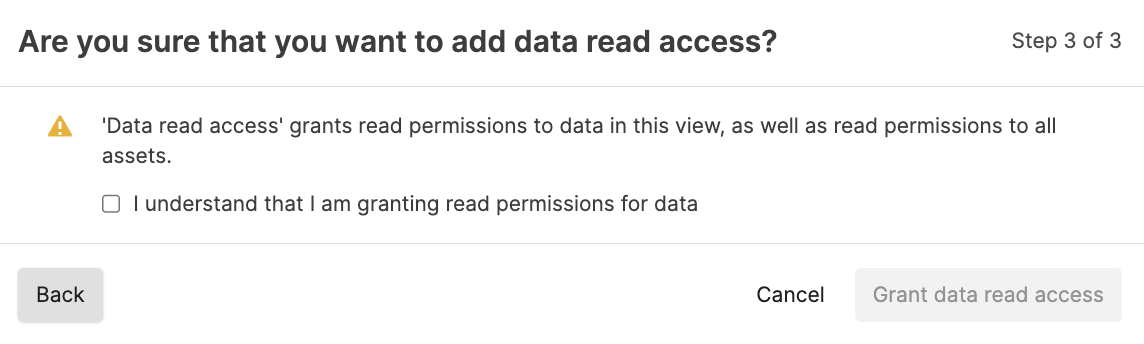
Select the appropriate permissions to assign. Be aware of the message that the user or group gets Read access to all assets in the repository automatically when assigning asset permissions for one asset in the repository. Click .
Confirm that you understand that you are granting Read access to all assets in the repository by adding the asset permission for the user or group. Click .
Click .