
Create Dashboards and Widgets
Security Requirements and Controls
Change dashboardspermissionData read accesspermission
There are two ways to create a new dashboard within a repository or view:
From the
Searchpage of the User Interface, starting with a new search: this will create a new dashboard and a new widget together. This method is generally used when you're working with a search query that you want to preserve by saving it directly as a new widget. See Create from a Query.From the
Dashboardspage of the User Interface: this method is used when you want an empty dashboard that will contain all the widgets you'll create, or when you intend to import/duplicate an existing dashboard. See Create from Dashboards tab.
Create from a Query
Security Requirements and Controls
Change dashboardspermissionData read accesspermission
To create a new dashboard (and its widget) from a search, these are the steps.
Go to the tab in the main LogScale User Interface and pick a repository.
Click the tab from the top menu bar.
Enter a query of your choice, one that would best suit your data.
Click the Time Selector on top to choose the time interval (e.g., ). The active search interval used is saved along with the widget. For details on the timeframe you can set, see Change Time Interval.
From the dropdown menu on the top left, choose the preferred or compatible chart — one chart type is selected by default e.g. depending on the query you have entered, see Widgets for details on all widgets available.
Click — you should now see the graph or table in the main pane; if not, check again the time interval you have selected, as it should be consistent with your data set.
Click the menu at the top right of the graph pane and select the option.
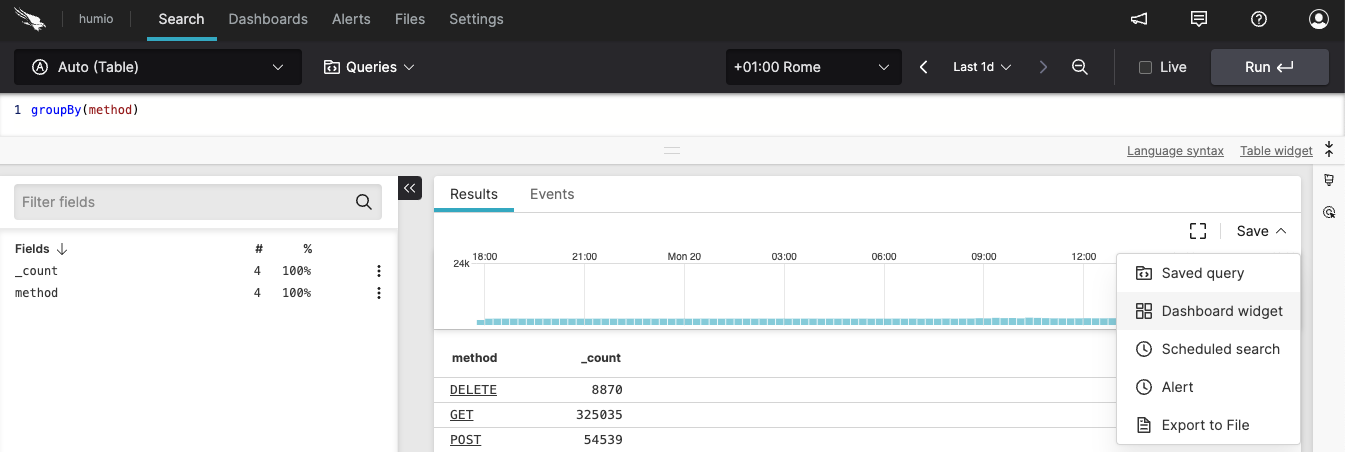
Figure 101. Creating Dashboard Widget
In the Dashboard Widget dialog popping up, enter information as required:
Dashboard — Select New Dashboard from menu and enter a name for your new dashboard. You have the option of assigning the widget you're creating to an existing dashboard, if there is any.
Widget Title — provide a title to the new widget.
Widget Description — provide a description for the new widget.
Open Dashboard after Save checkbox — click it to have your new widget opened in the dashboard.
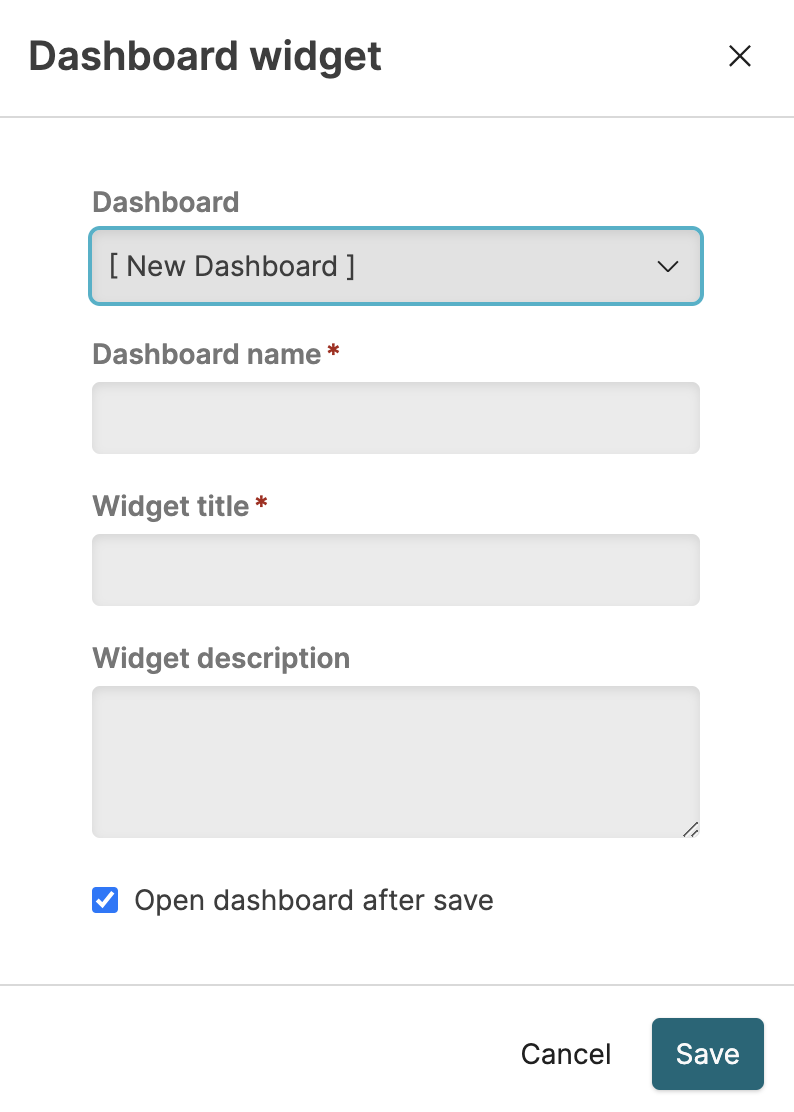
Figure 102. Dashboard Widget dialog
Click : your new dashboard is being created and appears in the main pane.
Optionally, click the pencil icon on the top right to resize or rename your widget, change the description etc., see Edit Dashboards for more information.
Create from Dashboards tab
Security Requirements and Controls
Change dashboardspermissionData read accesspermission
To create a new dashboard from the
Dashboards page, follow these steps.
Click the tab and pick the repository or view where to create your dashbord.
Select the tab from the top menu bar. There you'll see a list of dashboards, if you have any.
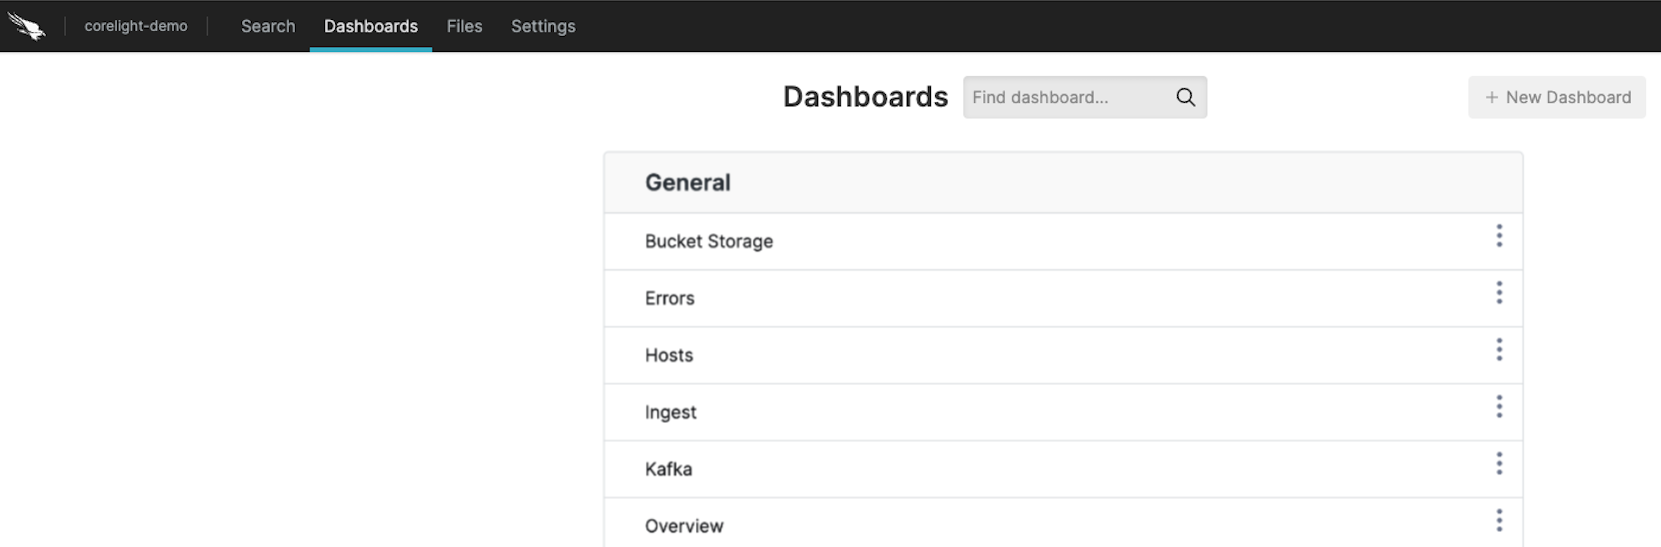
Figure 103. Dashboards Tab
Click the button.
In the New Dashboard dialog box, choose how to create the dashboard:
Empty Dashboard — creates from scratch an empty blank dashboard, one that will serve as a container for your Widgets. This is the default option, where you are prompted to provide only the Name for the dashboard.
Duplicate Existing — creates a copy of an existing dashboard, whether it is in the current or another repository or view: you are prompted to pick which one from the dropdown. Then pick the dashboard you want to copy from the dropdown:
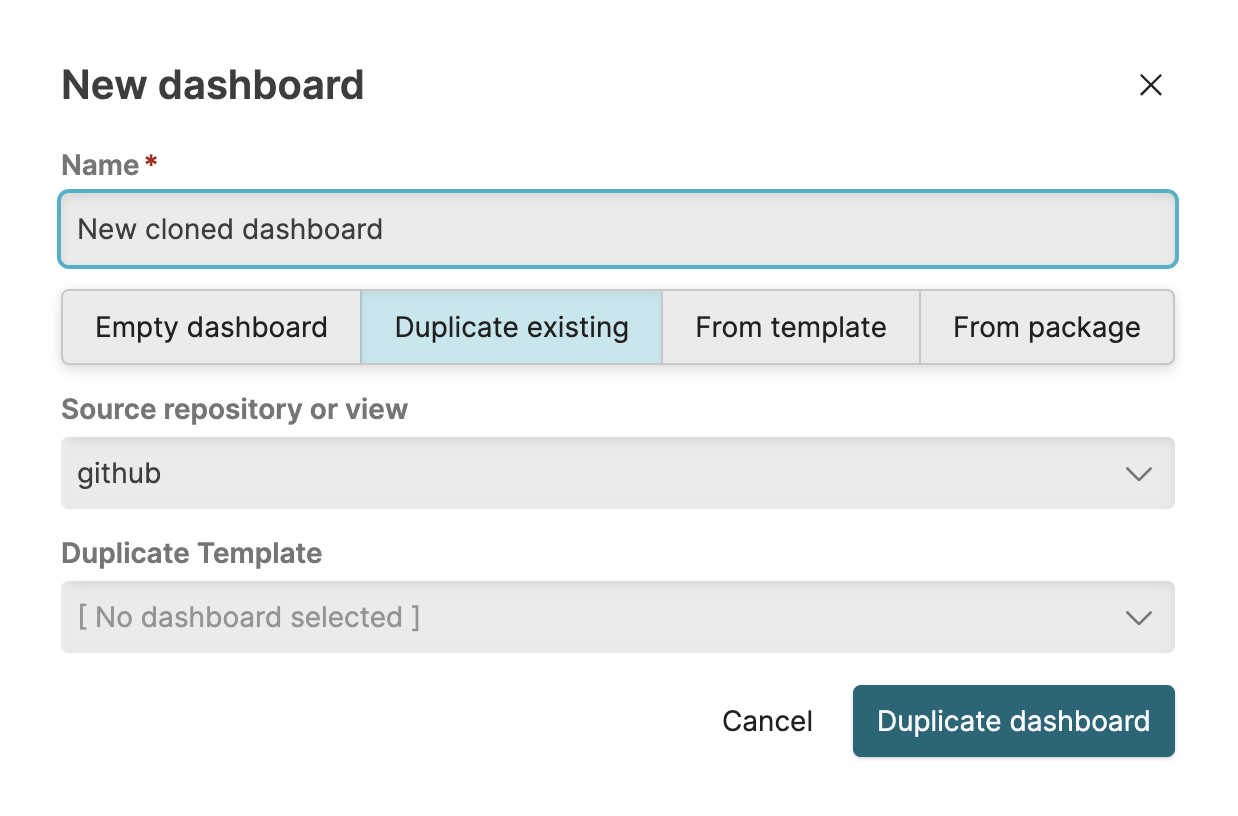
Figure 104. Duplicate a Dashboard
From Template — allows you to create a dashboard based on a template generated from another dashboard. Drag&drop a file or browse your computer to use such template.
From Package — allows you to invoke dashboard templates that are part of LogScale packages, provided that such packages are installed in the repository where you want to create the dashboard. For more information on how to install a package and access a package template, see Packages.