
Configure Falcon LogScale Collector
The Falcon LogScale Collector configuration can be managed either:
remotely (preferred) in a managed mode which provides a set of functionalities to centrally manage your configurations and assign a single configuration to multiple instances, see Create a Configuration - Fleet for more information on remote configuration creation.
locally by manually editing the
.yamlfile, see Create a Configuration - Local.
Create a Configuration - Fleet
These steps explain how to configure the Falcon LogScale Collector for remote management using the Config overview page to ship data to LogScale. See Manage Your Fleet for information on remote configuration.
When you create a Config file you can either aim to create a complete configuration or snippets which can then be combined when you Create a Group.
Go toData ingest tab and click .
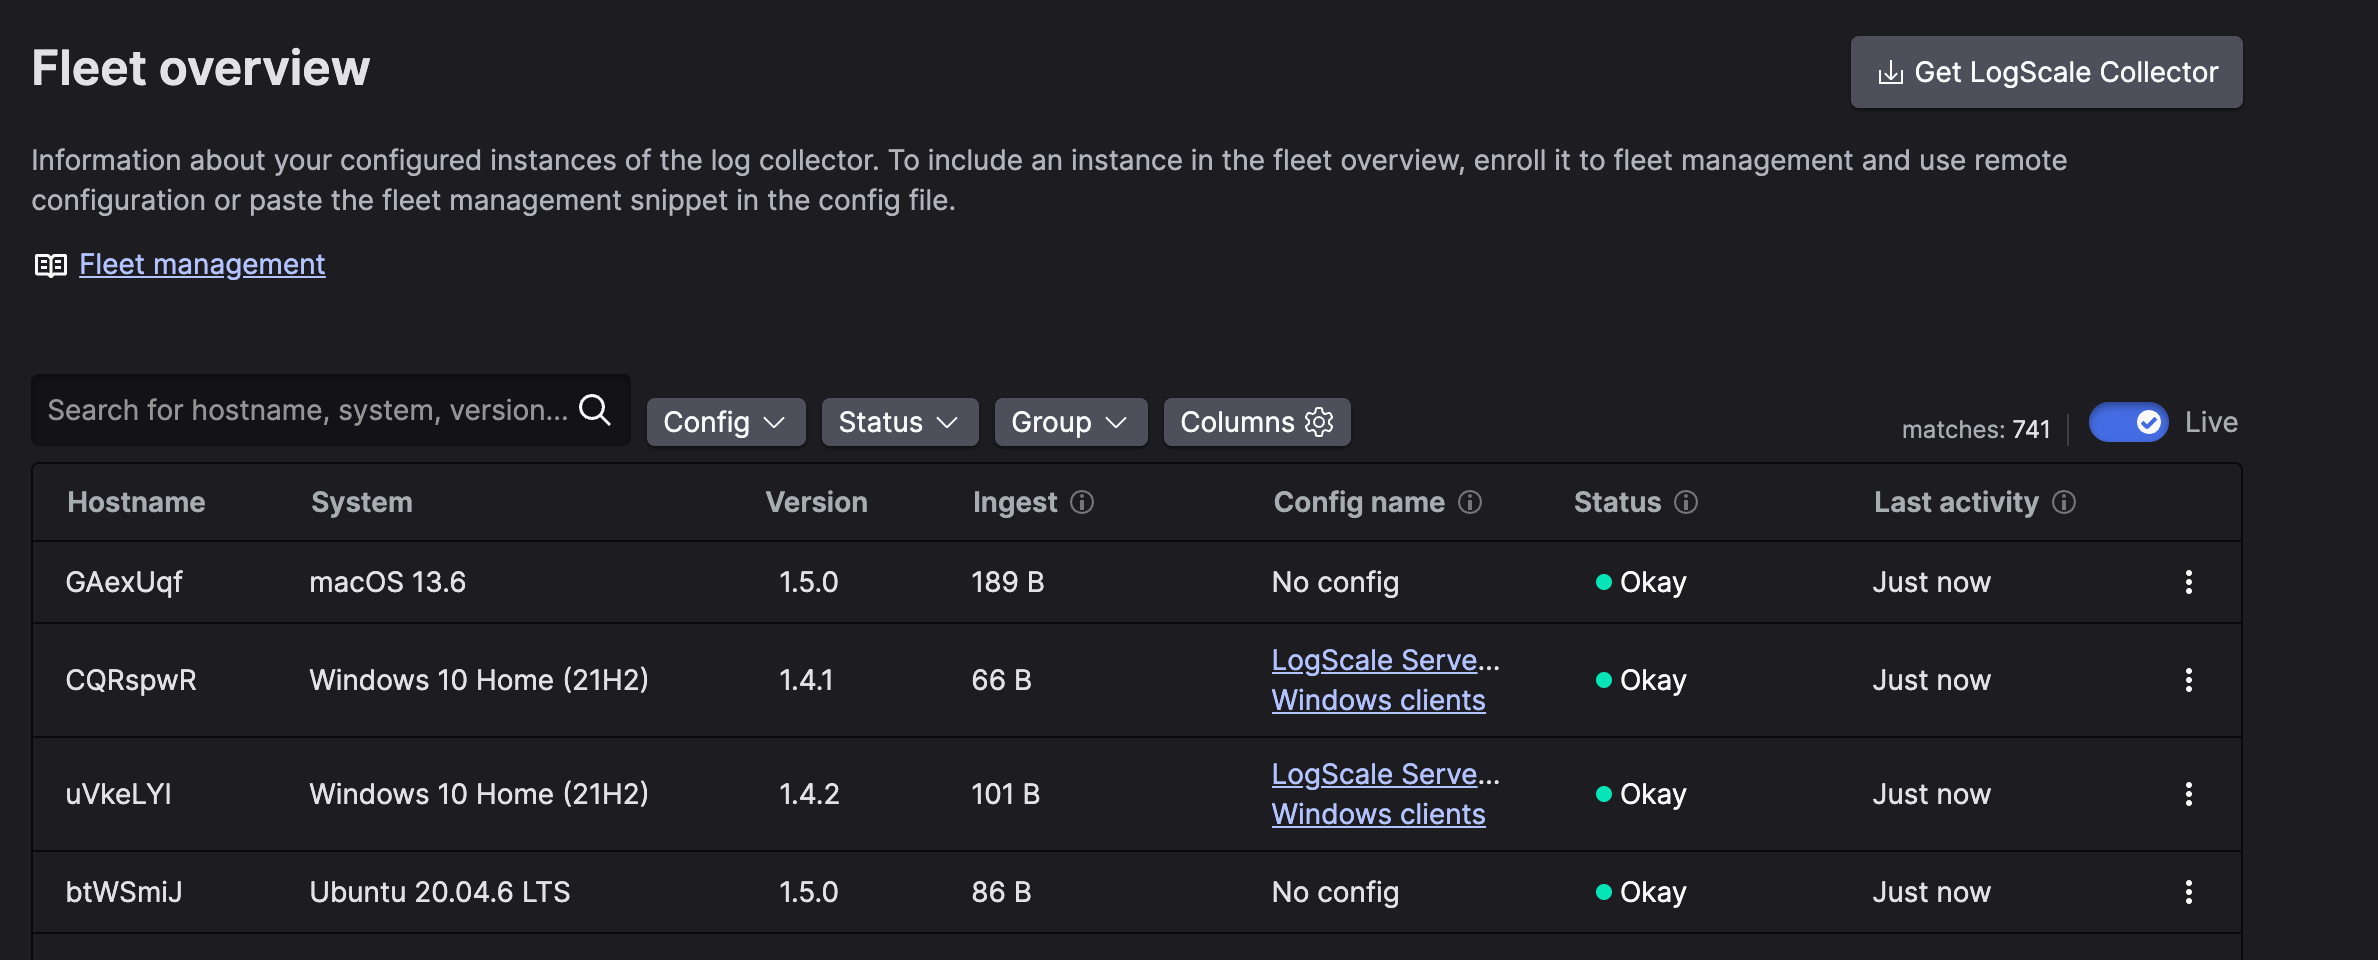
Figure 4. Fleet Overview
The Config overview page is displayed, click .
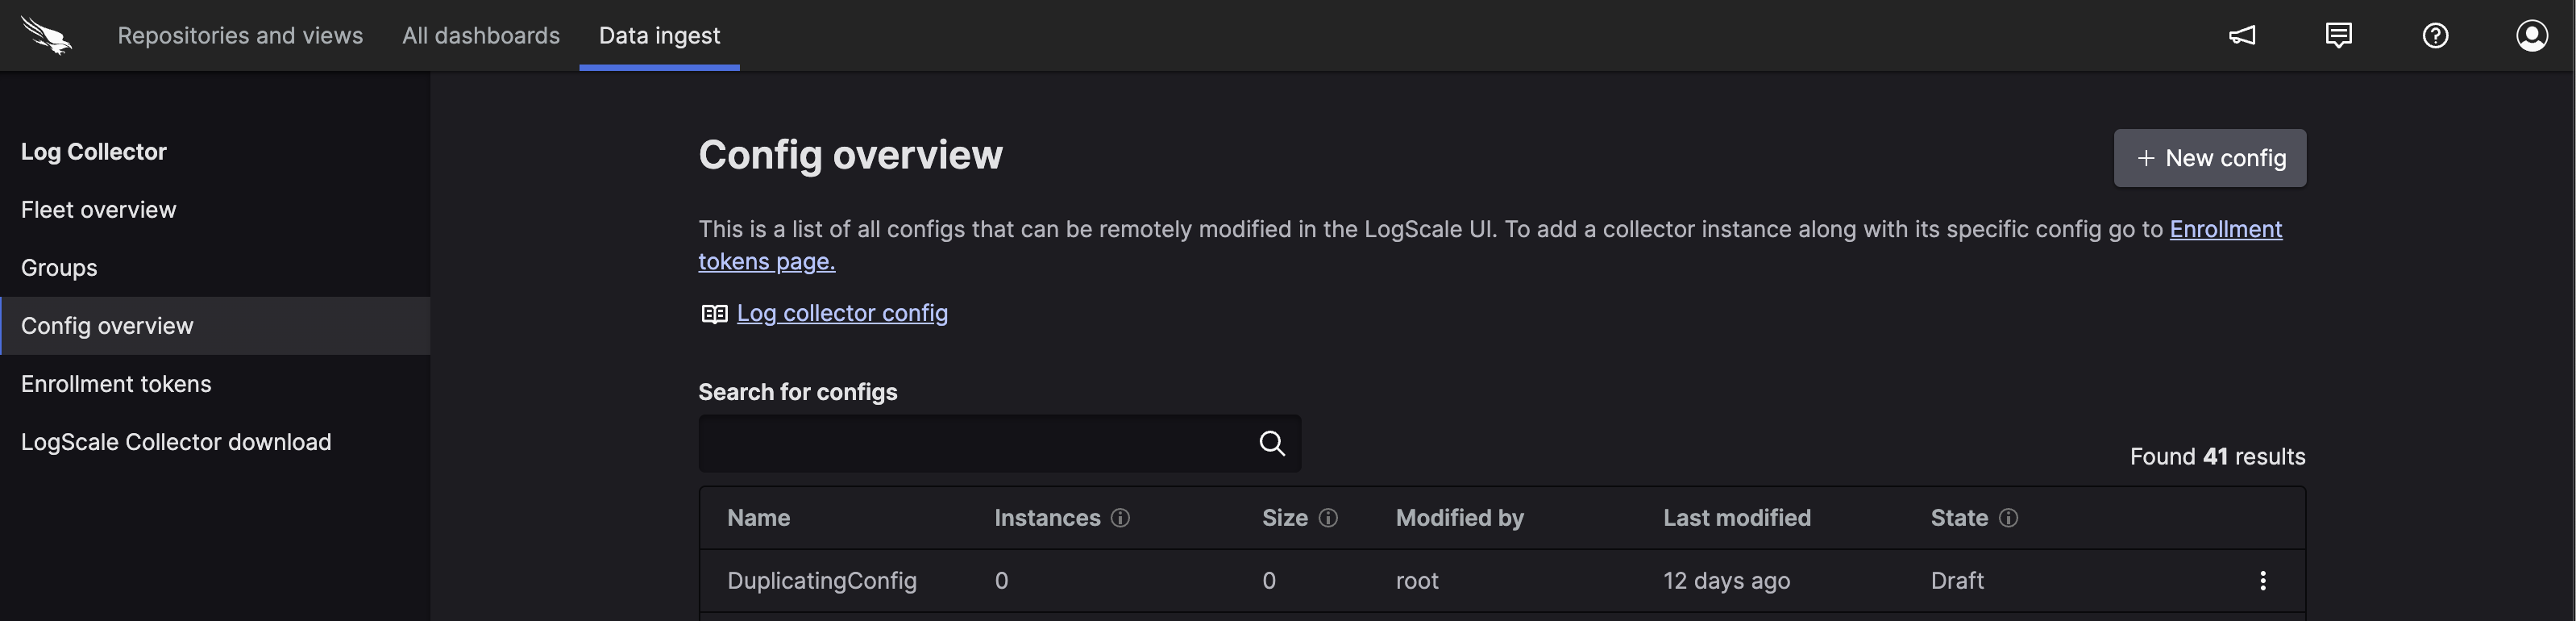
Figure 5. Config Overview
Type the name for your new configuration and click either:
- creates a new configuration from scratch.
and browse for a previously exported or manually created configuration file (
.yaml).
The Config Editor is displayed which allows you to make change to your configuration file.
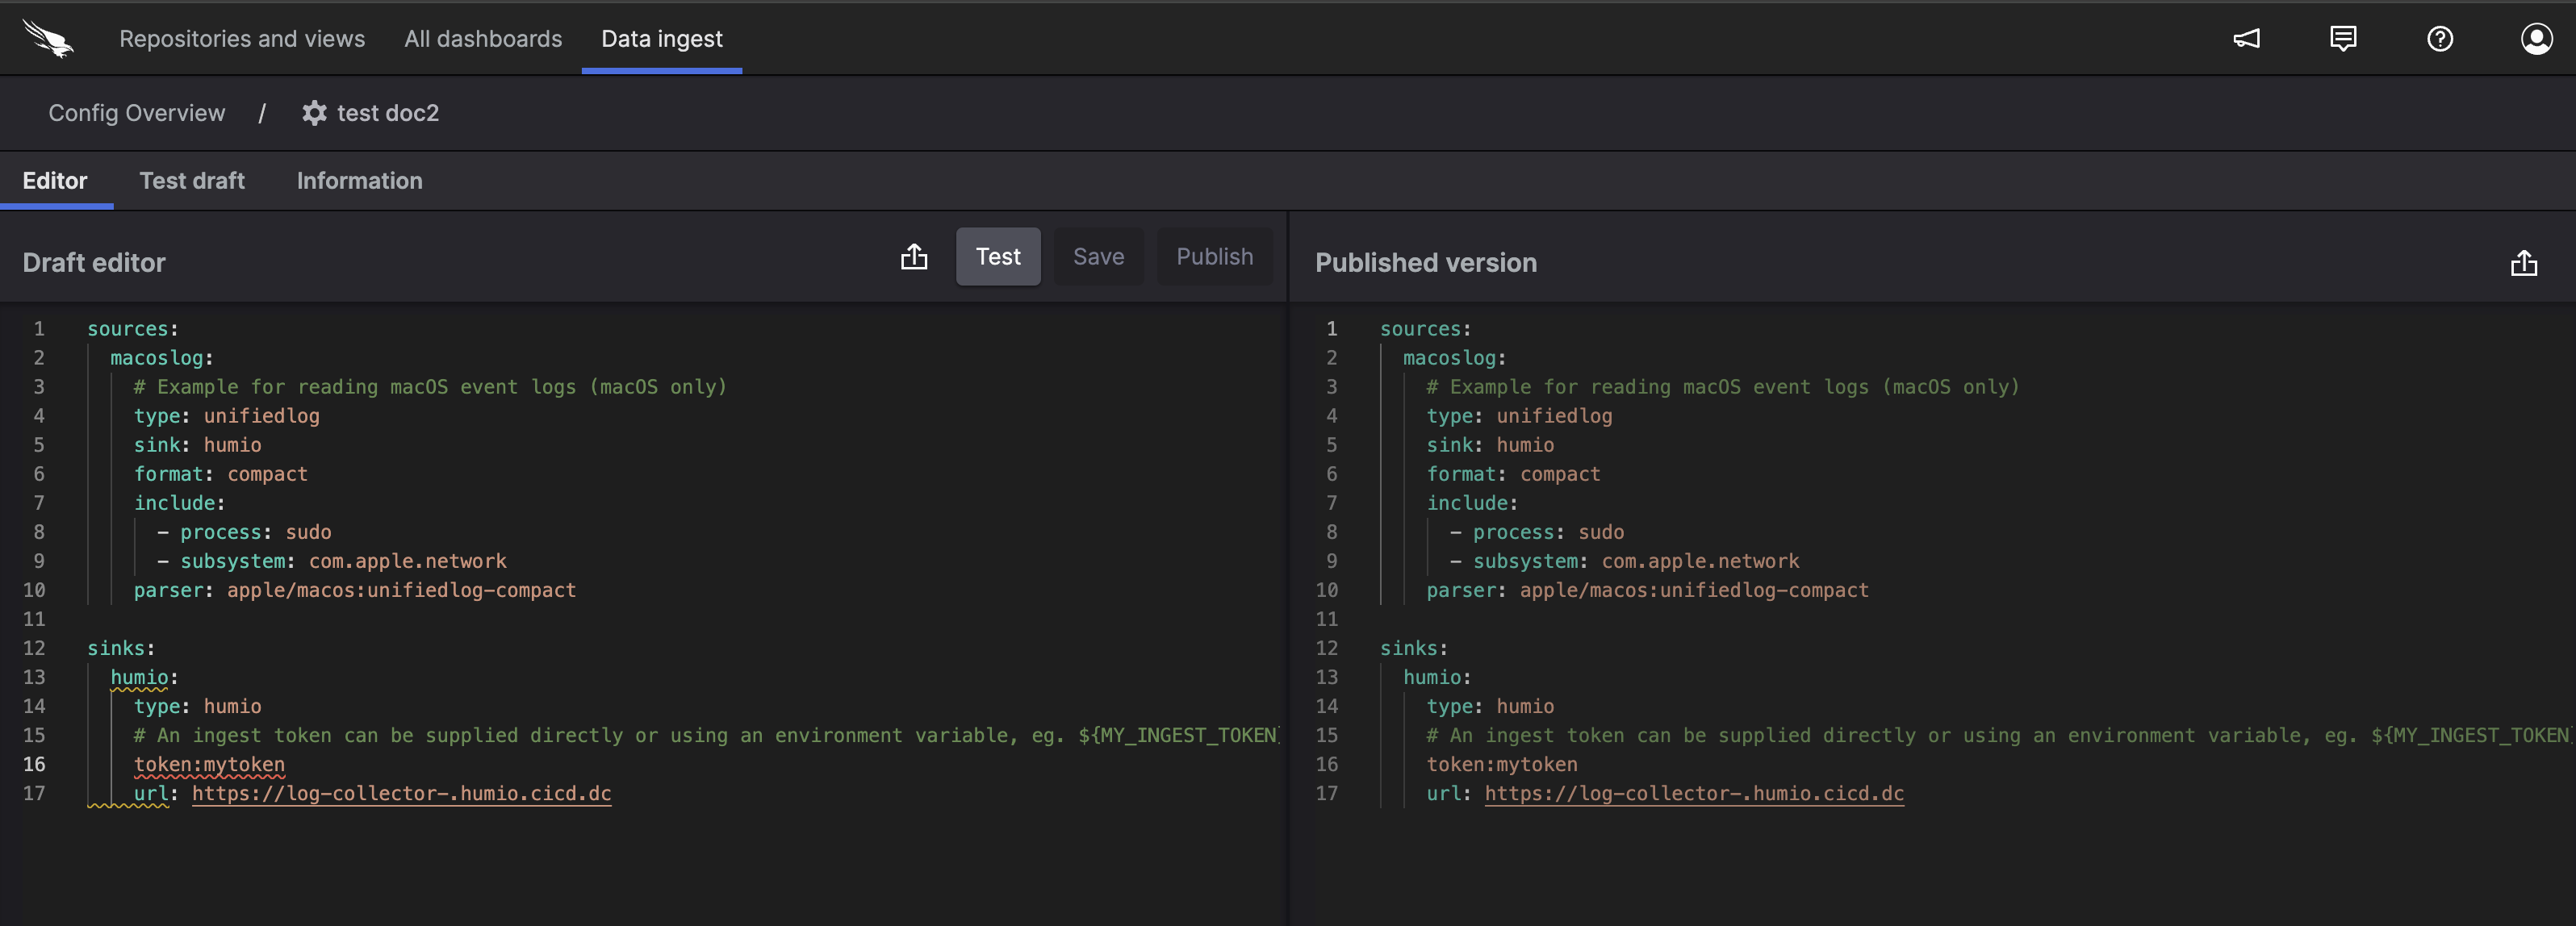
Figure 6. Config Editor
Edit the file and specify the fields, you can only edit the sections: sources, sinks and settings, described in Sources & Examples or you can try out data ingestion using the Minimal Configuration Example Collecting File Data Source. When creating configurations keep in mind that if you are using Manage Groups to manage your instances you may want to create reusable configuration snippets which will later be combined, see Combine Configuration Snippets .
The editor helps by underlining incorrectly positioned (incorrect level) or misspelled entities and by auto-completing entities when you are inserting new entities, additionally you can hover-over entities for useful tips and information.
Optionally, click the settings cog to view the
Basic
            Settings
to manage additional settings, like description and name, or to assign instances to the configuration or manage a test draft, see Manage Configurationsfor more information.You can now:
Click to save the changes without publishing.
Click to test a draft on a set of instance which you can choose in the next step, see Editing and Publishing a Test Configuration
Click to save the changes and publish them to all the instances which are assigned to this configuration.
Create a Configuration - Local
The following steps describe how to edit the configuration file in the case of local management, this can only be used for instances that have not been enrolled, see Manage Falcon LogScale Collector Instance Enrollment for more information.
If you want to create a remote configuration file see Manage Remote Configurations.
Open the file
config.yamlto edit using the editor of your choice, for example on Linux:shell$ sudo vi /etc/humio-log-collector/config.yamlThe file can be found in:
Linux (full)
/etc/logscale-log-collector/config.yamlLinux (Custom)
/etc/humio-log-collector/config.yamlWindows(Full)
C:\\Program Files
                (x86)\\CrowdStrike\\Logscale Log
                Collector\\config.yaml
Windows(Custom)
C:\\Program Files
                (x86)\\CrowdStrike\\Humio
                Log Collector\\config.yaml
MacOS
/usr/local/etc/logscale-collector/config.yaml
Edit the file and specify the fields and values described in Sources & Examples or you can try out data ingestion by specifying:
Under
sourcesyou must specifytypeandincludeUnder
sinksyou must specifytype,tokenandurlAdd
fleetManagementif you want to monitor your instances on Fleet management.
Once you have finished making changes save the file and restart the service.
Linux (custom)macOSshell$ sudo systemctl restart humio-log-collector.serviceWindowsshell$ sudo launchctl kickstart -k system/com.crowdstrike.logscale-collectorGot to and find Humio Log Collector and right click .
Additional environment variables can be configured, see Troubleshooting & Execution