Manage Dashboard Interactions
Security Requirements and Controls
Change interactionspermission
LogScale allows you to interact with your data in a dynamic way. Not only can you monitor data in dashboards, but you can also create your own custom Dashboard Interactions, to get workflows that optimize your daily analysis.
One of the most common cases with using dashboards is when you notice errors or unusual behaviors and want to explore that error in more detail.
Interactions automate the process of checking errors, entities or any behavior you may want to explore in another detailed dashboard, as they create workflows for easy navigation between related dashboards.
For example, you may either:
Click on the row in a table, or a slice in a pie chart, to dive deep into details on another dashboard.
Navigate to an external URL that you have defined, to match your data against an external source.
Interactions are particularly useful for non-expert users — instead of having to write complex queries each time and repeating them again and again, just click on the dashboard and obtain the information you want, every time you need it.
 |
Figure 139. A Dashboard Interaction
Interactions are configured on widgets, where you set the values you want to explore leveraging a Template Language to enter field values and keep the same context to pass to the destination dashboard, or to the external URL — for example, the value of a column in a table are passed to the destination URL.
Types of interactions are:
Link to Dashboard allows navigation between related LogScale dashboards.
Link to Custom URL allows navigation outside LogScale.
Link to Search page allows navigation from a dashboard to theSearch page by running a query detected from the dashboard.
Interactions are configurable on all widgets (except World
Map at the time of writing) and are supported in
Packages.
Conditions can be set on the widgets to control when the interactions are to be shown. For example, an interaction is valid and will be shown in the dashboard only for those fields that contain, or start, or end with a given value.
For the steps on how to configure dashboard interactions, see Setting Up a Dashboard Interaction.
Setting Up a Dashboard Interaction
To configure and use a new interaction, follow these steps.
From a single widget, click the three dots on the upper right corner, and select the option:

Figure 140. Creating Interactions from Widget
Or go to Editing Dashboard mode, select the widget you want to add an interaction to and click the arrow-clicking icon in the edit toolbar:
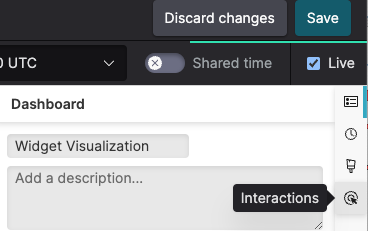
Figure 141. Accessing Interactions from Dashboard
In the Interactions panel, click the plus sign to add a new interaction. The figure below shows how to configure an interaction that will search for hosts (Computer Names) and will link to another dashboard:
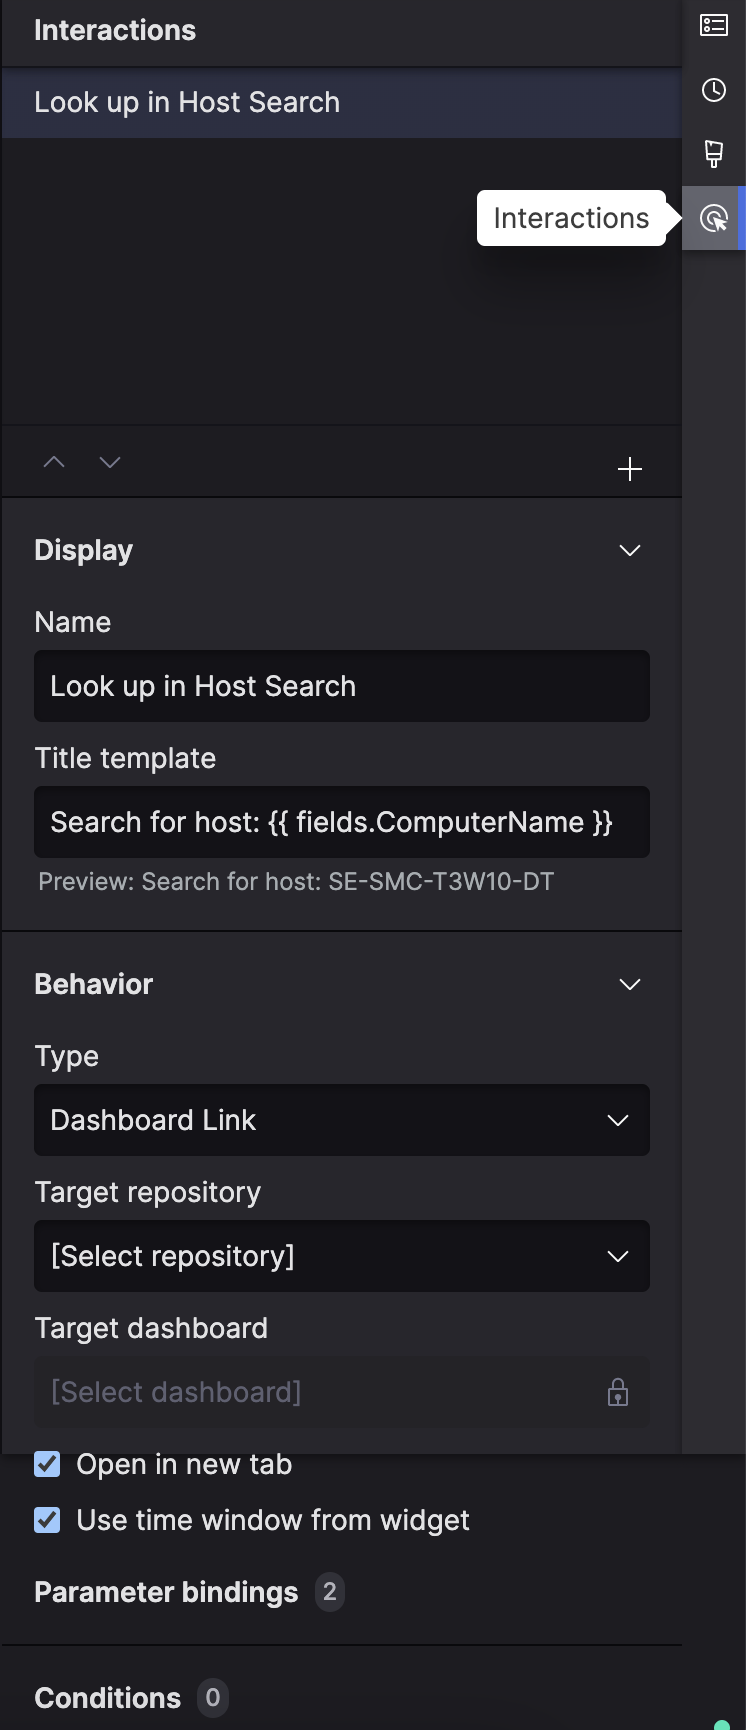
Figure 142. Dashboard Link Configuration
Under Display, set the name and title of the interaction:
Name contains the name assigned to the interaction, by default
Interaction
                #1
, which you can change e.g.,Lookup in Host Search.Title template allows you to incorporate strings/values from the event in the text. If you want to provide the users of your dashboard with a more precise label for the interaction, you can add it here e.g.,
Search for host {{fields.ComputerName}}.For example, if clicking on an element or a row where the field ComputerName is set to
John's Computer, the title of the interaction when clicking on that element or row would be Search for host John's Computer.If left blank, the value in Name will be used to label the interaction in the widget.
In order to write a valid Title template, values for fields must be entered using a required language syntax, the Template Language. For example, if the available fields are userId, ComputerName, the syntax for your Title template would be
{{ fields.userId }}{{ fields.ComputerName }}.
Under → Type, choose the destination you want your widget to interact with (, , or ):
— lookup for an item in a related dashboard.
Here you set:
Target repository — pick the repository that will contain the interaction from the dropdown list.
Target dashboard — pick the dashboard to link your widget to from the dropdown list.
Open in new tab — whether to open the destination dashboard in a new tab.
Use time window from widget — whether the interaction should use the time from the current dashboard or the time from the destination dashboard.
If the Shared Time option is not selected in the dashboard, the widget time window will be used, meaning it will take the current timeframe from the widget you are interacting with.
Parameter bindings — bind values from the data row and assign them to the parameters should they be present in the destination dashboard.
Use the Template Language to populate values based on the widget you are interacting with.
Unused parameters bindings.
If you change the query in a dashboard which is the target of a Dashboard Link interaction, any previous parameter bindings set in the interaction may no longer map the parameters in the new query. The interaction panel shows such unused parameter bindings, and gives you the option to remove them via the UI.
— lookup for an item in an external location by linking your widget to the destination URL.
Here you set:
URL template e.g.
https://github.com{{fields.org.login}}.Open in new tab — whether to open the destination URL in a new tab.
The example below shows how to configure an interaction that will lookup a list of organizations taken from the org.login field in the underlying data table, with Title template set as
Lookup
                {{fields.org.login}}
: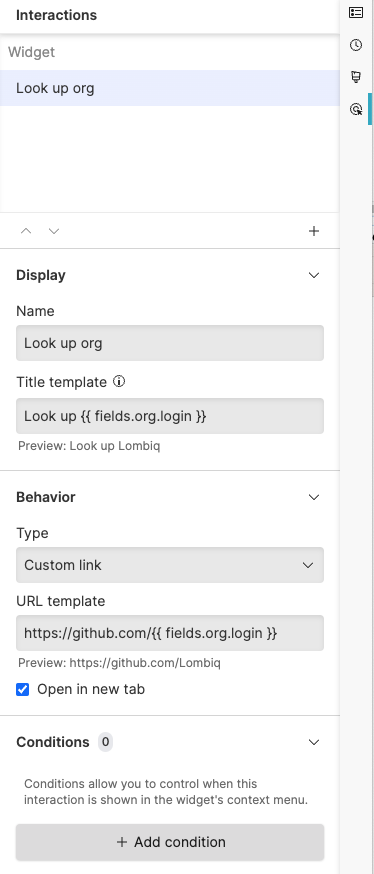
Figure 143. Custom Link Configuration
— detect values from the dashboard and bind them in a query that is run on the Search page.
Here you set:
Target repository — pick the repository that the query will be executed on.
Query — write the query to execute. A suggested query appears, which you can edit. The query can contain parameters that can be bound to a parameter value in the Parameter bindings section.
Open in new tab — whether to open the search page in a new tab.
Use time window from widget — whether the interaction should use the time from the widget or the default time of the destination.
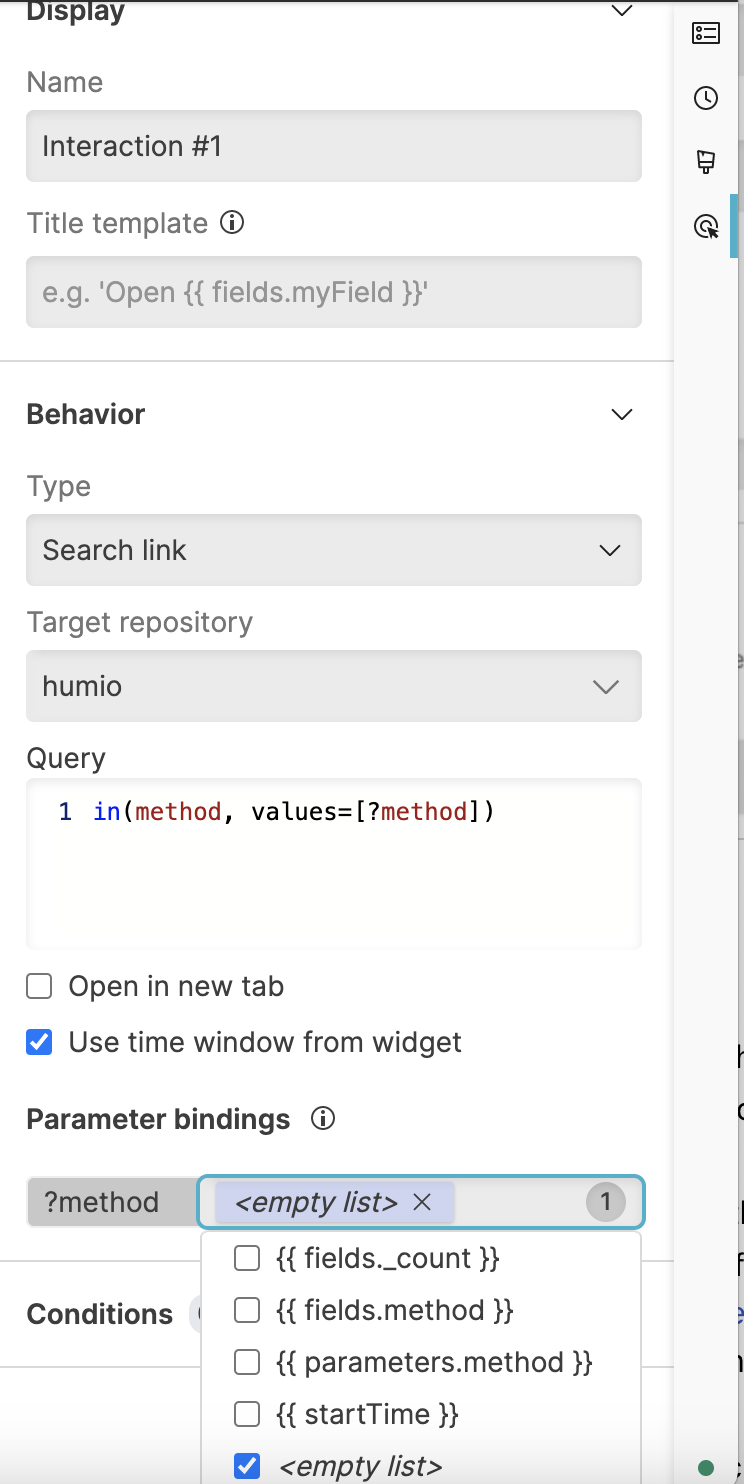
Figure 144. Search Link Configuration
Parameter bindings — bind a value to the parameter in the targeted query. The value can be static text and/or variables such as parameters and fields e.g.
{{ fields._count }}.If you want to retain a parameter's default value when the interaction is triggered, leave the parameter field blank.
You can choose whether to bind the parameter to some defined values or keep it unbound (to use the default behavior of the target destination). To keep it unbound, leave the input field empty.
Empty list alias.
In case of Multi-value Parameters, you can also specifically bind the parameter to an empty list of values by selecting the
empty
                        list
alias in the input field — it is available as an option along with the other input values. This option acts as a parameter binding with no values selected for that parameter, and will serve as an argument to the parameter itself.Unused parameters bindings.
When creating or editing a Search Link interaction, you may need to change the target query, resulting in some parameter bindings no longer mapping to any parameters in the current query. The interaction panel shows such unused parameter bindings, and gives you the option to remove them via the UI:
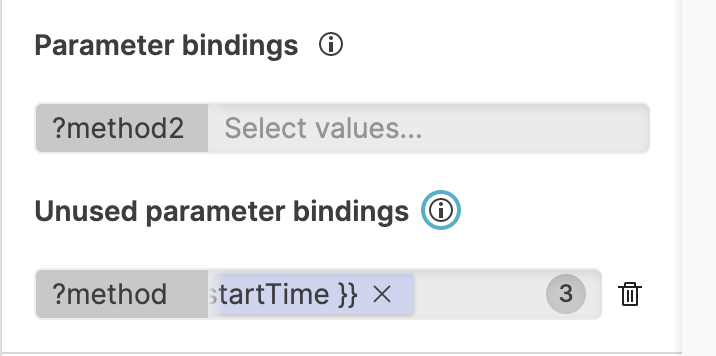
Figure 145. Unused Parameter Bindings
— set parameters in the context you're currently working in (dashboard or search):
When used on a widget on the dashboard, it allows you to update the dashboard parameters, and the generated link works as a interaction.
When used on a widget on the Search page, the query parameters in that search are set, and the generated link works as a interaction.
Here you set:
Use time window from widget — if checked, this will update the time settings of the page to match the time of the data which is being interacted with. If unchecked, triggering an interaction will not update the time.
Parameter bindings — bind values which will be assigned to the parameter when the interaction is invoked. Use the Template Language to bind values from the data row, other parameters, or context variables (
startTimeandendTime). Unbound parameter bindings will not update the associated parameter, meaning it will retain the same value that it had before invoking the interaction.
Click to set when you want the interaction to be shown, given some specified conditions. E.g.
starts with,contains.Back to the dashboard, select the widget you've just configured and click the three-dot menu on the left to trigger your interaction. The example here below shows the interaction that we have previously set in Figure 142, “Dashboard Link Configuration”:
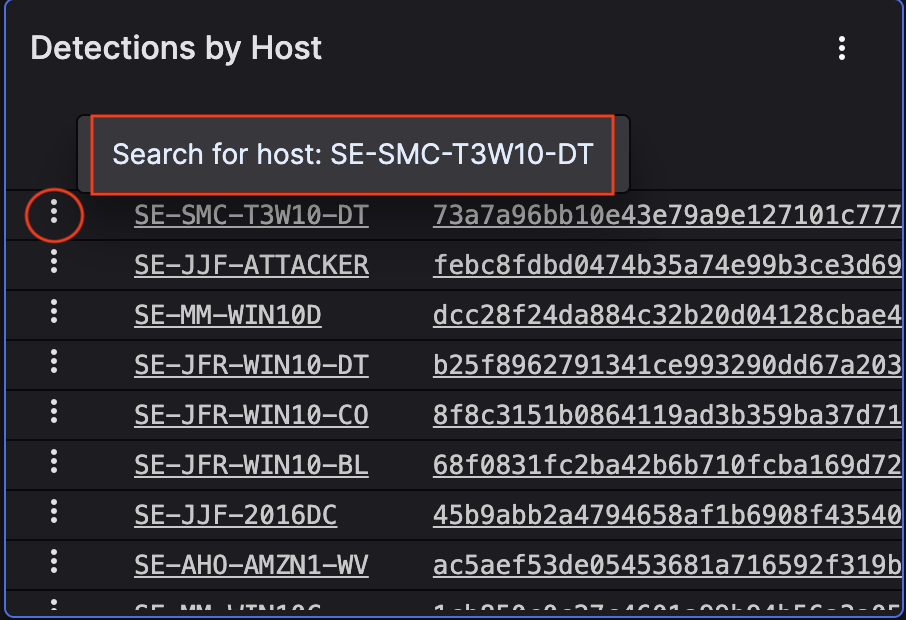
Figure 146. Interaction Example (Host Search)
This other example shows the interaction that we have set in Figure 143, “Custom Link Configuration”:

Figure 147. Interaction Example (Organization Lookup)
Note
Field names and values with spaces (e.g. field: Alert Name, value: Network Scans Count) must be put without quotes in the Conditions field.
With quotes around them (e.g. "Alert Name") the condition does not work, and the contextual three-dot menu disappears.
Click on the interaction name to go to the destination dashboard, or URL, to finally analyze the item in detail.